21 params and searchParams
这里的params和searchParams是通过url来实现的,这是一种编程方式,虽然说数据的传递可以使用zod、redux这些第三方库,但是nextjs里面的params和searchParams还有非常重要的作用,是和页面联系起来的。
比如说我经常做的管理系统,真正的url就是一些菜单路径,里面的main部分,table页面和操作页面是通过v-if/v-show来切换的。但是nextjs不一样,我把nextjs学完了,也没有看到它使用判断来切换页面。而是通过路由跳转来切换页面的,那么nextjs里面的main部分应该怎么做呢?我以system页面为例,可以这样:
xxxxxxxxxx91system2├── page.tsx3├── create4│ ├── [id]5│ │ └── page.tsx6│ └── page.tsx7└── detail8└── [id]9└── page.tsx
当打开/system的时候,就是搜索栏和table页面;当导航到/system/create的时候,就是新增页面;当导航到/system/create/1的时候,就是编辑页面;当导航到/system/detail/1的时候,就是详情页面。

那么params和searchParams的准确含义是什么呢?
params指的是nextjs里面的dynamic route parameters,就是使用[productId]这种方式定义的。
searchParams指的是url里面的query参数,就是?key=value这种很熟悉的内容。

下面用一个案例来说明这两个参数怎么获取、使用。
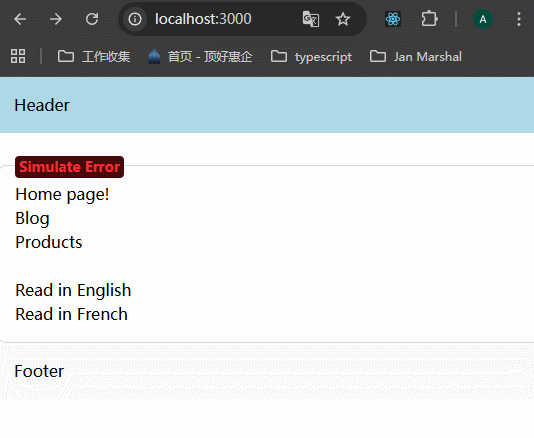
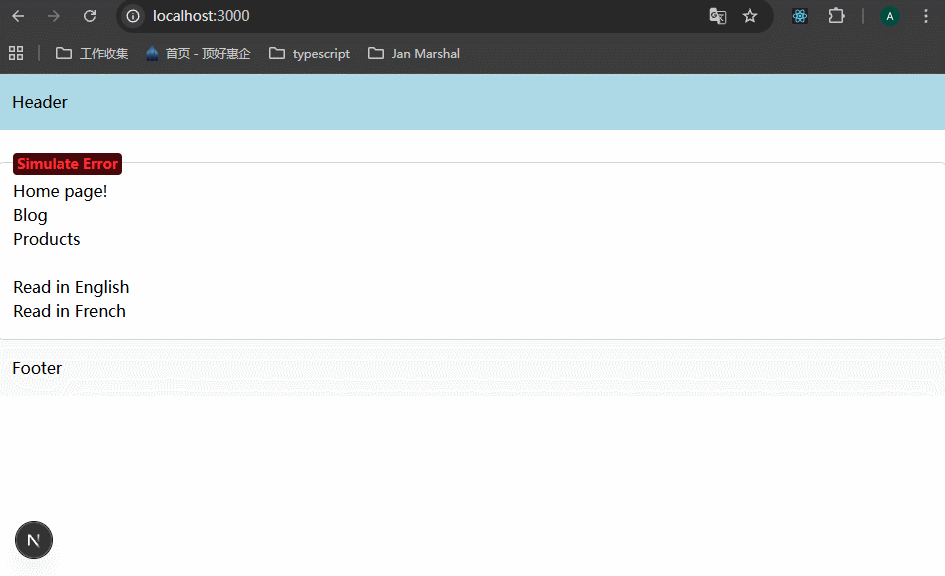
1、在app/page.tsx里面,创建两个Link链接,两个链接的params是相同的,但是searchParams是不同的。
xxxxxxxxxx171// app/page.tsx23import Link from "next/link"45export default function Home() {6 return (7 <>8 <h1>Home page!</h1>910 <Link href="/blog">Blog</Link>11 <Link href="/products">Products</Link>12 <br />13 <Link href="/articles/breaking-news-123?lang=en">Read in English</Link>14 <Link href="/articles/breaking-news-123?lang=fr">Read in French</Link>15 </>16 )17}2、在app下创建articles文件夹,并创建[articleId]/page.tsx,这一点之前就学过了,忘记了就回头看一下。
xxxxxxxxxx281// routing-demo/app/articles/[articleId]/page.tsx23import Link from "next/link";45export default async function NewsArticle({6 params,7 searchParams8}: {9 // 其实定义里面说的很清楚了,类型都是Promise的对象,里面只需要传递具体参数的类型就行了10 params: Promise<{ articleId: string }>;11 searchParams: Promise<{ lang?: "en" | "fr" }>12}) {13 // 获取params和searchParams里面的值,由于返回值是Promise对象,所以需要使用 async...await14 const { articleId } = await params;15 const { lang = "en" } = await searchParams;16 17 return (18 <div>19 <h1>News Article {articleId}</h1>20 <p>Reading in {lang}</p>2122 <div>23 <Link href={`/articles/${articleId}?lang=en`}>English</Link>24 <Link href={`/articles/${articleId}?lang=fr`}>French</Link>25 </div>26 </div>27 );28}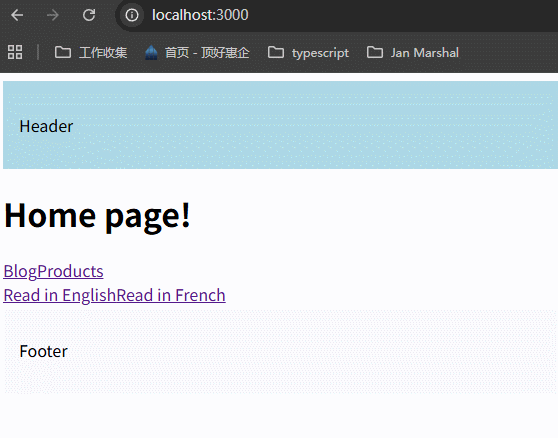
可以看到,params和searchParams参数都正常获取到了。
上面的例子是在server components里面获取参数,那怎么在client component里面获取参数呢?下面先将步骤2中的组件改为client component来试一下,添加use client,会报错:


第二个报错还不知道是什么意思,先看第一报错:only server components can be async at the moment。也就是说client components里面不能使用async,怎么解决呢?
需要用到react提供的usehook,这个use是一个hook,用它来代替async...await。
xxxxxxxxxx311// routing-demo/app/articles/[articleId]/page.tsx23"use client";45import Link from "next/link";6// 从react导入use这个hook7import { use } from "react";89// 这里不能使用async await10export default function NewsArticle({11 params,12 searchParams13}: {14 params: Promise<{ articleId: string }>;15 searchParams: Promise<{ lang?: "en" | "fr" }>16}) {17 // 调用 use 方法,传入参数18 const { articleId } = use(params);19 const { lang = "en" } = use(searchParams);20 return (21 <div>22 <h1>News Article {articleId}</h1>23 <p>Reading in {lang}</p>2425 <div>26 <Link href={`/articles/${articleId}?lang=en`}>English</Link>27 <Link href={`/articles/${articleId}?lang=fr`}>French</Link>28 </div>29 </div>30 );31}最后,老师提示,page.tsx里面可以获取params和searchParams,但是layout.tsx里面只能获取到params。

老师留了一个练习,如果在layout.tsx里面获取searchParams,会报什么错误。
xxxxxxxxxx231// routing-demo/app/articles/[articleId]/layout.tsx23export default async function NewsArticleLayout({4 children,5 params,6 searchParams7}: Readonly<{8 children: React.ReactNode;9}> & {10 params: Promise<{ articleId: string }>;11 searchParams: Promise<{ lang?: "en" | "fr" }>12}) {13 const { articleId } = await params;14 const { lang } = await searchParams;15 return (16 <>17 <h2>这是article的layout,尝试获取params和searchParams</h2>1819 <p>articleId{articleId},lang:{lang}</p>20 {children}21 </>22 )23}报错信息如下:

意思是不能从undefined解构出lang,说明此时的searchParams是undefined。
22- Navigating Programmatically
1、编程式路由跳转
这节课主要讲编程式导航。
想象一下你在Amazon下了一个单,提交了一个form,接着会跳转到confirm page,这个时候应该怎么做呢?
我知道这和我这么多年做的项目完全不一样,我做的最多的就是form页面直接提交,然后弄一个message来提示。
但是国外的项目真的不一样,用户习惯也不一样,不要按照老黄历来想国外的项目怎么做。接受、学习就行了。

这里我们通过案例来学习,案例要求通过点击button跳转到别的路由页面来模拟上面的行为。使用的是programmatically navigation。

这里使用useRouter来进行编程式导航,注意要使用这个hook,必须是在client component里面使用,所以在组件文件的top要加上"use client";。
注意useRouter是从next/navigation引入的,从next/router引入的报错。
在app中创建order-product/page.tsx,编写组件。
xxxxxxxxxx211// app/order-product/page.tsx23"use client";45// 导入useRouter6import { useRouter } from 'next/navigation'78export default function OrderProduct() {9 // 实例化router对象10 const router = useRouter()11 const handleClick = () => {12 // 使用router上的push方法来进行路由跳转13 router.push("/")14 }15 return (16 <>17 <h1>Order product</h1>18 <button onClick={handleClick}>Place order</button>19 </>20 )21}查看效果:

router.push()里面的参数可以是任何valid的route值,可以是嵌套路由地址、动态路由地址、catch-all-routes。
router.replace()方法,可以采用替换history stack中当前路由地址的方式,进行路由跳转。
router.back()方法,可以返回history stack中的previous page。
router.forward()方法,可以前进到history stack中的next page。
这个例子很简单,很容易让人想到为什么不直接使用Link组件呢?
实际上这里可能有复杂的逻辑,不一定确定要跳转,如果不符合要求,是不会跳转的,所以这里必须使用router来跳转。
2、路由重定向
之前在学习not-found的时候,在mytest/routing-demo/app/products/[productId]/reviews/[reviewId]/page.tsx我们定义了,如果reviewId大于1000,就触发notFound函数。
现在将逻辑改为,如果reviewId>1000,那么就重定向到/products页面,这时需要使用redirect这个hook。
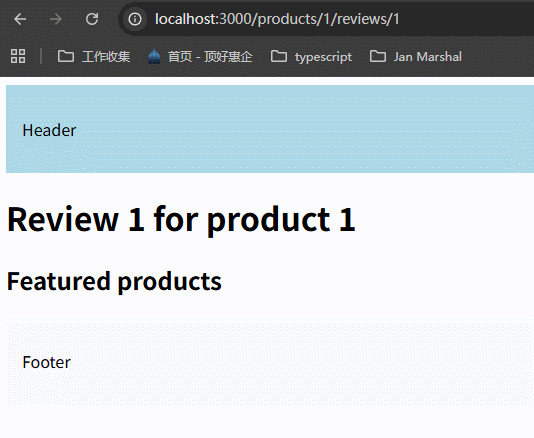
xxxxxxxxxx181// /routing-demo/app/products/[productId]/reviews/[reviewId]/page.tsx`23import { redirect } from 'next/navigation'45export default async function ProductReview(6 {7 params8 }: {9 params: Promise<{ productId: string; reviewId: string }>10 }11) {12 const { productId, reviewId } = await params;13 // 判断reviewId大于1000时,触发 redirect 函数14 if (parseInt(reviewId) > 1000) {15 redirect("/products")16 }17 return <h1>Review {reviewId} for product {productId}</h1>18}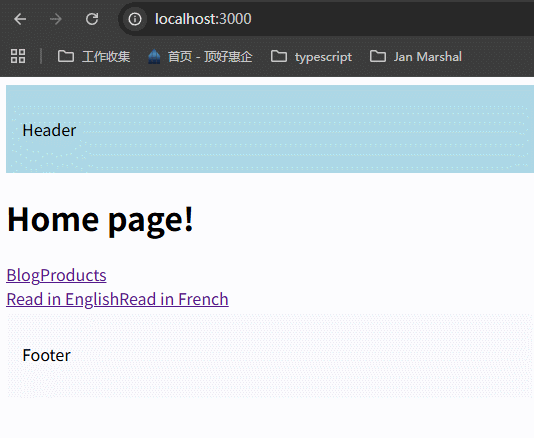
小结:
这节课主要讲了programmatical navigation。使用useRouter这个hook,有router.push()、router.replace()、router.back()、router.forward()这些方法来帮助我们操作路由。
23- Templates
概念
这节课主要讲解template.tsx的概念,template用于一些特定的情况,比如说刷新之后不需要保留原始的input数据,反而必须要求重新渲染。
下面用一个案例来理解templates。
在app/(auth)/layout.tsx中,添加一个input元素,设置初始值。重点就是观察切换路由之后,input里面的值还能不能保持住。
xxxxxxxxxx451"use client";2import Link from 'next/link'34// 导入usePathname这个hook5import { usePathname } from 'next/navigation'67import "./style.css"8import { useState } from 'react';910const navLinks = [11 { name: "Register", href: "/register" },12 { name: "Login", href: "/login" },13 { name: "Forgot Password", href: "/forgot-password" },14]1516export default function AuthLayout({ children }: {17 children: React.ReactNode18}) {19 // 使用usePathname这个hook20 const pathname = usePathname();2122 const [input, setInput] = useState("")2324 return (25 <>26 27 <div>28 <input type="text" value={input} onChange={e => setInput(e.target.value)} />29 </div>30 31 32 {33 navLinks.map(link => {34 const isActive = pathname.startsWith(link.href);35 return (36 <Link href={link.href} key={link.name} className={isActive ? "font-bold mr-4" : "text-blue-500 mr-4"}>37 {link.name}38 </Link>39 )40 })41 }42 43 {children}44 </>45 )46}查看效果:
可以看到,在切换路由的时候,input里面的值没有变化,the state is preserved,这是因为layouts only mount the part representing the content of the newly loaded page but keep all the common elements untouched, layouts don't remount shared components resulting in the performance.
上面这段话的“newly loaded page”是什么呢?就是layout.tsx文件里面{children}表示的部分。那么common elements是什么呢?就是非children的部分。
在大多数情况下,这是程序员需要的效果,但是sometimes you need the layouts to create a new instance for each of their children on navigation.For example, enter exit animations for pages, or running a side effect using the useEffect hook when the route changes.
要实现这种效果,需要将layout文件替换为template文件,实现起来也很简单,就是将layout.tsx改名为template.tsx,就这么简单。


查看效果:
注意
在同一个路由下,可以同时存在layout.tsx和template.tsx文件,此时的执行顺序是什么样的呢?
the layout.tsx renders first and the layout's children is replaced by the component exported from the template components output.

template.tsx用的并不多,大多数情况下应该使用layout.tsx来做shared UI功能,但是特定情况下遇到了可以使用。
24- Loading UI


creating a loading state is pretty straightforward, you just need to add a loading.tsx file in the right folder.
我们在blog文件夹里创建一个loading.tsx文件,来示范。
xxxxxxxxxx51// app/blog/loading.tsx23export default function Loading() {4 return <h1>loading...</h1>5}为了模拟加载缓慢的情况,我们在blog/page.tsx里面添加一段异步代码,看效果。
xxxxxxxxxx101// app/blog/page.tsx2export default async function Blog() {3 // 使用async await来模拟加载缓慢4 const result = await new Promise((resolve, _) => {5 setTimeout(() => {6 resolve("heihei")7 }, 2000);8 })9 return <h1>Blog Page!</h1>10}this file will automatically wrap page.tsx file and all its nested children within a react suspense boundary.

可以看到loading的效果。
loading.tsx有哪些好处呢?我知道,但是要用英语说出来。

问题:
这里实现loading效果,是通过在具体的route文件夹里面创建loading.tsx文件来实现的,但如果大部分loading效果都相同,我只需要一个loading文件就行了,此时应该怎么做呢?
答案:就在app文件夹或者主要的文件夹里面创建一个loading文件就行了。
loading.tsx和Suspense可以同时使用,只是作用的粒度不同。loading.tsx可以就只是做一个spin效果,针对整个页面;Suspense里面就可以做骨架屏这种效果。现在v16中的cache components,那么Suspense用到的地方就很多了。
- loading.tsx:提供路由级别的统一体验(用户进入页面时先看到一致的 loading 状态),适合做“页面整体骨架屏”
- Suspense:提供组件级别的精细控制(让页面“渐进式”显示内容),用户体验更好,不会整个页面都卡住
25- Error Handling

nextjs默认的报错页面并不友好,是一个单独的报错页面。如果我们设置了error.tsx,那么哪个报错,哪个地方就被这个文件里面的组件所替代,但是其余的部分都可以正常显示。所以我们需要设置error.tsx。
下面以案例来说明:
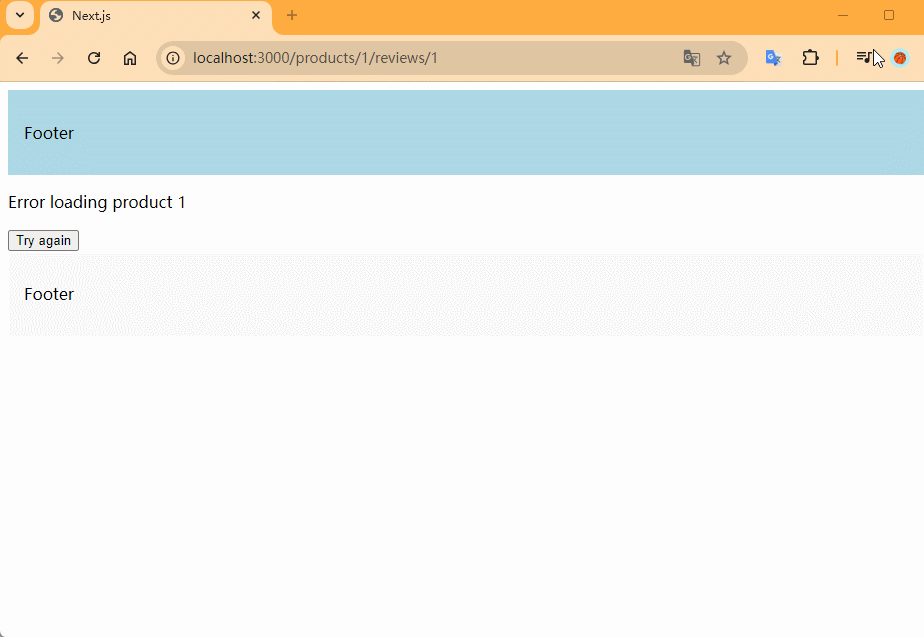
在app/products/[productId]/reviews/[reviewId]/page.tsx文件中, 编写一个函数,这个函数会在特定情况下抛出错误,用来模拟没有检测出的错误情况,无论是开发时或者打包时都可能报错,这就会造成bad user experience。
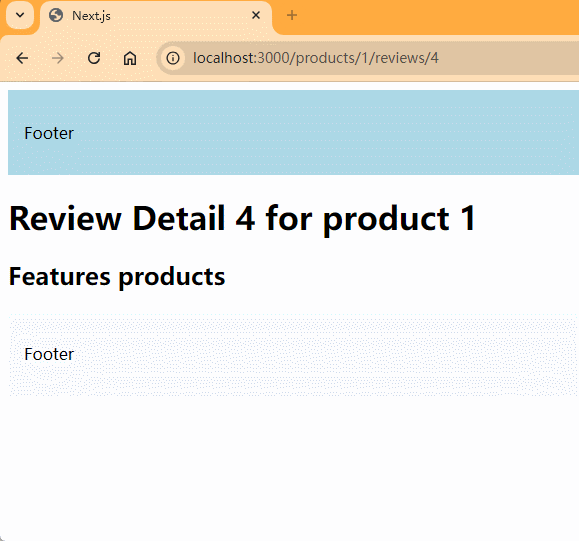
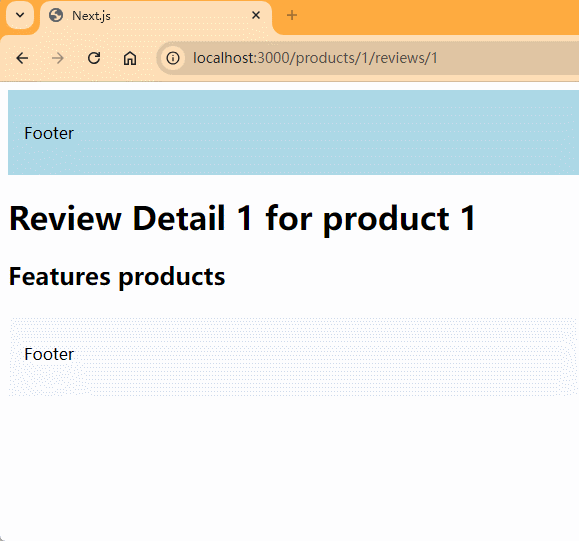
xxxxxxxxxx231// src/app/products/[productId]/reviews/[reviewId]/page.tsx23import { notFound } from 'next/navigation'45function getRandomInt(count: number) {6 return Math.floor(Math.random() * count)7}89export default function ReviewDetail({ params }: {10 params: {11 productId: string12 reviewId: string13 }14}) {15 const random = getRandomInt(2)16 // 抛出错误17 if (random === 1) throw new Error("Error loading review")1819 if (parseInt(params.reviewId) > 1000) {20 notFound()21 }22 return <h1>Review Detail {params.reviewId} for product {params.productId}</h1>23}不断的刷新页面看效果:
可以看到报错情况:


为了解决这个问题,可以create a error.tsx to wrap around our page.tsx file like an error boundary.
在page.tsx同级创建error.tsx文件,用来包裹住page.tsx里面的错误。
xxxxxxxxxx31export default function ErrorBoundary(){2 return <p>Error in reviewId</p>3}效果:

可以看到报错了,原因是error.tsx必须是一个client component。

查看效果:
需要注意的是,error.tsx只包裹了[reviewId]/page.tsx的错误,the rest of the UI remains unaffected.
this component can also receive the error object as a prop to display more information.
xxxxxxxxxx51"use client";23export default function ErrorBoundary({ error }: { error: Error }) {4 return <p>{error.message}</p>5}
可以看到这里的报错信息就是我们在page.tsx里面抛出的错误信息。

tailored:量身定制。hierarchy:层次、层级结构。granularity:粒度。
下面是我们已经学习过的special files,在同一个文件夹中,会最终转为的层级结构。

component hierarchy:组件层次。
这张图不是说代码可以这么写,而是说如果一个文件夹里面同时存在这些文件,nextjs最终将我们的代码组织成了这样。写代码还是按照功能,区分文件来写。
from the top we have the layout component followed by the template component, next we have an error boundary component from error.tsx which handles runtime errors, after that we have a suspense boundary from loading.tsx, another error boundary component from not-found.tsx which handles the scenario when the resource is not found and finally we have the page.tsx.
26- Recovering from Errors
some errors may not be serious and could be fixed by simply trying again.In this lesson we will learn how to recover from such errors.比如说只是因为有时候网速慢了,没有反应过来,就可以重新请求数据试一下。
error.tsx文件的default组件中,除了可以接收props.error参数,它还接收一个参数,props.reset,这是一个函数,可以在出现error的时候,执行reset函数,可以尝试重新渲染page.tsx中的default组件,这就是reset函数的作用。
但在案例中,只有reset函数是不起作用的,因为在这节课笔记的最后面有提到。
to ensure we can recover on client side, we need to convert our page.tsx to a client component.为了能在客户端恢复,需要将同级的page.tsx转为client component,使用
"use client";。但是将一个组件转为client component总是复杂的,根据最新的v15.5.2,我们可以在error.tsx中使用react的startTransition和nextjs的useRouter,更为优雅的解决问题。

xxxxxxxxxx251//routing-demo/src/app/products/[productId]/reviews/[reviewId]/error.tsx23"use client";45import { useRouter } from "next/navigation";6import { startTransition } from "react";78export default function ErrorBoundary({ error, reset }: {9 error: Error;10 reset: () => void11}) {12 const router = useRouter();13 const reload = () => {14 startTransition(() => {15 // 刷新路由16 router.refresh();17 // 执行reset18 reset();19 })20 }21 return <div>22 <p>{error.message}</p>23 <button onClick={reload}>Try again</button>24 </div>25}startTransition的作用:
- 优先级区分:被
startTransition包裹的更新优先级低于用户交互(如输入、点击)- 可中断性:如果有更高优先级的更新(如用户继续输入),过渡任务会被中断并重新计算
- 不阻塞 UI:即使过渡任务耗时较长,用户也能正常与界面交互
- 配合 Suspense:可以与 Suspense 结合使用,实现加载状态的优雅处理
效果:

注意:这里为什么同时使用
router.refresh();和reset();?如果说按照我的理解,执行了路由刷新,那么页面就会重新加载,rand不为1的话,页面就会正常。我在视频的评论区找到了答案:
router.refresh() initiates an asynchronous process to update the server component with fresh data.
reset() immediately clears the error state and forces a re-render of the client components under the error boundary.
When called back-to-back without delay, reset() may use outdated server data because the asynchronous refresh triggered by router.refresh() hasn’t completed.
Wrapping reset() in startTransition delays its execution, allowing the asynchronous refresh to complete and ensuring that the re-rendered components use the updated data.
router.refresh()是最常用的在客户端触发server components更新的方式,它会保留client components的状态,只重新拉取server component部分。所以要结合一起使用。
当点击try again并且page.tsx里面的random不为1的时候,就重新渲染成功了。
executing the reset function attempts to render the error boundaries contents, if successful the fallback error component is replaced by the re-rendered content from page.tsx.
27- Handling Errors in Nested Routes
this lesson we will focus on handling errors in nested routes.

cater to:迎合。 granular:粒度。
把error.tsx放到嵌套文件夹的不同层级,能够以不同的粒度来处理error。error.tsx不仅能够处理本文件夹里面的错误,还可以处理下级文件夹里面的错误。
我们将routing-demo/src/app/products/[productId]/reviews/[reviewId]/error.tsx放到routing-demo/src/app/products/error.tsx,看一下效果:
这里有两点需要注意:
1、在本节课的第一张图中可以看到,Errors bubbles up...,所以虽然错误是发生在[reviewId]/page.tsx里面,而error.tsx在它的祖父层级,却仍然可以接收到具体的错误信息Error loading review。
2、error.tsx放在嵌套文件夹的不同层级,它所覆盖的UI内容就相应不同。上面动图中可以看到,错误信息把整个products路由的内容都覆盖了。the entire products route is replaced by the UI from the error.tsx file。
the placement of error.tsx file plays a crucial role in determine the scope of error handling, allowing for more precise control over which parts of the UI are affected when errors occur.
The deeper the placement of error.tsx file , more granular is error handling.
28- Handling Errors in Layouts


从上图可以看出,error.tsx能够处理它所嵌套的所有组件,但是同一层级的layout.tsx和error.tsx,layout组件是在errorBoundary的外层,所以error.tsx是无法捕捉到layouts里面的错误的。
下面用一个案例来说明:
将[reviewId]/error.tsx复制到[productId]文件夹里面,在里面的layout.tsx中编写与之前类似的抛出错误的代码。同时为了避免冲突,将routing-demo/app/products/[productId]/reviews/[reviewId]/page.tsx里面抛出错误的代码注释掉。

查看效果:

具体报错信息:There isn't an error boundary to catch the error.Because error boundary will not handle errors thrown in a layout.tsx within the same segment.To solve this problem, we need to place the error.tsx file in the layout's parent segment.
所以为了解决这个问题,需要将error.tsx文件移动到layout.tsx的上一层级,也就是将routing-demo/src/app/products/[productId]/error.tsx移动到routing-demo/src/app/products/error.tsx。
查看效果:

29 Handling Global Errors
经过上面的学习,可以看到error boundary无法捕获同级的layout.tsx文件里面的错误,需要放到上级目录。那么app目录里面的layout.tsx,怎么才能捕获它的错误呢?

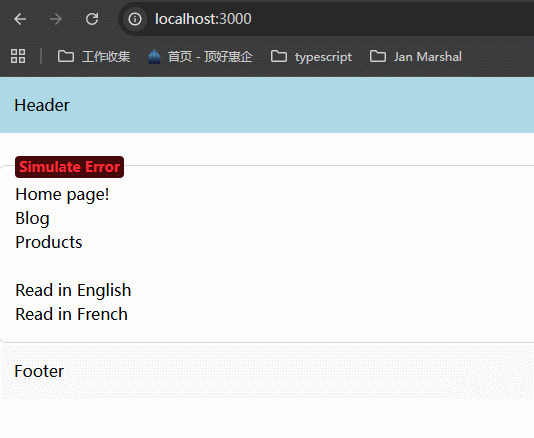
1、在app文件夹下新建一个error-wrapper的组件,这个组件将包裹app/layout.tsx里面的{children}。这个文件就照抄老师的组件即可。
xxxxxxxxxx411// app/error-wrapper.tsx23"use client";4import "./globals.css";56import { useState } from "react";78interface WrapperProps {9 children: React.ReactNode;10}1112const ErrorSimulator = ({13 message = "An error occurred",14}: {15 message?: string;16}) => {17 const [error, setError] = useState(false);1819 if (error) throw new Error(message);2021 return (22 <button23 title="Simulate an error"24 className="bg-red-950 text-red-500 rounded p-1 leading-none font-semibold text-sm hover:bg-red-900 transition"25 onClick={() => setError(true)}26 >27 Simulate Error28 </button>29 );30};3132export const ErrorWrapper = ({ children }: WrapperProps) => {33 return (34 <div className="flex flex-col rounded-lg mt-8 relative p-4 border border-gray-300">35 <div className="absolute top-0 left-4 -translate-y-1/2">36 <ErrorSimulator message="Simulated error in root layout" />37 </div>38 {children}39 </div>40 );41};这个文件的重点就在于有一个触发错误的按钮ErrorSimulator。
2、app/layout.tsx里面引入errorWrapper,把{children}包裹住。

3、新建一个app/global-error.tsx的文件,这是处理全局错误的最后一关。这个文件比较简单,其实就是想给用户展示什么信息而已,里面加了一个按钮,可以刷新页面。
xxxxxxxxxx221// app/global-error.tsx23"use client"; // Error boundaries must be Client Components45import "./globals.css";// 这个文件本来就有,但是要注意里面的样式67export default function GlobalError() {8 return (9 <div className="flex flex-col items-center justify-center min-h-screen">10 <h2 className="text-2xl font-bold mb-4">Something went wrong!</h2>11 <button12 onClick={() => {13 // refresh the page14 window.location.reload();15 }}16 className="bg-blue-500 hover:bg-blue-700 text-white font-bold py-2 px-4 rounded"17 >18 Refresh19 </button>20 </div>21 );22}运行起来看一下:
可以看到,在开发环境是没有全局错误的页面显示的。这是因为全局错误只能在生产环境显示,使用npm run build进行打包,然后执行npm run start运行生产环境的项目,还是使用localhost:3000来访问。
可以看到是可以的。我的nextjs版本是15.5.2。
但是老师的是不行的,我还是记下来。老师的版本是v15.0.3。原因是全局错误的页面,会整体替换掉app/layout.tsx里面的所有内容,所以必须在global-error.tsx的组件中,使用HTML和body包裹住,这才能显示出来。


最后老师给出了注意事项:
1、global-errors open works in production mode.
2、需要在global-errors里面写html和body,因为它会整体替换掉app/layout.tsx。但这个存疑,v15.5.3没有这个现象。
3、global-errors组件要尽量使用html和css来编写,保持简单,因为你千万不要让global-errors里面也出现错误,那就不好了。
30- Parallel Routes
Starting with this lesson, we will learn some advanced routing concepts in nextjs.
接下来就要讲一下比较复杂的路由了,首先讲“并行路由”。

从下面可以看到,并行路由可以让我们在同一个布局里面同时渲染多个pages。


仔细想一想,我好像从来没有在项目中做这个需求,在案例的dashboard页面里面,我从来没有做“并行渲染”,我所做的就是编写多个组件,然后放到dashboard里面,然后就一起渲染。
这样有什么问题呢?应该没有什么问题,但是既然nextjs提出了这种方式,肯定是有好处的。搜索了一下:
在 Next.js 中,Parallel Routes(并行路由)是 App Router 引入的一项高级路由功能,允许在同一布局中同时或有条件地渲染多个页面或组件。这对于构建动态、复杂的用户界面非常有用。以下是使用 Parallel Routes 的主要好处,结合了来自网络资源的洞见:
- 同时渲染多个页面,提升用户体验 Parallel Routes 允许在同一布局中同时渲染多个独立页面(通过 @folder 命名的槽位),例如在仪表板中同时显示团队信息和分析数据。这种方式避免了传统路由中一次只渲染一个页面的限制,用户无需切换页面即可查看多个相关内容,显著提升交互流畅性和信息呈现效率。
- 支持复杂动态界面 对于需要高度动态的应用程序部分(如仪表板、社交媒体动态或多栏布局),Parallel Routes 提供了模块化的内容组织方式。通过槽位(slots),开发者可以轻松管理多个独立的内容区域,适用于多区域仪表板或交互式叠加层等场景。
- 独立导航与状态管理 每个槽位可以独立导航,互不干扰。例如,在一个社交媒体应用中,@feed 和 @notifications 槽位可以分别加载内容,而不影响其他部分的上下文。这使得用户可以在不同槽位间切换,而无需重新加载整个页面,减少加载时间并提升响应性。
- 条件渲染的灵活性 Parallel Routes 支持根据条件(如用户角色、认证状态或其他逻辑)动态渲染槽位内容。例如,可以根据用户权限显示不同的仪表板组件。这种灵活性非常适合需要个性化界面的场景。
- 减少代码重复,优化维护 通过在共享布局中管理多个槽位,开发者可以在一个布局组件中统一处理多个页面,减少重复代码。例如,layout.tsx 可以同时接收 @team 和 @analytics 槽位作为 props 并渲染,简化了复杂界面的实现和维护。
- 支持模态窗口和上下文保持 当与 Intercepting Routes 结合使用时,Parallel Routes 可以实现类似 Pinterest 的模态窗口效果,即点击内容时显示模态窗口,同时保持当前页面上下文,并在刷新时显示完整页面。这种无缝导航模式显著提升了用户体验。
- 更快的页面加载 Parallel Routes 允许同时获取多个路由的数据,优化了服务器端渲染的性能。通过并行处理多个页面或组件的加载,减少了用户等待时间,尤其适用于数据密集型应用。
实际应用场景
- 仪表板:同时显示用户资料、分析数据和通知等多个独立区域。
- 社交媒体:在同一视图中渲染动态、通知和消息。
- 模态窗口:在不丢失页面上下文的情况下显示弹出内容。
- 多栏布局:如产品列表和类别筛选同时显示在同一页面。

场景7:
在访问localhost:3000/dashboard时,我要在dashboard里面同时展示user analytics、notifications、revenue metrics,传统做法是在app/dashboard文件夹里面,定义这些组件,然后统一引入到layout.tsx中来展示。
下面用代码来实现。创建app/complex-dashboard文件夹,创建layout.tsx文件,编写组件。创建page.tsx,编写组件。
xxxxxxxxxx201// routing-demo/src/app/complex-dashboard/layout.tsx23import UserAnalytics from '@/components/UserAnalytics'4import RevenueMetrics from '@/components/RevenueMetrics'5import Notifications from '@/components/Notifications'67export default function DashboardLayout({8 children9}: {10 children: React.ReactNode11}) {12 return (13 <>14 <div>{children}</div>15 <UserAnalytics />16 <RevenueMetrics />17 <Notifications />18 </>19 )20}xxxxxxxxxx51// routing-demo/src/app/complex-dashboard/page.tsx23export default function ComplexDashboardPage() {4 return <h1>Complex dashboard</h1>5}再编写子组件,就可以实现功能了。
但是这里可以使用parallel routes来实现同样的功能,下面是parallel routes的定义。

Example
以案例来说明,parallel routes可以这么做:

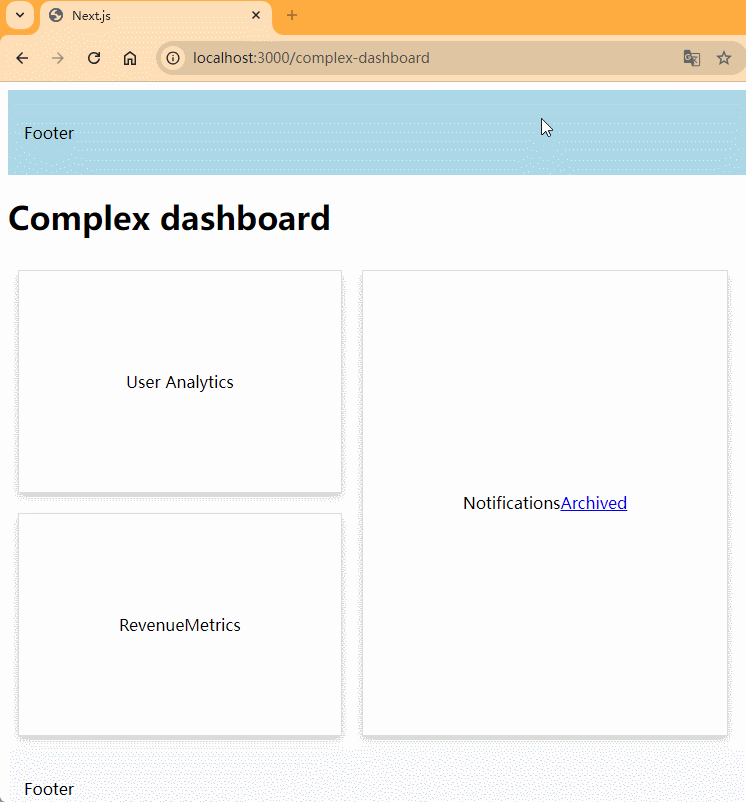
在app/complex-dashboard文件夹里面创建@revenue文件夹,创建page.tsx文件,编写组件。
xxxxxxxxxx51// routing-demo/src/app/complex-dashboard/@revenue/page.tsx23export default function RevenueMetrics() {4 return <div>Revenue Metrics</div>5}同样创建@notifications、@users。
Now we have created three slots within our complex-dashboard folder, each slot is automatically passed to the layout.tsx file component as a prop and no imports are needed.which we can then use to structure the dashboard component.
创建了parallel routes之后,它们会自动作为本文件夹的layout.tsx的props来供使用。所以不需要引入就可以使用,做法是在layout.tsx里面的组件参数,解构出来,注意,这里解构的variable name是文件夹的name,不是page.tsx中定义的component name。
xxxxxxxxxx271// routing-demo/src/app/complex-dashboard/layout.tsx23export default function DashboardLayout({4 children,5 users,6 revenue,7 notifications8}: {9 children: React.ReactNode,10 users: React.ReactNode,11 revenue: React.ReactNode,12 notifications: React.ReactNode,1314}) {15 return (16 <>17 <div>{children}</div>18 <div style={{ display: 'flex' }}>19 <div style={{ display: "flex", flexDirection: "column" }}>20 <div>{users}</div>21 <div>{revenue}</div>22 </div>23 <div style={{ display: "flex", flex: 1 }}>{notifications}</div>24 </div>25 </>26 )27}为了让展示效果更好,这里定义一个Card组件。
xxxxxxxxxx191// routing-demo/src/components/card.tsx23const Card = ({4 children5}: { children: React.ReactNode }) => {6 const cardStyle = {7 padding: "100px",8 margin: "10px",9 boxShadow: "0 4px 8px 0 rgba(0,0,0,0.2)",10 border: "1px solid #ddd",11 display: "flex",12 justifyContent: "center",13 alignItems: "center"14 }1516 return <div style={cardStyle}>{children}</div>17}1819export default Card;将@users、@revenue、@notifications的page.tsx里面的组件,div替换为Card组件:

查看效果:
注意:
slots不是路由片段,虽然是文件夹,但是Nextjs并不会将它们加入到路由中去,所以当你访问
/complex-dashboard/users或者/complex-dashboard/@users,都会返回not found。slots are not route segments and do not affect the URL structrue.If you navigate to localhost:3000/complex-dashboard/@users,you will see page not found.
为什么老师会提示这一点?想一想。
因为按照nextjs的route mechanism,文件夹一般对应一个route,所以访问这个route,会展示这个文件夹的内容。但是slots不是route segments。

实际上children是一个隐藏的slot,只不过这个slot并没有单独的文件夹。这个概念在后面的学习中会用到。
what you should also know is that the children prop is equivalent to
complex-dashboard/@children/page.tsx, so technitally we have four slots in layout.tsx file in this case.

Benefits


老师说了,第一点benefit并不是parallel routes的super power,我同样可以使用普通组件做到。真正的benefits是第2、3点。下面详细说明。


上面的图中,展示了parallel routes的好处,如果user analytics组件渲染较慢或者获取数据较慢,那么可以在@users文件夹里面创建loading.tsx文件,专门用来展示loading状态,别的组件很快的话,那就不用管。
If there is an error in fetching revenue metrics data, you can show an error message in that specific section without affecting the rest of the dashboard.


比如说可以在@notifications里面创建子路由,用户可以切换查看默认通知和已存裆的通知。这一点其实使用路由就可以办到。我知道你肯定在想v-if/v-show,但nextjs里面有独特的写法,要尊重它的最佳实践。(现在编程都在讲type-safe,如果使用v-if/v-show这种方法,无法做到这一点。而且子路由有可能很复杂,里面的逻辑很多,这时候就只能使用子路由了)


This approach allows for a more dynamic and interactive user experience as users can navigate through different parts of the application without unnecessary page reloads or layout shifts.
小结:
parallel routes allow simultaneous rendering of different pages within the same layout.Use slots to define parallel routes, slots organize content in a modular fashion, making code more manageable.
31- Unmatched Routes
这一节课到底讲了什么?注意 unmatched routes不是一种方法,而是一种现象,一种concept。我搜索了一下grok:
Unmatched routes 指的是当用户访问的 URL 无法直接映射到某个预定义的路由或 slot(插槽,Next.js 并行路由中的术语)时的情况。这种情况可能发生在以下场景:
- 并行路由中的未匹配插槽:在并行路由中,Next.js 允许同时渲染多个页面或组件(通过 @folder 命名的插槽)。如果某个插槽对应的 URL 路径没有定义相应的 page.js 文件,Next.js 会认为这是一个未匹配的路由。
- 页面导航或刷新:当用户通过 UI 导航或直接刷新页面时,URL 可能指向一个没有明确定义的路由。
- 动态路由未匹配:在动态路由中,如果 URL 参数无法匹配到预定义的路由结构,也可能触发未匹配路由的情况。
课上老师提到了当出现unmatched routes时,根据navigating的类型,unmatched slots有两种表现。
第一种是通过UI来跳转,那么此时的unmatched slots保持原有状态。
第二种就是page reload或者直接输入url访问,那么此时的unmatched slots必须有一个default.js文件,否则会出现404。
那么本节课就是学习怎么避免第二种情况的发生。
通过上面可以知道,unmatched routes 是一种情况。这种情况是需要被考虑到的,所以有以下四种方法来处理:
1、使用 default.js 提供并行路由插槽的回退内容。
2、创建 not-found.js 定义自定义 404 页面。
3、使用 catch-all 路由([...slug])捕获未定义路径。
4、在布局中动态处理未匹配插槽。
本节课就是讲了使用 default.js 来处理unmatched routes。

Introduction

在上节课中,我们学习了parallel routes,并且知道了它的好处之一:sub-navigation。但是怎么实现sub-navigation呢?下面就来实现。
Implement the Scenario
1、首先在@notifications/page.tsx里面编写跳转路由,让我们能够跳转到Archived。
xxxxxxxxxx131// routing-demo/src/app/complex-dashboard/@notifications/page.tsx23import Card from "@/components/card";4import Link from 'next/link'56export default function Notifications() {7 return (8 <Card>9 <div>Notifications</div>10 <Link href="/complex-dashboard/archived">Archived</Link>11 </Card>12 )13}2、创建Archived路由,编写组件。
注意:
虽然archived文件夹是定义在 @notifications 文件夹里面的,but this is a regular route folder, not a slot.
xxxxxxxxxx131// routing-demo/src/app/complex-dashboard/@notifications/archived/page.tsx23import Card from "@/components/card";4import Link from 'next/link'56export default function ArchivedNotifications() {7 return (8 <Card>9 <div>Archived Notifications</div>10 <Link href="/complex-dashboard">Default</Link>11 </Card>12 )13}查看效果:
sub-navigation within the notifications is working as expected.
Unmatched Routes
这里的unmatched routes应该不属于一个专门的名词,因为我在Nextjs官网上并没有找到。用unmatched slots应该更准确一点。官网信息如下:
https://nextjs.org/docs/app/building-your-application/routing/parallel-routes


在上节课中,我们知道,在案例中有四个slot,分别是@children、@users、@revenue和@notifications。
By default, the content rendered within a slot matches the current url, in the case above, all the four slots render their defined content when visit localhost:3000/complex-dashboard.However, when navigating to localhost:3000/complex-dashboard/archived, only the notifications slot has a matching route, other slots become unmatched.When dealing an unmatched slot, the content rendered by nextjs depends on the routing approach.
So there are two cases, you can see the above picture, one is 'Navigation from the UI', the other is 'Page reload'.
那么上面的案例就是符合第一种情况的,@children、@users、@revenue will remain unaffected。
Default Views
这里讲unmatched routes的第二种情况,就是page reload,无论是直接访问http://localhost:3000/complex-dashboard/archived,还是刷新这个页面,都会出现:

首先我要明确一点,unmatched routes是在parallel routes概念之后讲解的,说明unmatched routes概念和parallel routes概念是分不开的,所以使用场景一定要记清楚,因为概念实在是太多了。方便是方便,但是要下苦功夫才能用好。

为什么需要default.tsx?是谁需要default.tsx?
是unmatched routes需要default.tsx。为什么需要呢?因为在page reload的时候,nextjs会在每个unmatched slot里面寻找default.tsx,如果没有找到,会报错。

解决方法:
在complex-dashboard文件夹里面创建default.tsx,this will serve as the fallback view for the children's slot。default.tsx里面的内容一般来说都是直接copy page.tsx的内容,只需要把组件的名称改一下就行了。
xxxxxxxxxx51// routing-demo/src/app/complex-dashboard/default.tsx23export default function DefaultComplexDashboardPage() {4 return <h1>Complex dashboard default content</h1>5}在@users、@revenue里面进行同样的操作,查看效果:
可以看到,当page reload之后,children、users、revenue显示的就是default.tsx里面的内容。
Summary
这节课对unmatched slots进行了讲解,the content rendered within a slot depend on the type of navigation。
感想:
这里的default.tsx感觉代码很冗余,如果slots里面的内容很丰富呢?那不是代码量倍增了。
不用管,代码量倍增不是更容易出KPI吗?不是更好吗?说不定组件化的代码,就不允许一个文件里面的代码很长,都是直接引用的。反正知道什么情况该用slots就行了,我所想象的在首页使用slot看来值得商榷了。
32- Conditional Routes
conditional routes应该属于应用场景概念,不属于专有名词。还是属于parallel routes的应用,用条件判断来实现的。
根据这节课的案例,按照我以前的习惯,我肯定是将login和dashboard做成不同的route,然后在用户进入/dashboard时校验权限,如果没有权限就跳转到/login。
但是conditional routes提供了完全不同的解决方案,页面的一些部分是可以给用户看到的(比如说一些通用的页面内容,不涉及到数据方面的),然后只有其中重要的部分只有登录之后才能查看。那么就在这一部分显示login页面,是这么一个场景。

https://nextjs.org/docs/app/building-your-application/routing/parallel-routes

下面举一个案例来说明,based on the user's authentication state, you can choose to render the dashboard for authenticated users or a login page for those who are not authenticated.This is powerful as it enables fully separated code on the same URL.
在app/complex-dashboard文件夹中创建@login文件夹,创建page.tsx,编写组件。
xxxxxxxxxx71// routing-demo/src/app/complex-dashboard/@login/page.tsx23import Card from "@/components/card";45export default function Login(){6 return <Card>Please login to continue</Card>7}在routing-demo/src/app/complex-dashboard/layout.tsx文件中,使用login的slot,知识点如果忘记了,就看一下parallel routes这一小节。
xxxxxxxxxx291// routing-demo/src/app/complex-dashboard/layout.tsx23export default function DashboardLayout({4 children,5 users,6 revenue,7 notifications,8 login9}: {10 children: React.ReactNode,11 users: React.ReactNode,12 revenue: React.ReactNode,13 notifications: React.ReactNode,14 login: React.ReactNode,15}) {16 const isLogin = false;17 return isLogin ? (18 <>19 <div>{children}</div>20 <div style={{ display: 'flex' }}>21 <div style={{ display: "flex", flexDirection: "column" }}>22 <div>{users}</div>23 <div>{revenue}</div>24 </div>25 <div style={{ display: "flex", flex: 1 }}>{notifications}</div>26 </div>27 </>28 ) : (login)29}切换isLogin的值,来看一下效果:

提示:
如果代码写好了之后,login没有渲染出来,需要重新启动npm run dev。
课后习题:
代码都写好了之后,访问http://localhost:3000/complex-dashboard/archived会报错。怎么解决?

解决办法:
在@login文件夹中新增default.tsx文件,内容可以和@login/page.tsx保持一致。
xxxxxxxxxx71// routing-demo/src/app/complex-dashboard/@login/default.tsx23import Card from "@/components/card";45export default function DefaultLogin() {6 return <Card>Please login to continue</Card>7}访问没有问题:
