33- Intercepting Routes

There are two advanced routing patterns in nextjs, we've learned parallel routes in previous lessons, in the next two lessons we'll learn intercepting routes.
concept


下面是一个使用场景:

click on a login button, normally takes users to a full login page.However, with intercepting routes you can configure the application to display a login modal instead while the URL is still updated to reflect the /login route.This ensures the link remains sharable.If the page is reloaded or if someone accesses the page using the shared link, the full login page is displayed as expected.
这个场景是说,如果用户点击login按钮或链接,可以直接给一个modal框,但此时的路由地址仍然显示/login,这样对于用户操作来说避免了跳转,体验会比较好。但如果用户reloaed此页面或者直接访问/login,则会直接展示fullpage。
这是一种设计模式,告诉我们遇到这种需求的时候,就要想到使用intercepting routes。
下面是另一个使用场景:

similarly in a photo Feed application, where users can browse through a list of images, click on a photo would navigate users to a new page dedicated to that image.
With intercepting routes, clicking on a photo opens a modal within a feed, displaying an enlarged photo and details like the photographer's name and location.The URL updates to reflect the selected photo ensuring it is sharable.Direct URL access or page-reloads still lead to a full page view of the photo for complete details.
photo Feed application:照片供稿应用。
这里以照片供稿应用程序来说明,当点击一个照片时,会出现一个modal,里面显示放大的照片,并且显示照片的部分信息。此时的URL是当前照片的详情地址,这样可以在用户直接访问或者page-reolad的时候,显示full-page。这样做的好处就是直接在当前页面显示放大的照片,让用户在放大浏览照片的时候,可以记清楚自己浏览到哪里了,提升了用户体验。
interception routes的作用就记住两点:
1、能够在访问别的url内容的时候,保持住当前的上下文。(需要结合parallel routes一起使用才行)
2、能够使用同样的url访问具体的详情,这对于分享、社交、广告来说非常重要。
conventions
conventions,本意是约定,在本课程中用的很多。可以理解为nextjs为我们准备好的解决办法,只需要按照nextjs的规定或者说约定来编写代码即可,这样nextjs就知道我们在做什么。

注意:,这里面的on the same level,one level above,这些怎么理解?学习了下面的课程之后,你会知道,这里的level指的是intercepting routes和原本的route的位置关系。比如说下面的第一个案例,指的就是f2和(.)f2这两个文件夹的位置关系处于on the same level。也就是要intercepted的文件夹和原本的文件夹的位置关系。
下面我们用案例来说明上面的各种用法。
需要注意的是,无论使用哪种convention,目标目录在哪里,访问时Link的href就是哪里,而与intercepting routes所在的位置无关。
这个可能看上去有点绕,但是意思一定要搞清楚。比如说photo feed这种功能,intercepting routes文件夹可以和photos文件夹同级,那么就是这样来访问:
/feed/photo/1。feed/page.tsx里面访问photo时,要这么写:<Link href="/feed/photo/1"></Link>。1app2└── feed3├── page.tsx4├── photo5│ └── [photoId]6│ └── page.tsx7└── (.)photo8└── [photoId]9└── page.tsx但是也可以将photo文件夹与feed文件夹同级放置,那么就是这样来访问:
/photo/1,没有前面的/feedurl片段了。feed/page.tsx里面访问photo时,要这么写:<Link href="/photo/1"></Link>。xxxxxxxxxx91app2├── feed3│ ├── page.tsx4│ └── (..)photo5│ └── [photoId]6│ └── page.tsx7└── photo8└── [photoId]9└── page.tsx我所要说的就是Link里面的href应该怎么写,要理解。
1、(.)
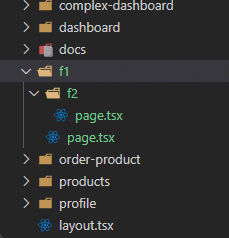
在app下创建文件夹和page.tsx文件,编写组件。f1 is short for folder one,依此类推。

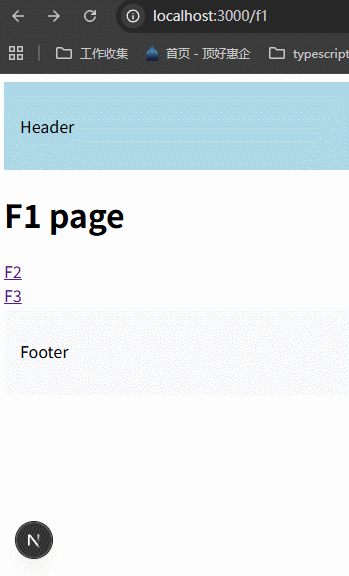
x1// routing-demo/src/app/f1/page.tsx23import Link from 'next/link'45export default function F1() {6 return (7 <>8 <h1>F1 page</h1>9 <div>10 <Link href="/f1/f2">F2</Link>11 </div>1213 </>14 )15}xxxxxxxxxx51// routing-demo/src/app/f1/f2/page.tsx23export default function F2() {4 return <h1>F2 page</h1>5}查看效果:
let's think about 2 key elements, the source folder and the target folder, we want to intercept(拦截) the f2 route when we navigating from f1 route.so f1 is our source folder and f2 is our target folder.
next, we'll set up an intercepting route to change this behavior.At the same level, we use a dot within parentheses prefix in a folder name.So in f1 directory, we create a new folder, dot within parentheses, and the folder name is f2.
within this new folder, create a page.tsx file with the default exported react component.
xxxxxxxxxx51// routing-demo/src/app/f1/(.)f2/page.tsx23export default function InterceptedF2() {4 return <h1>(.) Intercepted F2 page</h1>5}注意:代码写完之后,要重启项目才能看到效果。

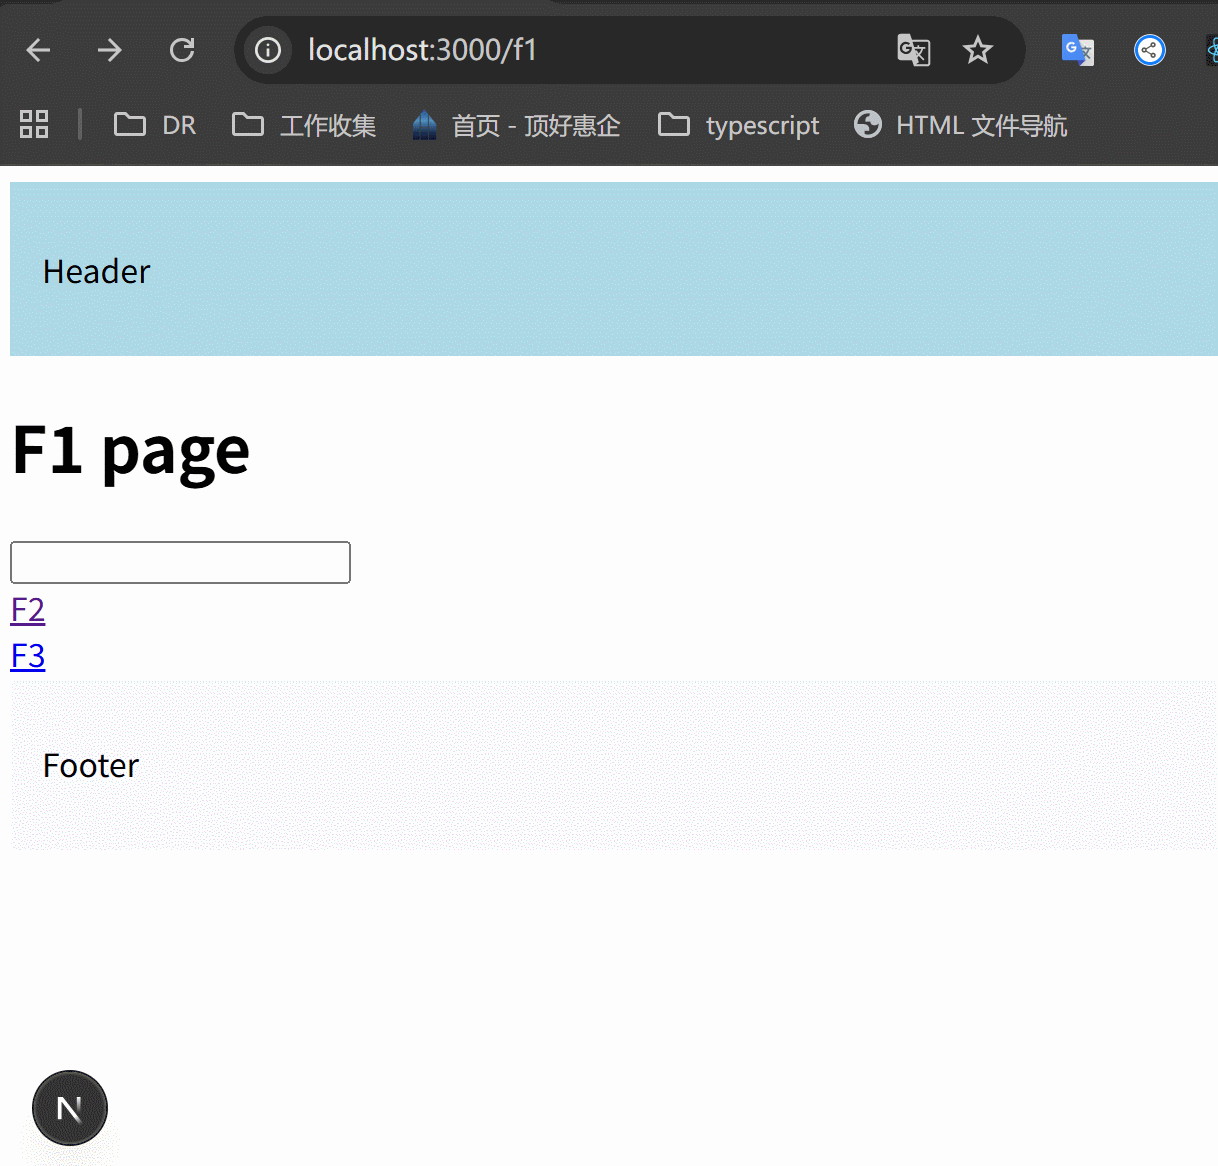
when you click on the F2 link now, the url updates to /f1/f2,but the intercepted routes content is displayed instead.reloading the page, we can see the original f2 content.

学了很久都不知道这个功能到底起什么作用?直到老师说了上面这句话,有一点懂了。我问了一下grok,给出了instagram的例子,是这样用的:模态窗口保持了主页的上下文,URL 可分享,且直接访问时显示完整页面,与拦截路由的设计目标一致。用户在photolist里面随便点击一张图片,显示的就是/(.)photo里面的内容,但是如果用户把这张图片分享出去,别的用户访问的就是/photo里面的内容。
这样的好处是什么呢?就是用户在photolist里面点击了图片之后,还能保持住原来的上下文,你也知道,如果用户点击之后,回到原页面、并且维持住原页面用户原有的状态,是非常麻烦的。
xxxxxxxxxx101app/2├── feed/3│ ├── page.js // 图片流页面(/feed)4│ ├── photo/5│ │ └── [postId]/6│ │ └── page.js // 实际的 /feed/p/[postId] 页面7│ └── (.)photo/8│ └── [postId]/9│ └── page.js // 拦截 /feed/p/[postId] 的模态窗口10├── layout.js
2、(..)
这个案例的意思是什么呢?如果我们在f1页面中要访问f3的页面,但是f3实际上是一个独立的功能,不需要或者不能放到f1文件夹中去,那么我们可以在f1文件夹里面使用(..)f3来做intercepting routes,后面的几种类型,(..)(..)和(...)都是这样的意思,所代表的就是目标文件夹与source folder的位置关系。
It is possible to match segments one level above.The convention is to prefix the folder name with two dots within parentheses.
在f1文件夹中创建文件夹和文件。

xxxxxxxxxx51// routing-demo/src/app/f3/page.tsx23export default function F3() {4 return <h1>F3 page</h1>5}xxxxxxxxxx171// routing-demo/src/app/f1/page.tsx23import Link from "next/link"45export default function F1() {6 return (7 <>8 <h1>F1 page</h1>910 <div>11 <Link href={`/f1/f2`}>F2</Link>12 <br />13 <Link href={`/f3`}>F3</Link>14 </div>15 </>16 )17}查看效果:
可以看到点击F3按钮,直接跳转到/f3的完整页面。现在我们想使用intercepting routes,改变跳转的效果。
inside the f1 folder, create a f3 folder with two dots inside parentheses as prefix, then create a page.tsx file with a simple react component.
xxxxxxxxxx51// routing-demo/src/app/f1/(..)f3/page.tsx23export default function InterceptedF3() {4 return <h1>(..) Intercepted F3 page</h1>5}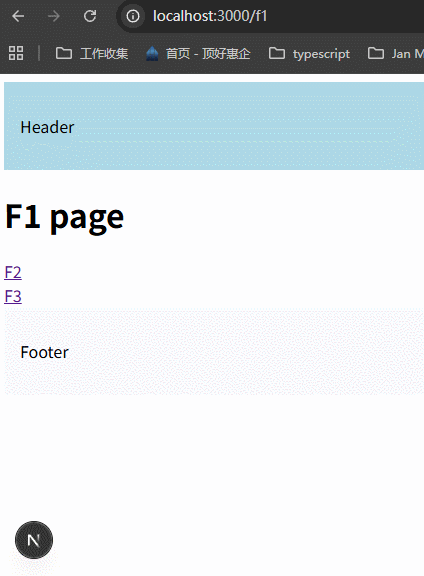
in the /f1 route ,when you click the F3 link, the URL still shows /f3 , but you will see the intercepted content instead.when you reload the page, you'll see the original F3 content .
3、(..)(..)
to match segments two levels above
in this example, we are going to intercept the f4 route when we navigating from f2.
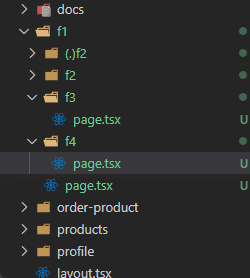
f1同层级创建f4文件夹。
xxxxxxxxxx41// routing-demo/app/f4/page.tsx2export default function F4() {3 return <h1>F4 page</h1>4}这次我们要从/f1/f2跳转到/f4,所以需要在f2文件夹中创建Link,并且创建intercepting routes,由于f2文件夹里面到f4文件夹隔了两层,所以用到了(..)(..)。
xxxxxxxxxx131// routing-demo/app/f1/f2/page.tsx2import Link from "next/link"34export default function F2() {5 return (6 <>7 <h1>F2 page</h1>8 <div>9 <Link href={`/f4`}>F4</Link>10 </div>11 </>12 )13}xxxxxxxxxx41// routing-demo/app/f1/f2/(..)(..)f4/page.tsx2export default function InterceptedF4(){3 return <h1>(..)(..) InterceptedF4 page</h1>4}
4、(...)
to match segments from the root app directory
在app下面创建f5/page.tsx。
xxxxxxxxxx41// app/f5/page.tsx2export default function F5() {3 return <h1>F5 page</h1>4}在/f1/f2下面新建一个inner-f2文件夹,编写文件,可以导航到/f5。
xxxxxxxxxx141// routing-demo/app/f1/f2/inner-f2/page.tsx23import Link from "next/link"45export default function InnerF2() {6 return (7 <>8 <h1>Inner F2 page</h1>9 <div>10 <Link href={`/f5`}>F5</Link>11 </div>12 </>13 )14}目标就是在导航到/f5时,拦截这个路由。怎么做呢?inner-f2里面的文件夹与f5文件夹的层级相隔3层,nextjs中没有特定的3层表示方法,最后一种只能拦截到app根目录下的路由,这里就使用(...)f3来表示。
xxxxxxxxxx41// routing-demo/app/f1/f2/inner-f2/(...)f5/page.tsx2export default function InterceptedF5() {3 return <h1>(...) InterceptedF5 page</h1>4}
小结:
intercepting routes allow you to load a route from another part of your application within the current layout.This routing paradigm is useful when you want to display the content of a route without the user to switching to a different context.
我有一个问题,比如说我在f1,使用了拦截路由跳转到f2,f2是一个弹窗,那么我在关闭弹窗的时候,应该怎么做呢?
因为此时的路由地址是
f1/f2,我肯定加上路由返回的功能(并不是简单的关闭弹窗就可以的),此时f1页面的context还能保持住吗?试一下,在f1里面加一个input看一下。答案是不能保持住。那怎么办?下节课会讲到。使用parallel routes + intercepting routes。
34- Parallel Intercepting Routes
这一节课来实现上节课说的photo feed功能。


注意看,点击了图片之后,url地址栏也改变了。并且这种特性还能让我们使用导航栏的箭头返回原页面。

如果别人直接使用URL访问,或者reload page,会显示一个照片的详情界面。
实现步骤是什么呢?简单来讲就是:
1、创建一个photo-feed路由,里面的page.tsx展示photolist。
2、photolist里面的每一个photo项,都使用Link包裹,点击会跳转到photo-feed/1这样的路由,此时需要考虑拦截路由。
首先需要使用/photo-feed/[photoId]/page.tsx,那么这种情况的拦截路由该怎么做呢?其实在上一节课的f1/f2案例里面可以看到,创建了/f1/(.)f2/page.tsx这样的文件,就是拦截路由。
这里的情况,应该这样做:/photo-feed/(.)[photoId]/page.tsx,接下来就是编写组件了。
3、但其实还差一步,差哪一步呢?就是怎么显示Modal的问题。不要把vue里面的内容带进来了,vue里面的Modal根本就没有使用到路由,就是使用的组件。这里是需要路由跳转的。
案例里面的要求应该是,点击图片跳转到了/photo-feed/1这种页面之后,原来的页面是不变的,Modal虽然说可以做成overlay的样式,但是从/photo-feed跳转到/photo-feed/1,怎么保证/photo-feed/page.tsx的内容仍然显示?并且保持原有内容不变。
这是一个重大问题,从33节里面的动图可以看到,虽然我拦截了路由,并且显示了拦截路由的内容。但是跳转过来的原始页面的内容呢?不在了。
所以这里要使用parallel routes,将/@modal/(.)[photoId]/page.tsx当作一个组件传进photo-feed/layout.tsx里面,与children共同组成页面。这是最重要的一个难点。
xxxxxxxxxx151// teacher-code/Next.js-15-Tutorials/routing-demo/src/app/photo-feed/layout.tsx23import "./styles.css";45export default function Layout(props: {6 modal: React.ReactNode;7 children: React.ReactNode;8}) {9 return (10 <>11 {props.modal}12 {props.children}13 </>14 );15}这里先把思路搞清楚就行了,可以照着老师的代码实现。
我自己写的简单的例子,需要注意的是,开发模式下,如果parallel或者intercepting routes里面的代码改变了,那么需要重新启动才能看到效果,否则效果是错误的。
目录结构:
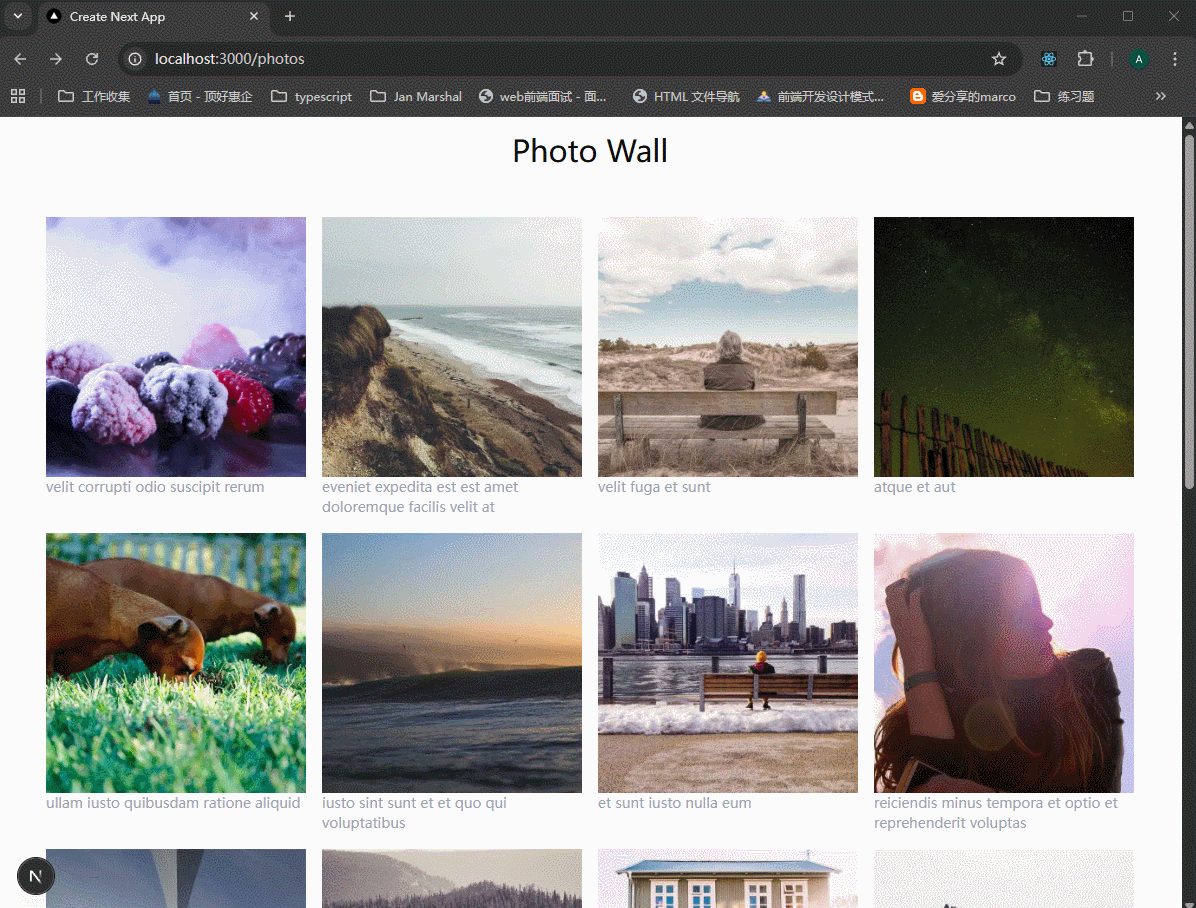
xxxxxxxxxx111src/2└── app/3└── photos/4├── [id]/ # 或是 [photoId] (图片 1 和 2 为 photoId,图片 3 为 id)5│ └── page.tsx # 照片详情全屏页6├── @modal/ # 并行路由插槽7│ ├── (.)[id]/ # 拦截路由 (图片 3 显示为 (.)[id])8│ │ └── page.tsx # Modal 弹窗内容页9│ └── default.tsx # 插槽默认返回组件 (通常返回 null)10├── layout.tsx # 渲染 children 和 modal 插槽的布局11└── page.tsx # 照片列表主页
/app/photos/page.tsx和/app/photos/layout.tsx里面的代码就不用讲了,page里面渲染图片列表,layout里面引入modal插槽。
1、必须创建一个@modal/default.tsx文件,里面的组件名必须是Default,而且返回null。
xxxxxxxxxx51// src/app/photos/@modal/default.tsx23export default function Default() {4 return null;5}2、创建/@modal/(.)[id]/page.tsx文件,这里是一个server component,但是里面的CustomModal组件可以是client component。
xxxxxxxxxx311// app/photos/@modal/(.)[id]/page.tsx23import CustomModal from "@/components/CustomModal";45// API 请求,这里也可以写 'use cache'6async function getPhotoDetail(id: string) {7 const res = await fetch(`http://192.168.1.6:4000/photos/${id}`, {8 // 服务端组件可以利用 Next.js 的缓存机制9 next: { revalidate: 3600 },10 });11 return res.json();12}1314export default async function PhotoModalPage({15 params,16}: {17 params: Promise<{ id: string }>;18}) {19 const { id } = await params;20 const data = await getPhotoDetail(id);2122 if (!data) return null;2324 return (25 <CustomModal26 url={data.url}27 title={data.title}28 // 这里不再需要传 loading 状态,因为 HTML 到达时数据已就绪29 />30 );31}3、编写CustomModal组件
nextjs里面使用react的createPortal创建modal需要考虑是否渲染完成。如果没有特殊的要求,还是使用html原生的dialog或者使用parallel+intercepting routes来实现。
xxxxxxxxxx551"use client";23import Image from "next/image";4import { useRouter } from "next/navigation";5import { useState } from "react";67export default function CustomModal({8 url,9 title,10}: {11 url: string;12 title: string;13}) {14 const router = useRouter();15 const [isLoading, setIsLoading] = useState(true);1617 return (18 <div19 className="fixed inset-0 z-999 flex items-center justify-center bg-black/70 backdrop-blur-md"20 onClick={() => router.back()} // 点击遮罩层返回21 >22 <div23 className="bg-white p-4 rounded-xl max-w-2xl w-full relative shadow-2xl overflow-hidden"24 onClick={(e) => e.stopPropagation()} // 阻止冒泡25 >26 <div className="relative aspect-square w-full">27 {/* 这是一个简单的骨架屏背景动画 (使用 Tailwind) */}28 {isLoading && (29 <div className="absolute inset-0 animate-pulse bg-gray-300 z-10" />30 )}31 <Image32 src={url}33 alt={title}34 fill35 priority // 关键优化:预加载 Modal 里的主图36 onLoad={() => setIsLoading(false)}37 className="w-full object-cover aspect-square"38 />39 </div>4041 <div className="p-4 flex justify-between items-center">42 <div>43 <h2 className="text-lg font-bold text-gray-900">{title}</h2>44 <p className="text-sm text-gray-500">已通过服务端预渲染</p>45 </div>46 <button47 onClick={() => router.back()}48 className="px-4 py-2 bg-gray-900 text-white rounded-lg hover:bg-gray-800 transition">49 关闭50 </button>51 </div>52 </div>53 </div>54 );55}效果:
35-Route Handlers
学习到这里,我应该感到高兴,因为我终于把nextjs里面涉及到前端的路由部分学习完了。回想起来,内容其实不多,但是思维方式的转变很巨大,一段时间不复习,真的会彻底忘记。
接下来开始学习route handlers,“route handlers let us build restful endpoints with complete control over the response”,可以让我们不用另外做一个前后端分离的服务端。
nextjs里面的route api用的多吗?怎么我看到很多代码都是直接在函数里面操作数据库,然后组件里面调用这个函数来获取数据?而且我觉得route api定义的方式有局限,就比如说GET请求,设置多种GET请求时很麻烦,
/products、/products/:id这种就很难区分开。(2026-01)
Next.js 中的 Route API(即 route handlers,
/app/api/xxx/route.ts)现在用的频率其实已经大幅下降了,尤其在 2024–2026 年的新项目和社区主流实践中。当前最常见的两种数据获取模式对比:
模式 使用频率(2025–2026) 典型写法位置 优点 缺点/痛点 适用场景 Server Component 直接 fetch / 操作数据库 ★★★★★(主流) page.tsx / layout.tsx 里直接写 代码最少、最直观、零额外文件、自动 streaming 逻辑复杂时页面文件变臃肿 绝大多数中大型项目、内容型站点、Dashboard Route Handler(API Routes) ★★☆☆☆(下降中) app/api/xxx/route.ts 适合对外暴露 API、需要严格控制请求方式 多一层文件、多一次网络请求、维护成本高 需要公共 API、第三方调用、移动端后端 Server Action ★★★★☆(快速上升) page.tsx 或单独 action 文件 表单提交、mutation 专用、类型安全好 目前主要用于写操作,不适合纯读 表单、点赞、评论、购物车等交互 为什么现在很多人直接在 Server Component 里操作数据库?
xxxxxxxxxx271// app/dashboard/page.tsx(最常见的现代写法)2import { db } from '@/lib/prisma';34export default async function DashboardPage() {5// 直接在 Server Component 里查询数据库6const users = await db.user.findMany({7take: 10,8orderBy: { createdAt: 'desc' },9});1011const stats = await db.post.aggregate({12_count: { id: true },13_sum: { views: true },14});1516return (17<div>18<h1>仪表盘</h1>19<p>总文章数:{stats._count.id}</p>20<ul>21{users.map(user => (22<li key={user.id}>{user.name}</li>23))}24</ul>25</div>26);27}这种写法现在特别流行,主要原因:
代码量最少、最直观 不用再写一个 api/users/route.ts,再 fetch('/api/users'),少了两层抽象
零额外网络请求 Server Component 运行在服务器端,直接访问数据库就是本地调用,性能更好
天然支持 Streaming + Suspense 可以很方便地做渐进式加载
xxxxxxxxxx31<Suspense fallback={<UserListSkeleton />}>2<UserList /> // 里面直接 await db.xxx()3</Suspense>React Server Components 模型就是为此设计的 Next.js 从 13 开始就大力推这个模式:数据获取尽可能靠近使用的地方
那 Route Handler 现在还用在哪些场景?
虽然用得少了,但依然有不可替代的地方:
- 需要给外部客户端(移动 App、第三方服务、前端非 Next.js 项目)提供 API
- 需要严格的请求方法控制(只允许 POST、需要验证 header 等)
- 实现 Webhook 接收、文件上传、图片代理 等特殊路由
- 团队内部有前后端分离的强规范(即使技术上可以合并)
- 迁移旧项目(Pages Router 时代大量 api 路由)
2025–2026 社区主流推荐总结
x1大多数新项目(尤其是内部管理后台、内容站点、SaaS):2Server Component 直接写数据库查询 → 90% 的读操作都这么干34需要写操作(创建、更新、删除):5Server Action 为主67真正需要对外暴露的 API 接口:8才用 Route Handler一句话结论:
Route API 现在已经不是主流的数据获取方式了。 大多数人看到的那种“组件里直接调用数据库函数”的写法,正是目前 Next.js 官方和社区最推荐、最简洁的做法。
“在哪里使用数据,就在哪里获取数据” —— 这是 React Server Components + Next.js 官方反复强调的核心理念
如果你项目里还在大量用 Route Handler,基本可以考虑逐步迁移到 Server Component + Server Action 的组合,代码会少很多,体验也会更好。
新建一个route-handlers-demo的项目,npx create-next-app route-handlers-demo。
https://nextjs.org/docs/app/getting-started/route-handlers-and-middleware


与page routes一样,route handlers must live in the app folder.
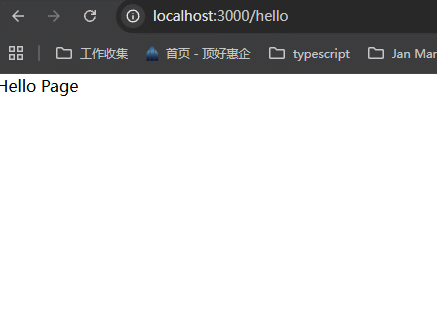
创建app/hello文件夹,并创建route.ts文件,这个文件名是固定的。here we export a function that matches the GET http verb。
xxxxxxxxxx51// route-handlers-demo/src/app/hello/route.ts23export async function GET(){4 return new Response("Hello world!")5}浏览器输入/hello,查看效果。
可以看到,返回了Response里面的文字。
几点注意事项:
1、与page routes一样,route handlers must live in the app folder.

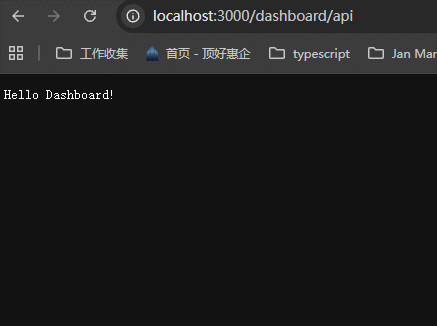
2、route.js不能和page.js处于同一级,因为访问/文件夹名的时候,给出的是route.js的返回结果,页面不会显示。所以一般在page.js的同级创建api文件夹,将route.js放到api文件夹里面去。访问接口的时候,/hello/api就可以访问了。

3、不只是folder可以有自己的api/route.js,里面的subfolders也可以有自己的api/route.js。访问的时候就按照folder的顺序来访问即可。

这部分我感觉有点多余,因为我后面学习了prisma连接数据库,我可以直接调用写好的方法接口来操作数据。还要写接口,这不是多余吗?
答案是可以,但是在client components里面是不能使用prisma来操作的。
xxxxxxxxxx101对外公开的 API → Route Handler(必须)2移动端/第三方调用、Webhook、文件上传等 → Route Handler34内部页面、Dashboard、管理后台、内容站 → Server Component 直接写数据库查询5+ Server Action 处理写操作/表单6+ middleware 做全局鉴权(如 JWT 检查)78Client Component → 只管 UI + 交互(useState、useEffect、fetch SWR 等)9→ **严禁** import 任何数据库相关代码(Prisma、drizzle 等)10→ 如果是表单提交,那么就可以设置form的action,然后单独设置一个server action方法来调用。
36-Handling GET Requests
首先安装Thunder Client插件,用于测试api。

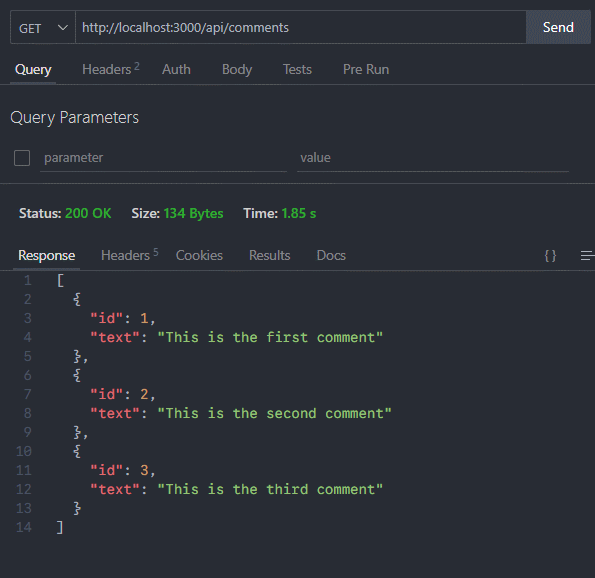
创建app/comments/data.ts,这是准备的数据源。
xxxxxxxxxx161// `app/comments/data.ts`23export const comments = [4 {5 id: 1,6 text: "This is the first comment",7 },8 {9 id: 2,10 text: "This is the second comment",11 },12 {13 id: 3,14 text: "This is the third comment",15 },16];创建comments/api/route.ts
xxxxxxxxxx51import { comments } from "../data";23export async function GET() {4 return Response.json(comments)5}在thunder client里面测试接口。

37-Handling POST Requests
我们定义的handler函数名称,一定要和具体的HTTP动作相同,比如说GET、POST这些,一定要一致。
新增POST handler函数。
xxxxxxxxxx231// route-handlers-demo/src/app/comments/api/route.ts2import { comments } from "../data";34export async function GET() {5 return Response.json(comments)6}78export async function POST(request: Request) {9 // 使用 request 来接收传过来的数据10 const comment = await request.json();11 // 新增一个评论12 const newComment = {13 id: comments.length + 1,14 text: comment.text15 }1617 comments.push(newComment);18 // 新增的时候,返回201比较好。这个先不管19 return new Response(JSON.stringify(newComment), {20 headers: { "content-Type": "application/json" },21 status: 20122 })23}测试OK。

再请求一下GET,发现有4条数据了。

38-Dynamic Route Handlers
在获取详情、删除、编辑的时候,需要用户提供id,可能是query或者params的方式,这样就需要在route.ts中定义的时候,先定义一个参数来接收,下面学习怎么定义。
the dynamic route handlers follow the same pattern as dynamic page routes
首先要创建一个[id]文件夹,里面创建/api/route.js,使用params参数来接收具体的id值。
xxxxxxxxxx221// route-handlers-demo/src/app/comments/[id]/api/route.ts23import { comments } from "../../data";45/**6 * 7接收两个参数,一个是request,一个是params,这个params是 context object containing the route parameters。8也就是说,request里面可以获取json请求数据,而params上有param这种请求数据910这里由于不需要使用request参数,所以前面加上了_,变成了_request,提示typescript这里不用管11 */1213export async function GET(14 _request: Request,15 params: Promise<{ id: string }>16) {17 // 从params参数获取到url上的param传参18 const { id } = await params;19 const comment = comments.find(c => c.id === parseInt(id))2021 return Response.json(comment)22}测试:

为什么报错了,因为这种url是不能获取到param的,我看到老师是没有使用api文件夹的,当然可以成功。但是真实项目中肯定会很复杂,怎么办呢?
查看了一下官方文档,发现有解决办法。

如果遇到需要获取动态参数的时候,可以直接使用ctx来获取,但是此时列表获取接口也是GET,可以怎么区分开来吗?
问了一下grok,可以通过判断参数来区分:

但是这里不使用这种方式,而是通过文件夹来处理。这一种方法我认为比较好。
xxxxxxxxxx121app/2├── api/3│ ├── comments/4│ │ ├── route.ts5│ │ └── [id]/6│ │ └── route.ts7├── comments/8│ ├── (.)[id]/9│ │ └── page.js // 拦截 /comments/[id] 的模态窗口10│ ├── [id]/11│ │ └── page.js // 渲染 /comments/[id] 的页面12│ └── page.js
那么我就这样做了,原来app/comments里面所有的api文件夹全部删除,改成下面这样。

xxxxxxxxxx171// route-handlers-demo/src/app/api/comments/[id]/route.ts23import { comments } from "@/app/comments/data";4import type { NextRequest } from 'next/server'56// 这里的两个参数是按照官方文档来做的78export async function GET(9 _req: NextRequest,10 ctx: RouteContext<'/api/comments/[id]'>11) {12 // 从params参数获取到url上的param传参13 const { id } = await ctx.params;14 const comment = comments.find(c => c.id === parseInt(id))1516 return Response.json(comment)17}效果很好啊:
这里其实我有一个疑问,这个接口定义在了
/comments/[id]文件夹里面,那么如果列表页面要用这些接口怎么办呢?这其实很简单,接口就是一些链接,我直接调用就行了。不是我所想的,一个接口定义在哪个文件夹里面,只有这个文件夹里面才能使用,这肯定是不对的。
39-Handling PATCH Requests
文档里面把API说明的很清楚,各种请求都有哪些参数,怎么获取用户传递过来的参数都说明白了:https://nextjs.org/docs/app/api-reference/file-conventions/route#request-body。
xxxxxxxxxx301// route-handlers-demo/src/app/api/comments/[id]/route.ts2import { comments } from "@/app/comments/data";3import type { NextRequest } from 'next/server'45// 这里的两个参数是按照官方文档来做的67export async function GET(8 _req: NextRequest,9 ctx: RouteContext<'/api/comments/[id]'>10) {11 // 从params参数获取到url上的param传参12 const { id } = await ctx.params;13 const comment = comments.find(c => c.id === parseInt(id))1415 return Response.json(comment)16}1718export async function PATCH(19 req: NextRequest,20 ctx: RouteContext<'/api/comments/[id]'>21) {22 const { id } = await ctx.params;23 const body = await req.json();// 使用 req.json() 获取body里面的数据,官方文档里面有24 const { text } = body2526 const index = comments.findIndex(c => c.id === parseInt(id))27 comments[index].text = text;2829 return Response.json(comments[index])30}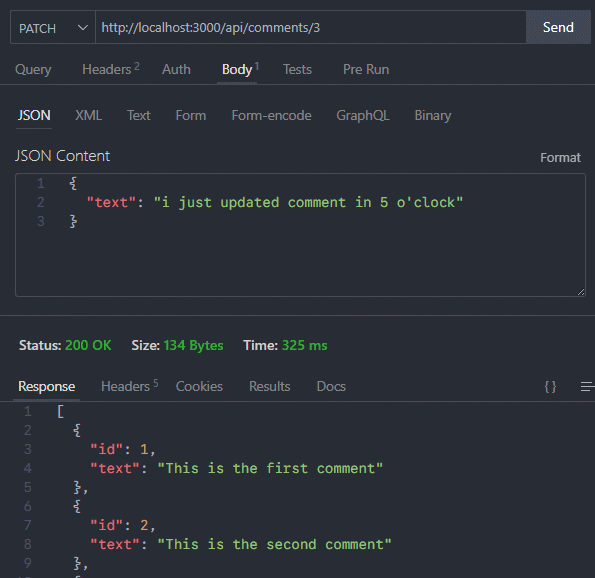
40-Handling DELETE Requests
xxxxxxxxxx161// route-handlers-demo/src/app/api/comments/[id]/route.ts23import { comments } from "@/app/comments/data";4import type { NextRequest } from 'next/server'56export async function DELETE(7 _req: NextRequest,8 ctx: RouteContext<'/api/comments/[id]'>9) {10 const { id } = await ctx.params;11 const index = comments.findIndex(c => c.id === parseInt(id))12 const deletedComment = comments[index]1314 comments.splice(index, 1)15 return Response.json(deletedComment)16}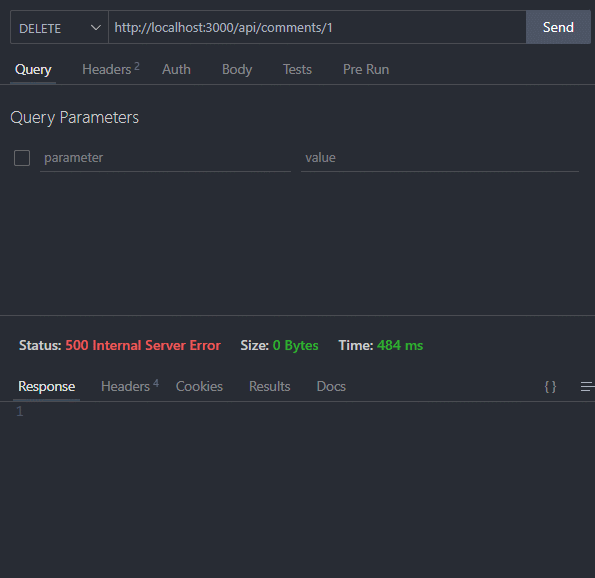
41-URL Query Parameters
通过案例来说。需求是:按照给定的?keyword=first这种关键词搜索条件来返回结果。
request.nextUrl.searchParams返回所有的query参数,然后通过get()方法,来获取具体参数的值。
xxxxxxxxxx111// route-handlers-demo/src/app/api/comments/route.ts23import { comments } from "@/app/comments/data";4import type { NextRequest } from "next/server";56export async function GET(request: NextRequest) {7 const searchParams = request.nextUrl.searchParams;8 const keyword = searchParams.get("keyword")9 const filteredComments = keyword ? comments.filter(c => c.text.includes(keyword)) : comments;10 return Response.json(filteredComments)11}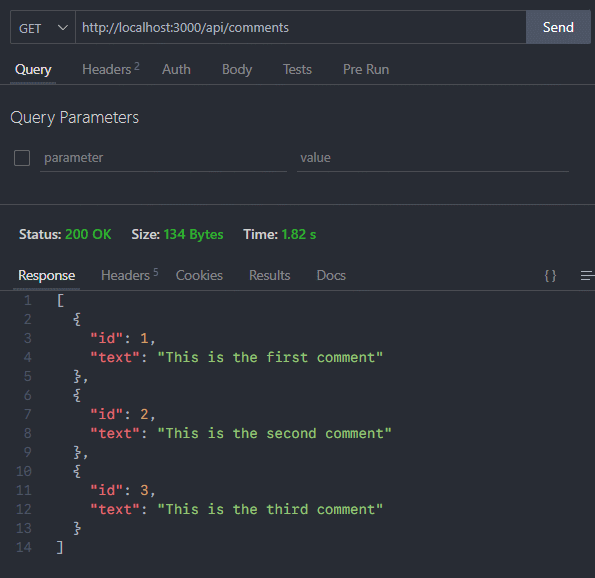
42-Headers in Route Handlers


新建一个app/profile/route.ts文件,来模拟接收headers和设置headers该怎么做。
1、使用request.headers来接收headers
xxxxxxxxxx101// app/profile/route.ts23import type { NextRequest } from "next/server";45export async function GET(request: NextRequest) {6 const requestHeaders = new Headers(request.headers);7 console.log("request.headers = ", requestHeaders.get("Authorization"));89 return new Response("Profile API data")10}
2、使用next/headers提供的headers方法来接收headers
xxxxxxxxxx101// app/profile/route.ts23import { headers } from "next/headers";45export async function GET() {6 const headersList = await headers();7 console.log("headersList = ", headersList.get("Authorization"));89 return new Response("Profile API data")10}
3、在返回结果时,设置headers的信息
xxxxxxxxxx151// app/profile/route.ts23import { headers } from "next/headers";45export async function GET() {6 const headersList = await headers();7 console.log("headersList = ", headersList.get("Authorization"));89 return new Response("<h1>Profile API data</h1>", {10 headers: {11 // 将返回结果的类型改为 text/html12 "content-Type": "text/html"13 }14 })15}需要在浏览器中查看,可以看到,返回的结果被当作html渲染了,而不再只是字符串。

43-Cookies in Route Handlers

我们想在/profile这个接口里面设置cookie,这样这个接口之后的请求都会带上cookie。
xxxxxxxxxx121// app/profile/route.ts23export async function GET() {4 5 return new Response("<h1>Profile API data</h1>", {6 headers: {7 // 将返回结果的类型改为 text/html8 "content-Type": "text/html",9 "Set-Cookie": "theme=dark"10 }11 })12}先请求一遍:

从此Response Headers里面就带上了cookie,之后的请求就可以使用下面的方法获取了。
1、使用request.cookie.get()方法,来获取具体的cookie的值。
xxxxxxxxxx151// app/profile/route.ts23import { NextRequest } from "next/server"45export async function GET(request: NextRequest) {6 const theme = request.cookies.get("theme")78 console.log("通过request获取cookie", theme);9 return new Response("<h1>Profile API data</h1>", {10 headers: {11 // 将返回结果的类型改为 text/html12 "content-Type": "text/html"13 }14 })15}
2、使用next/headers提供的cookies方法,有set、get等多种功能。
xxxxxxxxxx161// app/profile/route.ts23import { cookies } from "next/headers";45export async function GET() {6 const cookieStore = await cookies();7 cookieStore.set("resultPage", "20");8 9 console.log("通过cookies方法获取", cookieStore.get("resultPage"));10 return new Response("<h1>Profile API data</h1>", {11 headers: {12 // 将返回结果的类型改为 text/html13 "content-Type": "text/html"14 }15 })16}
44-Redirects in Route Handlers
老师用一个案例来说明,原来设计的接口地址是/api/v1/users,现在有了更好的接口/api/v2/users,在前端不更改请求地址的情况下,后端怎么将/api/v1/users的访问重定向到/api/v2/users。
使用next/navigation提供的redirect方法,没有错,就是之前在page routes里面学习的redirect方法。

当然,v2的接口要注意包含v1接口的全部字段,否则有错误。
45-Caching in Route Handlers

缓存只在GET请求中起作用。
设置缓存效果很简单,只需要在route.ts里面加上export const dynamic = "force-static";。如果想要隔一段时间就能够获取新数据,可以设置export const revalidate = 10;,这里的单位是s。
新建app/time/route.ts
xxxxxxxxxx71// app/time/route.ts23export async function GET() {4 return Response.json({5 time: new Date().toLocaleTimeString()6 })7}可以看到,每次刷新的时候,都会返回最新的时间:

添加了缓存之后,只在生产环境看得到,所以需要先npm run build,然后npm run start查看。
添加缓存:
xxxxxxxxxx91// app/time/route.ts23export const dynamic = "force-static";45export async function GET() {6 return Response.json({7 time: new Date().toLocaleTimeString()8 })9}
可以看到,无论怎么刷新,返回的都是第一次请求返回的数据。
如果我想隔一段时间就可以更新一次,有些数据只是变得比较少,不是一直不变,所以还是很常见的需求,该怎么做呢?设置更新时间间隔:
xxxxxxxxxx101// app/time/route.ts23export const dynamic = "force-static";4export const revalidate = 10;// 设置重新检验的时间,这里设置10秒之后就可以检验新老数据是否一致,如果不一致就更新56export async function GET() {7 return Response.json({8 time: new Date().toLocaleTimeString()9 })10}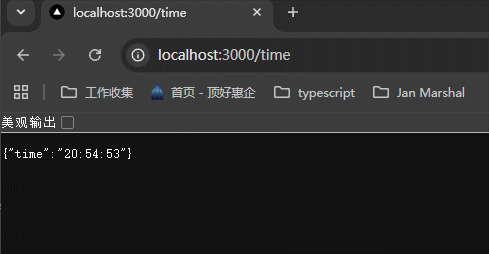
可以看到,隔一段时间之后就可以更新了,注意这里的时间不需要特别精确。
46-Middleware


中间件通过 specify paths (具体说明路径) 的方式,来指定在哪里生效。有两种具体说明paths的方式,以案例说明。

一个项目只能有一个middleware.ts文件,但是还是可以使用js的modules来组织代码。这个文件与app文件夹是同层级的。
案例说明:imagine a scenario where navigating to /profile should redirect to / .当用户访问 /profile的时候,重定向到/。
创建/src/middleware.ts文件。
1、使用 config 来配置中间件起作用的路径
xxxxxxxxxx131// /src/middleware.ts2import { NextResponse } from "next/server";3import type { NextRequest } from 'next/server';45// 定义并暴露中间件6export function middleware(request: NextRequest) {7 return NextResponse.redirect(new URL("/", request.url))8}910// 告诉nextjs,在 /profile 路径应用这个中间件11export const config = {12 matcher: "/profile"13}
2、使用 request.nextUrl.pathname 来判断是否是需要中间件起作用的路径。这里将重定向路径更换了一下,看一下效果。
xxxxxxxxxx111// /src/middleware.ts23import { NextResponse } from "next/server";4import type { NextRequest } from 'next/server';56// 定义并暴露中间件7export function middleware(request: NextRequest) {8 if (request.nextUrl.pathname === "/profile") {9 return NextResponse.redirect(new URL("/hello", request.nextUrl))10 }11}
中间件还可以操作headers和cookies,以下是一个案例:
xxxxxxxxxx201// src/middleware.ts23import { NextResponse } from "next/server";4import type { NextRequest } from 'next/server';56// 定义并暴露中间件7export function middleware(request: NextRequest) {8 // 获取到response对象9 const response = NextResponse.next();10 // 获取cookies11 const theme = request.cookies.get("theme")12 // 如果没有theme这个cookie,就设置13 if (!theme) {14 response.cookies.set("theme", "dark")15 }16 // 设置headers 17 response.headers.set("custom-header", "custom-value")1819 return response;20}可以看到上面的中间件并没有设置config,所以cookies和headers是应用到所有接口了。


学习到这里,就结束了nextjs里面route相关的内容,总结一下,主要学习了这些内容:
