78-useFormStatus vs useActionState


nextjs对哪些情况下使用pending(from useFormStatus)或者isPending(from useActionState)没有详细说明,这个交给用户来决定了。
如果有的地方使用到了useActionState,那么就使用里面的isPending就行了。
79-Update Server Action
这节课我们学习怎么更新数据。
创建products-db/[id]/page.tsx,将products-db-create/page.tsx的代码粘贴过来。
1、获取该product的原始表单数据。
x1// data-fetching-demo/src/app/products-db/[id]/page.tsx23"use client";45import { useActionState } from "react";6import { FormState, createProduct } from '@/actions/products'7import { getProduct } from "@/prisma-db";89export default async function EditProductPage({10 params11}:{12 params: Promise<{id: string}>13}) {14 // 获取原始数据15 const {id} = await params;16 const product = await getProduct(parseInt(id));17 18 1920 return (21 22 );23}这里的报错其实可以使用useEffect来解决,client components不能使用async...await,但是里面的函数是可以使用async...await的。
但是报错,原因是client component里面不能使用async...await:

怎么办呢?将表单操作单独做成一个client component。将app/products-db/[id]/page.tsx改成server component,这样就可以在里面使用async...await了。将form逻辑抽离出去之后的页面如下:
xxxxxxxxxx291// app/products-db/[id]/page.tsx23import { EditProductForm } from './edit-product-form'4import { getProduct } from "@/prisma-db";5import { Product } from '../page'6import { notFound } from 'next/navigation';78export default async function EditProductPage({9 params10}: {11 params: Promise<{ id: string }>12}) {1314 // 获取dynamic params15 const { id } = await params;16 // 调用prisma里面定义的方法,获取product详情。这里获取到的可能是null,所以ts类型要写上17 const product: Product | null = await getProduct(parseInt(id));1819 // 要加上product为null时的处理20 if(!product){21 notFound();22 }23 24 return (25 <>26 <EditProductForm product={product} />27 </>28 )29}抽离的逻辑写到app/products-db/[id]/edit-product-form.tsx中去,同时在actions/products.ts里面新增一个编辑的action函数。这里面临一个问题,我该怎么把id传递给这个编辑函数呢?因为编辑函数是作为useActionState的参数传进去的,没有直接使用,怎么传呢?
可以使用bind绑定参数,创建一个新函数,指定editProduct函数第一个参数的值。注意:input和textarea里面使用了defaultValue来回显。
x
1// app/products-db/[id]/edit-product-form.tsx23"use client";45import { useActionState } from "react";6import { FormState, editProduct } from '@/actions/products'7import type { Product } from "../page";89export const EditProductForm = ({ product }: {10 product: Product11}) => {1213 // 定义表单初始状态,这里只需要定义errors14 const initialState: FormState = {15 errors: {}16 }1718 // 使用bind方法,新建一个函数,指定第一个参数的值19 const editProductId = editProduct.bind(null, product.id);2021 const [state, formAction, isPending] = useActionState(editProductId, initialState);2223 return (24 // 更换action函数25 <form action={formAction} className="p-4 space-y-4 max-w-96">2627 <div>28 <label className="text-white">29 Title30 <input31 type="text"32 className="block w-full p-2 text-white border rounded"33 name="title"34 defaultValue={product.title}35 />36 </label>37 {/* 添加错误提示 */}38 {39 state.errors.title && <p className="text-red-500">{state.errors.title}</p>40 }41 </div>42 <div>43 <label className="text-white">44 Price45 <input46 type="number"47 className="block w-full p-2 text-white border rounded"48 name="price"49 defaultValue={product.price}50 />51 </label>52 {53 state.errors.price && <p className="text-red-500">{state.errors.price}</p>54 }55 </div>56 <div>57 <label className="text-white">58 Description59 <textarea60 className="block w-full p-2 text-white border rounded mb-2"61 name="description"62 defaultValue={product.description ?? ""}63 />64 </label>65 {66 state.errors.description && <p className="text-red-500">{state.errors.description}</p>67 }68 </div>69 <button70 type="submit"71 className="block w-full p-2 text-white bg-blue-500 rounded disabled:bg-gray-500"72 disabled={isPending}73 >74 Submit75 </button>76 </form>77 );78}那么定义editProduct函数的时候,就要添加一个参数:
xxxxxxxxxx401// data-fetching-demo/src/actions/products.ts23"use server";45import { addProduct, updateProduct } from "@/prisma-db";6import { redirect } from "next/navigation";7810export async function createProduct(prevState: FormState, formData: FormData) {11 12}1314export async function editProduct(productId: number, prevState: FormState, formData: FormData) {15 const title = formData.get("title") as string;16 const price = formData.get("price") as string;17 const description = formData.get("description") as string;1819 // 添加表单校验20 const errors: Errors = {};2122 if (!title) {23 errors.title = "Title is required"24 }2526 if (!price) {27 errors.price = "Price is required"28 }2930 if (!description) {31 errors.description = "Description is required"32 }3334 if (Object.keys(errors).length > 0) {35 return { errors }36 }3738 await updateProduct(productId, title, parseInt(price), description)39 redirect("/products-db")40}为了更好的显示效果,在products-db/page.tsx里面,每一个product的title上面包裹Link标签,可以跳转到编辑页面。

查看效果:
这里说一下bind的用法,重点看预置参数这个案例:
这里的
const editProductId = editProduct.bind(null, product.id);应该怎么理解?
1、因为editProduct这个函数里面,实际上是用不到this的,所以这里的bind的第一个参数,其实无所谓。这里的场景就是不需要第一个参数thisArg,所以传递null是最好的。传递一个对象也无所谓,但最好还是传递null。
2、bind的第二个参数,含义就是预置的参数,这些参数会在新函数被调用时,预先添加到实际传入的参数列表的前面。
JavaScript 中 Function.prototype.bind() 方法详解
Function.prototype.bind() 是 JavaScript 中一个内置的方法,用于函数对象。它允许你创建一个新的函数,该函数在调用时会将 this 关键字绑定到指定的对象,并可选地预置一些参数。这是一个非常有用的方法,尤其在处理回调函数、事件处理或需要控制上下文的场景中。
下面我将从多个方面详细讲解这个方法,包括语法、参数、返回值、工作原理、使用场景、示例、与其他方法的区别、浏览器兼容性以及常见陷阱。讲解基于官方文档和实际应用经验。
- 语法
xxxxxxxxxx11const boundFunction = originalFunction.bind(thisArg[, arg1[, arg2[, ]]]);
- originalFunction:你要绑定的原始函数。
- 返回值 boundFunction:一个新的函数副本。
- 参数
- thisArg(必需):当绑定的新函数被调用时,this 将指向这个值。如果省略或传入 null/undefined,则在非严格模式下 this 会指向全局对象(浏览器中是 window),在严格模式下是 undefined。
- arg1, arg2, ...(可选):预置的参数。这些参数会在新函数被调用时,预先添加到实际传入的参数列表的前面(即部分应用函数)。
- 返回值返回一个新的函数(bound function),这个新函数:
- 具有与原始函数相同的函数体。
- 但 this 被永久绑定到 thisArg。
- 预置的参数会先于调用时传入的参数被使用。
- 新函数的 length 属性会减少预置参数的数量(例如,原始函数有3个参数,预置了1个,则新函数的 length 为2)。
- 新函数不能再被 bind、call 或 apply 改变 this 值(绑定是永久的)。
- 工作原理
bind() 不会立即调用原始函数,而是返回一个包装后的新函数。
当新函数被调用时,它会:
- 将 this 设置为 thisArg。
- 将预置的参数(如果有)与调用时传入的参数合并。
- 使用合并后的参数调用原始函数。
这类似于函数柯里化(currying)或部分应用(partial application),但重点是绑定 this。
注意:bind() 不改变原始函数,它只是创建一个副本。
- 关键使用场景
- 绑定 this 上下文:在回调函数中防止 this 丢失(例如,setTimeout、事件监听器或数组方法如 forEach)。
- 部分应用函数:预设部分参数,创建更专用的函数版本(例如,创建一个固定某些参数的函数工厂)。
- 在类或对象方法中:确保方法在脱离对象时 this 仍指向正确实例。
- 兼容旧代码:在不支持箭头函数的环境中模拟箭头函数的 this 绑定行为。
- React/Next.js 等框架:如之前的对话中,用于绑定额外参数到 Server Actions 或事件处理函数中。
- 示例简单示例:绑定 this
xxxxxxxxxx121const person = {2name: 'Alice',3greet: function() {4console.log('Hello, ' + this.name);5}6};78const greetFn = person.greet; // 脱离对象,this 会丢失9greetFn(); // 输出: Hello, undefined (this 指向全局)1011const boundGreet = person.greet.bind(person); // 绑定 this12boundGreet(); // 输出: Hello, Alice高级示例:预置参数(部分应用)
xxxxxxxxxx91function multiply(a, b, c) {2return a * b * c;3}45const multiplyBy2 = multiply.bind(null, 2); // 预置 a=2,this 不重要6console.log(multiplyBy2(3, 4)); // 输出: 24 (2 * 3 * 4)78const multiplyBy2And3 = multiply.bind(null, 2, 3); // 预置 a=2, b=39console.log(multiplyBy2And3(4)); // 输出: 24 (2 * 3 * 4)与 Next.js/React 中的使用(参考之前对话)如在 Server Actions 中绑定额外参数:
xxxxxxxxxx81async function editProduct(prevState, formData, extraParam) {2console.log(extraParam); // 使用额外参数3// ... 逻辑4}56const boundEditProduct = editProduct.bind(null, null, null, 'someValue');7// 第一个 null 是 this(通常 null),后两个 null 占位 prevState 和 formData8// 然后 'someValue' 作为 extraParam
- 与 call() 和 apply() 的区别
共同点:都用于改变函数的 this 值,并可以传递参数。
区别:
- call(thisArg, arg1, arg2, ...):立即调用函数,参数逐个传入。
- apply(thisArg, [arg1, arg2, ...]):立即调用函数,参数作为数组传入。
- bind(thisArg, arg1, arg2, ...):不立即调用,而是返回一个新函数,可以稍后调用。绑定是永久的,不能被后续的 call/apply 覆盖。
总结:call/apply 用于一次性调用并改变 this;bind 用于创建可重用的绑定函数。
80-Delete Server Action
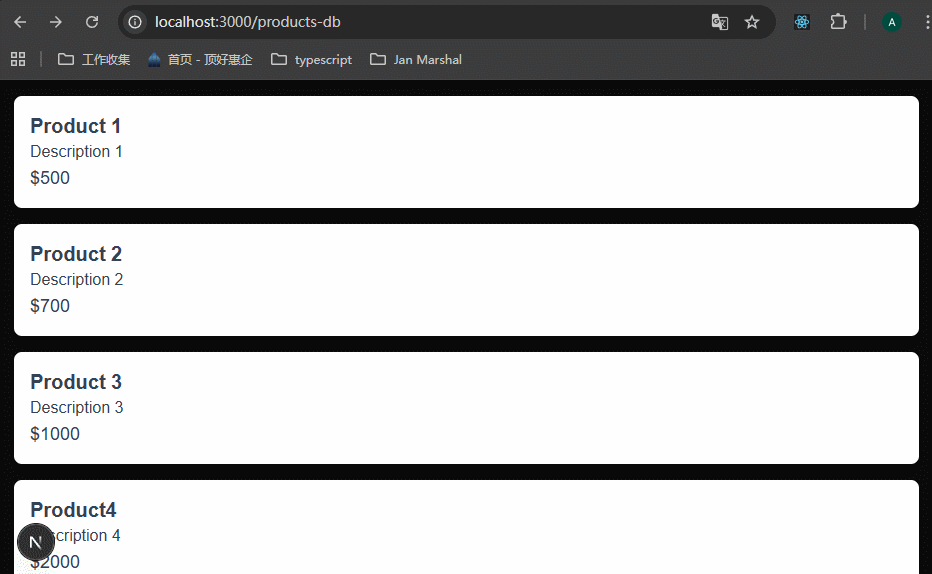
先为products-db/page.tsx里面每一个product添加delete button,button的type设置为submit。
xxxxxxxxxx411// products-db/page.tsx23import { getProducts } from "@/prisma-db";4import Link from "next/link";56export type Product = {7 id: number;8 title: string;9 price: number;10 description: string | null;11};1213export default async function ProductsPrismaDBPage() {14 const products: Product[] = await getProducts();1516 return (17 <ul className="space-y-4 p-4">18 {products.map((product) => (19 <li20 key={product.id}21 className="p-4 bg-white shadow-md rounded-lg text-gray-700"22 >23 <h2 className="text-xl font-semibold">24 <Link href={`/products-db/${product.id}`}>25 {product.title}26 </Link>27 </h2>28 <p>{product.description}</p>29 <p className="text-lg font-medium">${product.price}</p>30 31 32 <button type="submit" className="px-4 py-2 mt-4 text-white bg-red-500 rounded-md hover:bg-red-600 focus:outline-none focus:ring-2 focus:ring-red-600">33 Delete34 </button>35 36 37 </li>38 ))}39 </ul>40 )41}在actions/products.ts里面,定义remove action函数。
xxxxxxxxxx201// actions/products.ts23"use server";45import { addProduct, deleteProduct, updateProduct } from "@/prisma-db";6import { redirect } from "next/navigation";7810export async function createProduct(prevState: FormState, formData: FormData) {11 12}1314export async function editProduct(productId: number, prevState: FormState, formData: FormData) {15 16}1718export async function removeProduct(productId: number) {19 await deleteProduct(productId);20}此时我们遇到一个问题,如果直接把removeProduct函数绑定到button的onClick事件上,那么这个组件要变为client component,但是我们想让它保持为server component,因为在里面可以少定义很多变量,并且获取数据更加方便快速。
怎么做呢?在button外面包裹一层form,将removeProduct函数绑定到form的action上面去就行了。

运行试一下:
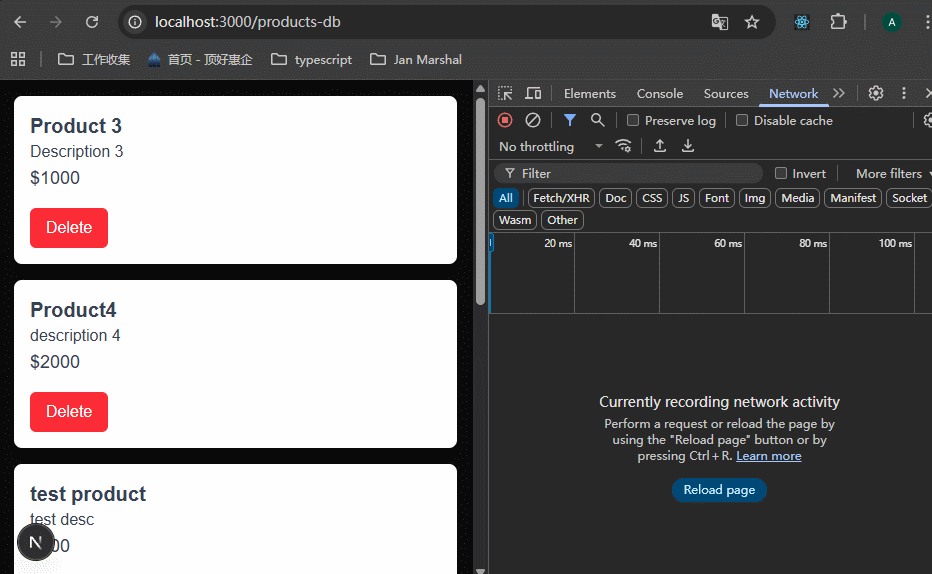
可以看到,删除成功了,但是页面没有重新加载。那么可以使用next/cache提供的revalidatePath方法,这个方法可以重新加载页面。https://nextjs.org/docs/app/api-reference/functions/revalidatePath

xxxxxxxxxx111// src/actions/products.ts23import { addProduct, deleteProduct, updateProduct } from "@/prisma-db";4import { revalidatePath } from "next/cache";568export async function removeProduct(productId: number) {9 await deleteProduct(productId);10 revalidatePath("/products-db");11}可以看到,删除成功之后,页面数据重新加载了。

这里其实还可以增加一个按钮的Loading,直接使用定义的Submit组件就行了。
81-Optimistic Updates
当我们点击删除的时候,等待了很久才有返回,因为我们在prisma数据操作里面加了一些延时,延时是客观存在的,那么有没有办法在延时存在的情况下,也能优化一下呢?
optimistic 乐观

需要实现的效果就是,点击了删除按钮之后,从列表里面立即删除这一项。使用到了react提供的useOptimistic

这里需要注意的是,useOptimistic返回的两个值,一个值就是乐观状态,它等于updateFn的返回值,这个就是我们需要的值。第二个值就是触发乐观更新的函数,也就是哪个操作你想返回乐观状态,就绑定到哪个操作上面去。
上面的解释确实很抽象,下面以例子说明:
1、首先我们遇到的问题就是,删除操作之后,app/products-db/page.tsx里面的products列表的更新不及时,那么就将products列表的值改为乐观状态值。

2、需要使用addOptimistic函数,来触发乐观更新。这个函数接收一个optimisticValue参数,这个参数在这里就是productId。那么需要在删除操作的时候,也触发这个函数。
此时定义一个新函数,在里面触发addOptimistic函数,同时执行删除操作。这个函数就绑定到button上面去。

但此时报错,因为server components里面不能使用react hooks,所以需要将useOptimistic相关的代码,抽离到一个client component里面去,之后引入这个client component就行了。
xxxxxxxxxx211// app/products-db/page.tsx23import { getProducts } from "@/prisma-db";4import { ProductDetail } from "./product-detail";56export type Product = {7 id: number;8 title: string;9 price: number;10 description: string | null;11};1213export default async function ProductsPrismaDBPage() {14 const products: Product[] = await getProducts();15 16 return (17 <>18 <ProductDetail products={products} />19 </>20 )21}xxxxxxxxxx481// app/products-db/product-detail.tsx23"use client";45import type { Product } from "./page";6import Link from "next/link";7import { useOptimistic } from "react";8import { removeProduct } from "@/actions/products";910export const ProductDetail = ({products}: {11 products: Product[]12}) => {13 const [optimisticProducts, addOptimistic] = useOptimistic(14 products,15 (currentProducts, productId) => {16 return currentProducts.filter(p => p.id !== productId)17 })1819 const removeProductById = async (productId: number) => {20 // 这一步是先将乐观状态显示给用户,真正的删除操作在之后进行21 addOptimistic(productId);22 await removeProduct(productId);23 }2425 return (26 <ul className="space-y-4 p-4">27 {optimisticProducts.map((product) => (28 <li29 key={product.id}30 className="p-4 bg-white shadow-md rounded-lg text-gray-700"31 >32 <h2 className="text-xl font-semibold">33 <Link href={`/products-db/${product.id}`}>34 {product.title}35 </Link>36 </h2>37 <p>{product.description}</p>38 <p className="text-lg font-medium">${product.price}</p>39 <form action={removeProductById.bind(null, product.id)}>40 <button type="submit" className="px-4 py-2 mt-4 text-white bg-red-500 rounded-md hover:bg-red-600 focus:outline-none focus:ring-2 focus:ring-red-600">41 Delete42 </button>43 </form>44 </li>45 ))}46 </ul>47 )48}查看效果:
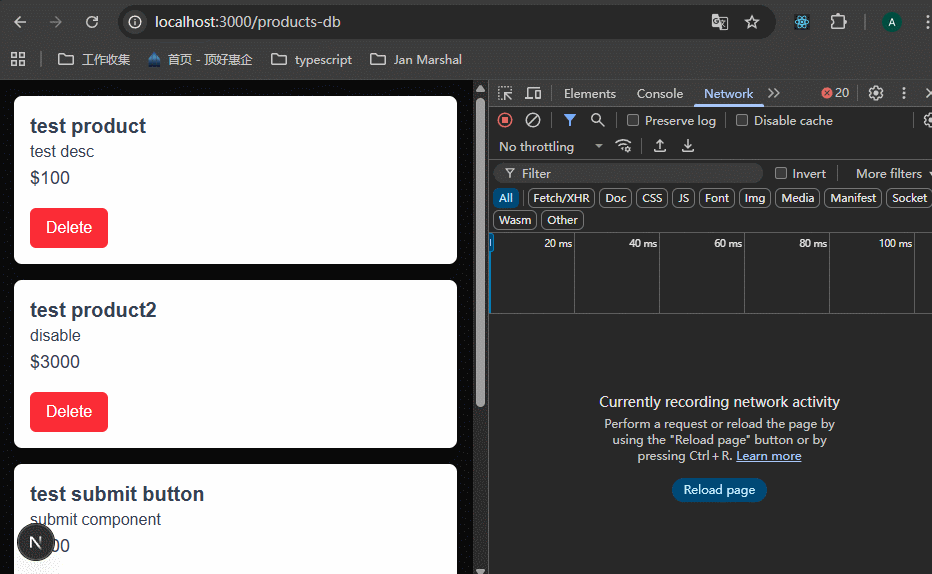
可以看到,删除一项之后,页面立即更新了,但是看右下角的数据请求,过了3s之后才真正返回结果。并且可以看到,3s之后返回真实结果,页面并没有刷新的感觉,这就很好。
一个列表页面的删除操作使用了useOptimistic,删除之后会重新获取列表数据,这对界面渲染不会造成影响吗?
先说结论:只要你的
key使用得当,用户完全不会察觉到第二次渲染的存在,只会感觉到页面非常丝滑。实际上来说:会有渲染影响,但这正是 React 为了保证“最终一致性”而必须做的步骤。
之所以你觉得“删除后重新获取”没有造成负面的视觉影响(比如闪烁),是因为 React 在底层利用了 并发渲染(Concurrent Rendering) 和 DOM 差异比对(Diffing) 机制。
我们来拆解一下这个过程中发生的两次关键渲染:
- 第一次渲染:乐观更新(瞬间发生)
当你触发
startTransition时,useOptimistic会立即修改状态。
- 发生了什么: React 瞬间重新渲染列表,由于删除了一个项目,Virtual DOM 发现少了一个节点,于是立即从屏幕上移除它。
- 用户感受: 极快,感觉像是在本地操作文件夹一样,完全没有网络延迟感。
- 第二次渲染:数据刷新(Action 完成后)
当你的 Server Action 在后台执行完,并调用了
revalidatePath或revalidateTag时,Next.js 会去服务器重新拉取数据。
发生了什么:
- 服务器传回新的列表数据(正式删除了该项的数据)。
- React 接收到新数据,再次进行渲染。
- useOptimistic 的状态会自动回滚,转而使用服务器返回的真实数据。
为什么不会造成闪烁? 由于服务器返回的数据中,那个项目也已经被删除了,所以 Virtual DOM 比对后的结果与当前屏幕上的状态是一致的。
React 发现:“哦,服务器给我的数据里确实没有这个项,而我现在屏幕上也没显示这个项,所以我不需要修改任何真实的 DOM 节点。”
- 会造成影响的情况(风险点)
虽然通常不会闪烁,但如果处理不好,确实会有以下性能或体验影响:
A. 竞态条件 (Race Conditions)
如果你快速连续点击删除 3 个项目,由于网络请求返回的顺序可能不一致,如果没处理好,列表可能会出现“反复跳动”(闪现又消失)。
- 解决:
useOptimistic内部会根据 Action 的执行顺序自动排队处理状态,通常能规避这个问题。B. 昂贵的组件树重新渲染
如果你的列表非常长(比如 1000 条),即使 DOM 没变,React 依然要计算一次整个列表的 Virtual DOM。
解决: * 对列表项使用
React.memo。
- 确保你的
key是稳定且唯一的(不要用index)。
- 为什么我们必须“重新获取数据”?
你可能会想:既然本地已经删除了,为什么还要从服务器再拿一遍?
- 确认真理: 万一服务器删除失败了呢(比如权限不足)?这时候
useOptimistic会自动回滚,把那个项目“变”回来。如果不重新获取,前端就会显示虚假的信息。- 同步副作用: 删除一个项目可能会影响列表的其他部分(比如分页、总数统计、排序)。重新获取能确保这些相关联的数据也是正确的。
总结:数据流的闭环
- 点击 -> useOptimistic (UI 立即变)。
- Server Action -> 数据库操作。
- Revalidate -> Next.js 获取真实数据包。
- React Diffing -> 对比发现 UI 已经符合预期,静默完成替换。
只要你的
key使用得当,用户完全不会察觉到第二次渲染的存在,只会感觉到页面非常丝滑。
82-Form Component

以案例说明,在/主页添加一个搜索框,在搜索框里面输入关键字,点击按钮之后会导航到products-db页面,显示关键字相关的products。
先想一想如果不使用nextjs提供的Form组件,我可以怎么做。
我会创建一个Search组件,里面使用普通的form标签,编写一个action函数,使用"use server";,那么action函数里面就可以使用formData.get("query")的方法获取到input里面的内容。然后使用
xxxxxxxxxx11redirect(`/products-db?query=${query}`)这个方法来跳转并传参。之后在products-db/page.tsx里面,先获取参数,然后请求数据即可。
我想把app/products-db/page.tsx里面添加一个loading.tsx,并将获取products的接口添加查询参数。
xxxxxxxxxx51// app/products-db/loading.tsx23export default function Loading() {4 return <div>Loading products...</div>5}
在prisma-db.ts里面,为查询函数添加查询参数:

我先使用普通的form来做的看一下:
xxxxxxxxxx301// src/components/Search-form.tsx23import { redirect } from "next/navigation";45export const SearchForm = () => {67 // 使用server action8 async function goToProducts(formData: FormData) {9 "use server";10 const query = formData.get("query") as string;1112 redirect(`/products-db?query=${query}`)13 }14 15 return (16 <form action={goToProducts} className="flex gap-2">17 <input18 name="query"19 className="flex-1 px-4 py-2 rounded-lg border border-gray-300 focus:outline-none focus:ring-2 focus:ring-blue-500 focus:border-transparent text-white"20 placeholder="Search products"21 />22 <button23 type="submit"24 className="px-4 py-2 bg-blue-500 text-white rounded-lg hover:bg-blue-600 focus:outline-none focus:ring-2 focus:ring-blue-500 focus:ring-offset-2"25 >26 Submit27 </button>28 </form>29 )30}在app/page.tsx里面使用这个组件,看一下效果:
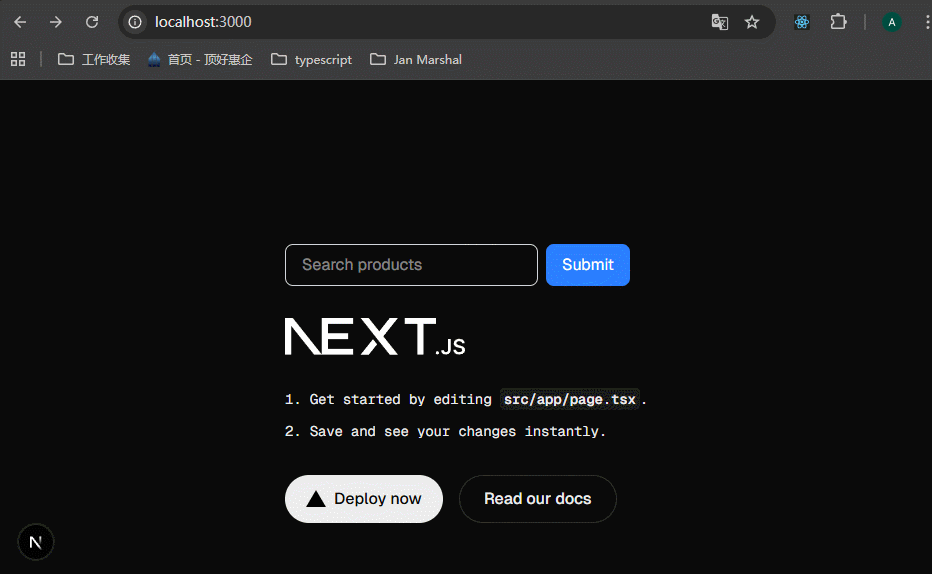
效果还不错啊,loading也正常显示了,数据也正常返回了。
那nextjs的Form组件,有哪些好处呢?https://nextjs.org/docs/app/api-reference/components/form


可以看到,action属性可以接收string或者function,当action接收string类型时,会像native HTML form标签那样使用GET方法,form data被作为searchParams编译到url中,当form提交的时候,会跳转到具体的url。
Form的好处就是:可以提前获取loading UI,点击submit button可以实现navigation跳转,可以减少一些模板代码。
那么我就使用Form来是实现一下:
xxxxxxxxxx211// src/components/Search.tsx23import Form from 'next/form'45export const Search = () => {6 return (7 <Form action="/products-db" className="flex gap-2">8 <input9 name="query"10 className="flex-1 px-4 py-2 rounded-lg border border-gray-300 focus:outline-none focus:ring-2 focus:ring-blue-500 focus:border-transparent text-white"11 placeholder="Search products"12 />13 <button14 type="submit"15 className="px-4 py-2 bg-blue-500 text-white rounded-lg hover:bg-blue-600 focus:outline-none focus:ring-2 focus:ring-blue-500 focus:ring-offset-2"16 >17 Submit18 </button>19 </Form>20 )21}最大的好处就是可以不写action函数。

下面是nextjs里面的Form组件在这个案例中的作用。


到这里就已经学完了data mutations和data fetching的全部内容了,下面总结一下我们学了哪些内容:

83-Authentication


虽然说可以自己定义authentication的方案,但是nextjs里面的权限非常复杂,nextjs都建议使用第三方库。https://nextjs.org/docs/app/guides/authentication

老师推荐使用Clerk这个库,https://clerk.com/docs/quickstarts/nextjs。
新建项目npx create-next-app authentication-demo。
84-Clerk Setup
先创建一个clerk的账户,我使用anderson tom的账号登录。然后会进入一个创建应用的界面,输入应用名称和支持登录的账号类型。选择create application。

会进入用户引导页面,前3步严格按照这些引导操作。

第4步,只需要将ClerkProvider引入到app/layout.tsx里面并使用即可。引导文档里面的内容其实包括了后面的学习内容,后面我们会逐步来学习。
xxxxxxxxxx411// app/layout.tsx23import {4 ClerkProvider5} from '@clerk/nextjs'6import type { Metadata } from "next";7import { Geist, Geist_Mono } from "next/font/google";8import "./globals.css";910const geistSans = Geist({11 variable: "--font-geist-sans",12 subsets: ["latin"],13});1415const geistMono = Geist_Mono({16 variable: "--font-geist-mono",17 subsets: ["latin"],18});1920export const metadata: Metadata = {21 title: "Create Next App",22 description: "Generated by create next app",23};2425export default function RootLayout({26 children,27}: Readonly<{28 children: React.ReactNode;29}>) {30 return (31 <ClerkProvider>32 <html lang="en">33 <body34 className={`${geistSans.variable} ${geistMono.variable} antialiased`}35 >36 {children}37 </body>38 </html>39 </ClerkProvider>40 );41}85-Sign in and Sign out
clerk提供了pre-built components that handle all the authentication flows for us.
这节课我们来学习clerk提供的sign in和sign out功能,首先创建一个/src/components/navigation.tsx组件,这个组件就是网页的nav栏,直接复制老师的代码。引入到app/layout.tsx里面,放在{children}上面。
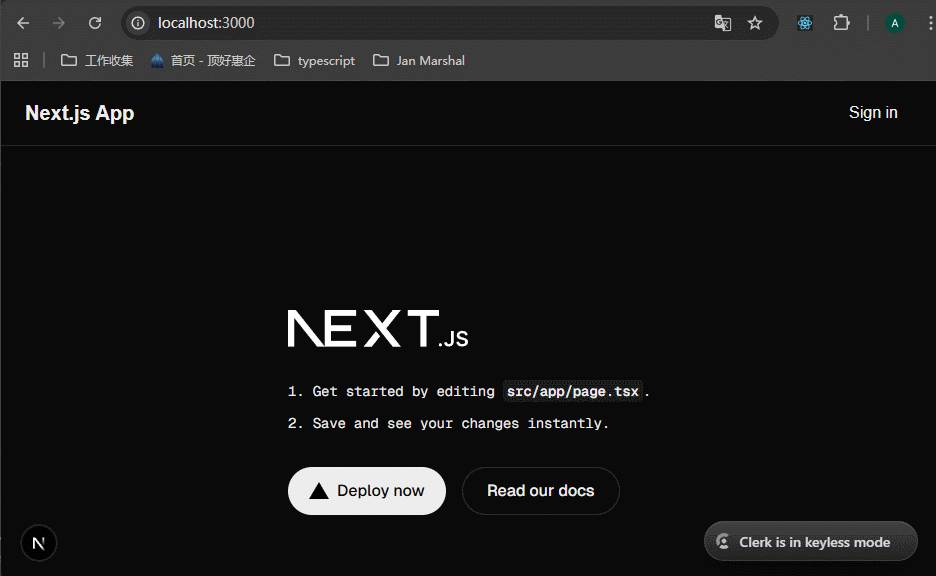
xxxxxxxxxx201// src/components/navigation.tsx23export const Navigation = () => {4 return (5 <nav className="bg-[var(--background)] border-b border-[var(--foreground)]/10">6 <div className="max-w-7xl mx-auto px-4 sm:px-6 lg:px-8">7 <div className="flex justify-between h-16 items-center">8 <div className="flex-shrink-0">9 <h1 className="text-xl font-semibold text-[var(--foreground)]">10 Next.js App11 </h1>12 </div>13 <div className="flex items-center gap-4">14 {/* Sign in button goes here */}15 </div>16 </div>17 </div>18 </nav>19 );20};
运行看一下,可以看到导航栏的效果已经出来了:

下面为nav添加sign in按钮,使用clerk提供的按钮,采用modal模式,这表示点击sign in按钮会打开一个弹窗而不是跳转到一个页面。
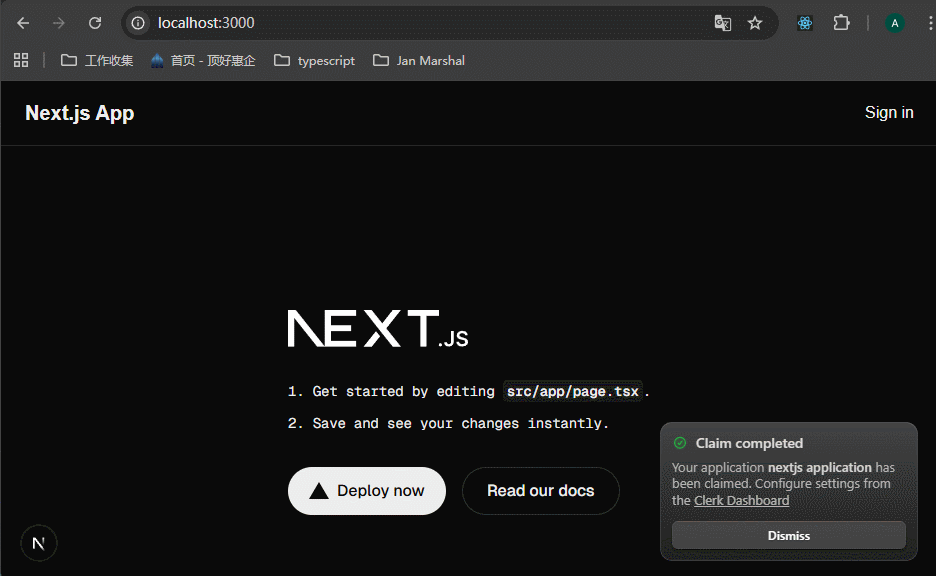
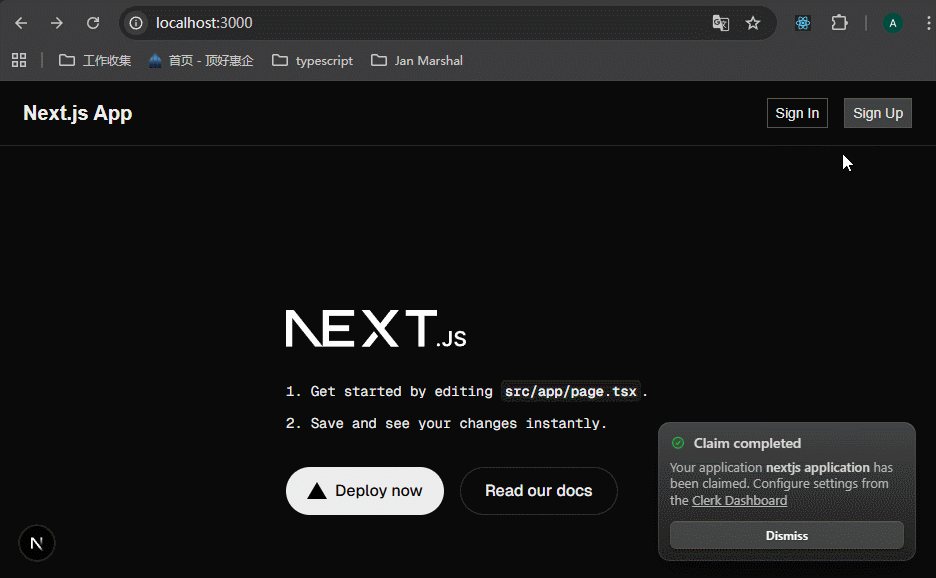
xxxxxxxxxx231// src/components/navigation.tsx23import { SignInButton } from "@clerk/nextjs";45export const Navigation = () => {6 return (7 <nav className="bg-[var(--background)] border-b border-[var(--foreground)]/10">8 <div className="max-w-7xl mx-auto px-4 sm:px-6 lg:px-8">9 <div className="flex justify-between h-16 items-center">10 <div className="flex-shrink-0">11 <h1 className="text-xl font-semibold text-[var(--foreground)]">12 Next.js App13 </h1>14 </div>15 <div className="flex items-center gap-4">16 {/* mode="modal" means open a modal instead of redirecting to a separate page */}17 <SignInButton mode="modal" />18 </div>19 </div>20 </div>21 </nav>22 );23};看一下效果,点击sign in按钮,会显示弹窗,由于我们没有账号,可以点击sign up注册账号。注册成功之后会关闭弹窗并返回原页面,但是clerk返回的信息我们还没有获取到,这些内容后面会讲到。

下面引入sign out按钮,点击这个按钮,clerk会自动处理所有事情:clear the session, remove tokens and update the UI if needed.
但是此时这个功能不完整,下面的课程会逐步完善。
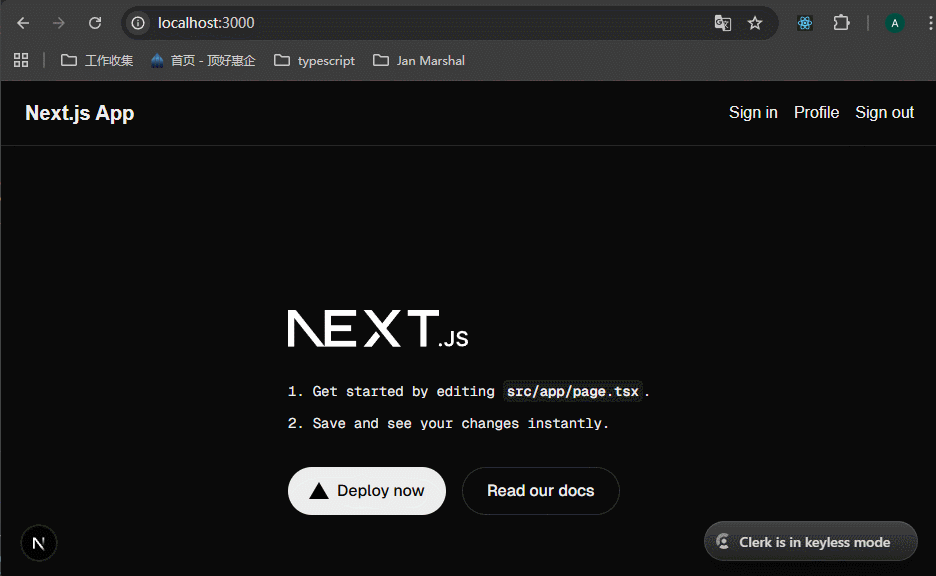
xxxxxxxxxx241// src/components/navigation.tsx23import { SignInButton, SignOutButton } from "@clerk/nextjs";45export const Navigation = () => {6 return (7 <nav className="bg-[var(--background)] border-b border-[var(--foreground)]/10">8 <div className="max-w-7xl mx-auto px-4 sm:px-6 lg:px-8">9 <div className="flex justify-between h-16 items-center">10 <div className="flex-shrink-0">11 <h1 className="text-xl font-semibold text-[var(--foreground)]">12 Next.js App13 </h1>14 </div>15 <div className="flex items-center gap-4">16 {/* mode="modal" means open a modal instead of redirecting to a separate page */}17 <SignInButton mode="modal" />18 <SignOutButton />19 </div>20 </div>21 </div>22 </nav>23 );24};
这节课只是导入了clerk提供的登录、登出按钮,体验一下操作而已,完整的流程在接下来会逐步完善。
86-Profile Settings
为了注销,clerk提供了UserButton组件,这个功能更加强大。
1、profile modal
这个是显示一个profile的弹窗。
注释掉SignOutButton组件,使用UserButton组件:

可以看到,登录之后,nav栏的右上角出现了一个用户图标,点击图标可以管理账户信息,还可以登出账号。
2、profile page
这个是显示profile的单独页面。我们还是可以使用clerk的组件,不过使用方法大不相同。

这里用到的知识,我学到这里已经忘记了,我翻了一下前面的学习内容,发现在lesson-9里面的optional catch all segments里面讲到了。/user-profile/[[...user-profile]]/page.tsx,这个文件,会匹配任何url为/user-profile开头的地址,显示的都是这个文件。事实上[[...user-profile]]里面的这个变量名,可以自定义,原来学习的时候就是[[...slug]],这个不影响什么。
创建一个app/user-profile/[[...user-profile]]/page.tsx,里面使用clerk提供的UserProfile组件。
xxxxxxxxxx121// app/user-profile/[[...user-profile]]/page.tsx23import { UserProfile } from "@clerk/nextjs"45export default function UserProfilePage() {6 return (7 <div className="flex justify-center items-center py-8">8 {/* path属性的作用就是,当网页的route为这个path时,UserProfile就加载 */}9 <UserProfile path="/user-profile" />10 </div>11 )12}
在nav里面使用Link链接跳转到这个页面,然后注销UserButton,还是使用SignOutButton。
xxxxxxxxxx301// authentication-demo/src/components/navigation.tsx23import {4 SignInButton,5 SignOutButton,6 // UserButton, 7} from "@clerk/nextjs";8import Link from "next/link";910export const Navigation = () => {11 return (12 <nav className="bg-[var(--background)] border-b border-[var(--foreground)]/10">13 <div className="max-w-7xl mx-auto px-4 sm:px-6 lg:px-8">14 <div className="flex justify-between h-16 items-center">15 <div className="flex-shrink-0">16 <h1 className="text-xl font-semibold text-[var(--foreground)]">17 Next.js App18 </h1>19 </div>20 <div className="flex items-center gap-4">21 {/* mode="modal" means open a modal instead of redirecting to a separate page */}22 <SignInButton mode="modal" />23 <Link href="/user-profile">Profile</Link>24 <SignOutButton />25 </div>26 </div>27 </div>28 </nav>29 );30};查看效果,可以看到点击Profile链接之后,会跳转到/user-profile,不要把这个页面看成弹窗了,这个页面就是这么设计的。点击sign out按钮之后,会退出登录,并自动重定向到首页。
87-Conditional UI Rendering
这节课我们学习怎么做条件渲染。
上面实现的内容,在没有sign in的时候,profile和sign out其实应该隐藏。在sign in之后,sign in按钮应该隐藏。下面使用clerk提供的SignedIn和SignedOut组件来解决问题。
用法非常简单,使用SignedOut包裹SignInButton,表示在没有登录的时候,显示登录按钮,依此类推。
xxxxxxxxxx371// authentication-demo/src/components/navigation.tsx23import {4 SignInButton,5 SignOutButton,6 // UserButton, 7 SignedIn,8 SignedOut,9} from "@clerk/nextjs";10import Link from "next/link";1112export const Navigation = () => {13 return (14 <nav className="bg-[var(--background)] border-b border-[var(--foreground)]/10">15 <div className="max-w-7xl mx-auto px-4 sm:px-6 lg:px-8">16 <div className="flex justify-between h-16 items-center">17 <div className="flex-shrink-0">18 <h1 className="text-xl font-semibold text-[var(--foreground)]">19 Next.js App20 </h1>21 </div>22 <div className="flex items-center gap-4">23 {/* mode="modal" means open a modal instead of redirecting to a separate page */}24 <SignedOut>25 <SignInButton mode="modal" />26 </SignedOut>2728 <SignedIn>29 <Link href="/user-profile">Profile</Link>30 <SignOutButton />31 </SignedIn>32 </div>33 </div>34 </div>35 </nav>36 );37};这里有一个报错,是关于middleware.ts文件的,我找了很久都找不到原因,最后发现是midddleware写错了,多一个d。文件名对了之后就不报错了。我找了一下文档,发现这里还可以指定哪些路由需要受保护,参考:https://clerk.com/docs/references/nextjs/custom-sign-in-or-up-page
可以看到,按照预期效果实现了。

88-Protecting Routes
这一节课学习怎么保护页面,在用户没有登录的情况下,不能被访问。
现在访问/user-profile是这个效果:

参考:https://clerk.com/docs/references/nextjs/custom-sign-in-or-up-page
设置protect routes有什么好处呢?
protect method will redirect the user to the sign-in page automatically if they are not signed in.
设置了protect routes之后,如果用户访问这个地址,clerk会帮忙自动跳转到登录页面。如果登录了之后,就会跳转到用户之前访问的地址。
在中间件文件中设置:
xxxxxxxxxx221// src/middleware.ts23import { clerkMiddleware, createRouteMatcher } from '@clerk/nextjs/server';45// 使用createRouteMatcher,创建需要保护的路由数组,返回的是一个函数6const isProtectedRoutes = createRouteMatcher(["/user-profile"])78export default clerkMiddleware(async (auth, req) => {9 // 判断路由地址是否需要保护10 if (isProtectedRoutes(req)) {11 await auth.protect();12 }13});1415export const config = {16 matcher: [17 // Skip Next.js internals and all static files, unless found in search params18 '/((?!_next|[^?]*\\.(?:html?|css|js(?!on)|jpe?g|webp|png|gif|svg|ttf|woff2?|ico|csv|docx?|xlsx?|zip|webmanifest)).*)',19 // Always run for API routes20 '/(api|trpc)(.*)',21 ],22};看一下效果,可以看到访问/user-profile,在没有登录的情况下,跳转到登录页面,等到登录之后,会回到之前访问的/user-profile,功能还是蛮强大的:
但是项目中的大多数页面都需要受到保护,所以最好还是定义一个isPublicRoutes,取反来判断。
xxxxxxxxxx231// src/middleware.ts23import { clerkMiddleware, createRouteMatcher } from '@clerk/nextjs/server';45// 使用createRouteMatcher,创建需要保护的路由数组,返回的是一个函数6// const isProtectedRoutes = createRouteMatcher(["/user-profile"])7const isPublicRoutes = createRouteMatcher(["/", "/sign-in(.*)", "/sign-out(.*)"])89export default clerkMiddleware(async (auth, req) => {10 // 判断路由地址是否需要保护11 if (!isPublicRoutes(req)) {12 await auth.protect();13 }14});1516export const config = {17 matcher: [18 // Skip Next.js internals and all static files, unless found in search params19 '/((?!_next|[^?]*\\.(?:html?|css|js(?!on)|jpe?g|webp|png|gif|svg|ttf|woff2?|ico|csv|docx?|xlsx?|zip|webmanifest)).*)',20 // Always run for API routes21 '/(api|trpc)(.*)',22 ],23};
还可以自定义保护的逻辑,比如说记录哪个ip地址的用户一直在尝试登录等等。
xxxxxxxxxx281// src/middleware.ts23import { clerkMiddleware, createRouteMatcher } from '@clerk/nextjs/server';45// 使用createRouteMatcher,创建需要保护的路由数组,返回的是一个函数6// const isProtectedRoutes = createRouteMatcher(["/user-profile"])7const isPublicRoutes = createRouteMatcher(["/", "/sign-in(.*)", "/sign-out(.*)"])89export default clerkMiddleware(async (auth, req) => {1011 // 从 auth 中解构出参数和方法12 const { userId, redirectToSignIn } = await auth();13 // 用户没有登录,并且路由需要保护14 if (!userId && !isPublicRoutes(req)) {15 // add custom logic to run before redirection1617 return redirectToSignIn();18 }19});2021export const config = {22 matcher: [23 // Skip Next.js internals and all static files, unless found in search params24 '/((?!_next|[^?]*\\.(?:html?|css|js(?!on)|jpe?g|webp|png|gif|svg|ttf|woff2?|ico|csv|docx?|xlsx?|zip|webmanifest)).*)',25 // Always run for API routes26 '/(api|trpc)(.*)',27 ],28};89-Read Session and User Data
这节课主要学习怎么获取user data,session data,在server components和client components里面使用的方法不同。
1、在server components里面获取user data,session data
创建app/dashboard/page.tsx。
xxxxxxxxxx111import { auth, currentUser } from "@clerk/nextjs/server"23export default async function DashboardPage() {4 const authObj = await auth();5 const userObj = await currentUser();67 console.log(authObj, userObj);8 return (9 <h1>Dashboard page</h1>10 )11}看一下输出内容:


在server components和route handlers中,我们通常会使用auth提供的userId,并用它来查询数据库。
2、在client components里面获取user data,session data
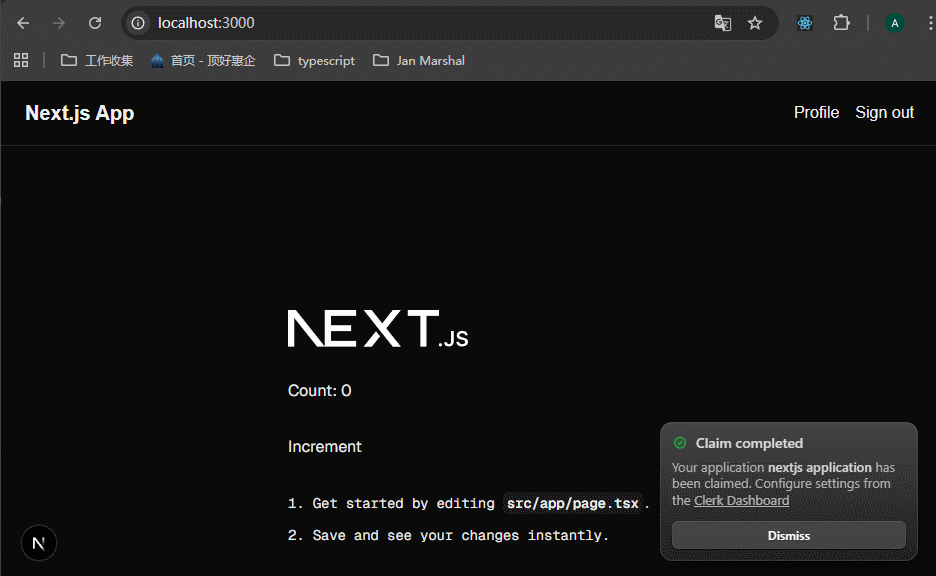
创建src/components/counter.tsx。这个组件要放到app/page.tsx里面去,也就是首页展示。这里会做一个功能,如果用户没有登录,这个counter组件就不显示;登录了才显示。
xxxxxxxxxx261// src/components/counter.tsx23"use client";45import { useAuth, useUser } from "@clerk/nextjs";6import { useState } from "react";78export const Counter = () => {9 const [count, setCount] = useState(0);1011 // 这二者有一些属性是冲突的,所以选择一种就行了12 const { isLoaded, userId, sessionId, getToken } = useAuth();13 // const { isLoaded, isSignedIn, user } = useUser();1415 // isLoaded表示页面加载完成,userId表示用户已登录16 if (!isLoaded || !userId) {17 return null;18 }1920 return (21 <>22 <p>Count: {count}</p>23 <button onClick={() => setCount(count + 1)}>Increment</button>24 </>25 )26}可以看到,没有登录的时候或者页面没有加载完成的时候,Counter组件没有显示。
这个“没有显示”很巧妙啊,也是react里面的方法,要记住。
90-Role Based Access Control
这节课学习怎么根据登录用户的角色来显示不同的页面,这个如果要我来做,我该怎么做?
在vue中的权限大部分都是后端控制的,菜单的权限是根据用户的角色来配置的,不同的角色配置不同的菜单。
不同的角色是单独的CURD页面,里面可以配置菜单、服务商角色等等。
前端做什么呢?1、前端会直接显示后端返回的菜单,没有做权限校验,返回什么显示什么。2、后端返回一些权限控制的字段,然后vue里面编写一些指令,比如说v-auth,放到一些标签上,指令的作用就是判断后端返回的字段里面有没有对应的权限字段,如果有就显示标签,否则不显示。
其实clerk里面也异曲同工,不过整个过程将前后端的配置都加了进来,刚开始我还是有点接受不了的,内容确实有点多,如果要我来写一整个项目,那会更加复杂。先从简单的开始,官方文档:https://clerk.com/docs/references/nextjs/basic-rbac,老师实际上是按照这个文档来讲解的。


1、Configure the session token
1、clerk 提供user metadata的方法
clerk提供
user metadata的方法,https://clerk.com/docs/users/metadata,可以让我们来存储一个用户的信息,这里我们选择存储publicMetadata。这个publicMetadata存储在了用户的信息当中,我们可以通过middleware.ts里面的clerkMiddleware的auth取出来。或者通过
import { auth } from '@clerk/nextjs/server'的auth取出来。这个变量虽然叫publicMetadata,但是实际返回的值还是metadata,那么里面定义了role的值,取出来就行了。
2、在中间件中或者页面中获取role的值,做逻辑校验
使用
auth来获取metadata。3、刚开始其实是哪个用户都没有设置role的,那么role在哪里设置呢?
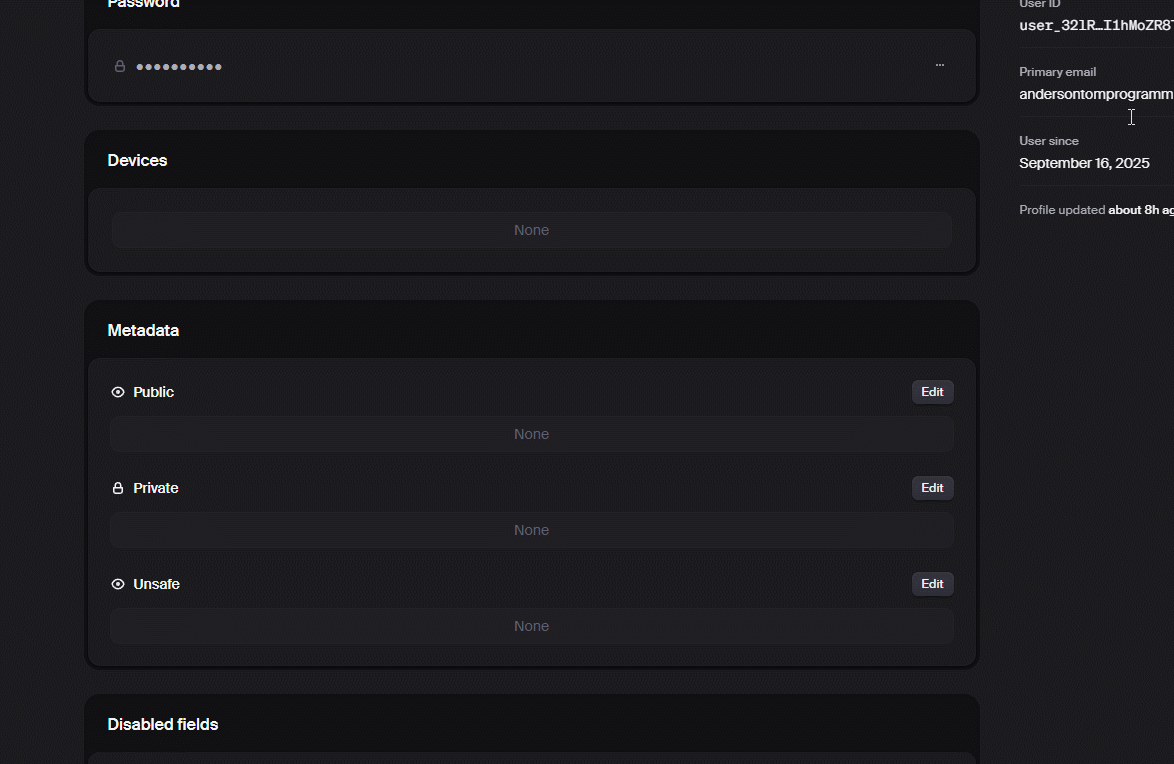
可以在clerk项目工作台里面设置,注意项目要准确,我就是因为搞错了项目,结果看到User里面没有数据,搞了几个小时。
在里面的Metadata的Public里面,添加:
其实掌握了上面三步之后,主要的流程就清楚了。


在clerk的项目控制台里面,选择configure页面,选择Sessions

编辑自定义session token的内容,并保存,如下:

2、Create a global typescript definition
这一步是定义roles有哪几种类型,采用枚举方法。同时定义一个CustomJwtSessionClaims的类型,里面存放的是metadata。至于为什么要这么定义,首先metadata是从auth的sessionClaims获取的,所以如果要定义类型的话,就要定义在这里面;其次,使用declare global,将这个interface定义成全局类型,这样使用的时候就不需要导入了。
参考:https://clerk.com/docs/guides/custom-types
xxxxxxxxxx231// authentication-demo/types/globals.d.ts23/**4 * 作用:在 TypeScript 中,如果一个 .d.ts 文件不包含任何 export 或 import,它会被视为全局声明文件,所有声明都会污染全局命名空间。为了避免这个问题,这里使用 export {}; 将文件转换为“模块”(module),这样后续的声明(如 export type)就属于模块作用域,而不是全局。5 */6export { };78// Create a type for the roles9export type Roles = "admin" | "moderator";1011/**12 * declare global:这是一个 TypeScript 关键字,用于在模块文件中声明或扩展全局命名空间(global namespace)。13作用:里面的内容会被添加到全局作用域中,即使文件本身是模块。这允许你“增强”(augment)现有的全局类型,而不需要导入。14为什么用 declare?:declare 表示这是一个声明,不是实际实现。它告诉 TypeScript:“假设这个东西已经存在了,只提供类型信息。”15 */16declare global {17 interface CustomJwtSessionClaims {18 metadata: {19 role?: Roles;20 };21 }22}233、添加app/admin/page.tsx,中间件里面为这个路径添加校验
xxxxxxxxxx51// app/admin/page.tsx23export default function AdminPage(){4 return <h1>Admin page</h1>5}xxxxxxxxxx401// src/middleware.ts23import { clerkMiddleware, createRouteMatcher } from '@clerk/nextjs/server';4import { NextResponse } from 'next/server';56// 使用createRouteMatcher,创建需要保护的路由数组,返回的是一个函数7// const isProtectedRoutes = createRouteMatcher(["/user-profile"])8const isPublicRoutes = createRouteMatcher(["/", "/sign-in(.*)", "/sign-up(.*)"])910// 为 admin 页面添加matcher函数11const isAdminRoute = createRouteMatcher(["/admin(.*)"]);1213export default clerkMiddleware(async (auth, req) => {1415 // 从 auth 中解构出参数和方法16 const { userId, redirectToSignIn } = await auth();1718 // 如果用户进入 /admin 页面,并且role !== "admin",那么就返回首页19 if (isAdminRoute(req) && (await auth()).sessionClaims?.metadata?.role !== "admin") {20 const url = new URL("/", req.url);21 return NextResponse.redirect(url);22 }232425 // 用户没有登录,并且路由需要保护26 if (!userId && !isPublicRoutes(req)) {27 // add custom logic to run before redirection2829 return redirectToSignIn();30 }31});3233export const config = {34 matcher: [35 // Skip Next.js internals and all static files, unless found in search params36 '/((?!_next|[^?]*\\.(?:html?|css|js(?!on)|jpe?g|webp|png|gif|svg|ttf|woff2?|ico|csv|docx?|xlsx?|zip|webmanifest)).*)',37 // Always run for API routes38 '/(api|trpc)(.*)',39 ],40};
看一下效果,可以看到访问/admin的时候,就自动跳转到首页了。原因是此时所有的用户,role都没有设置:
4、修改用户的role
新增的用户的role默认都是空字符串,所以要手动进行修改。除非是新增的时候为它们添加默认值,这里先不考虑。
方法一:
在clerk项目控制台里面修改,上面已经说了。先看一下效果:

可以看到,定义role为admin之后,可以进入admin页面了。

方法二:
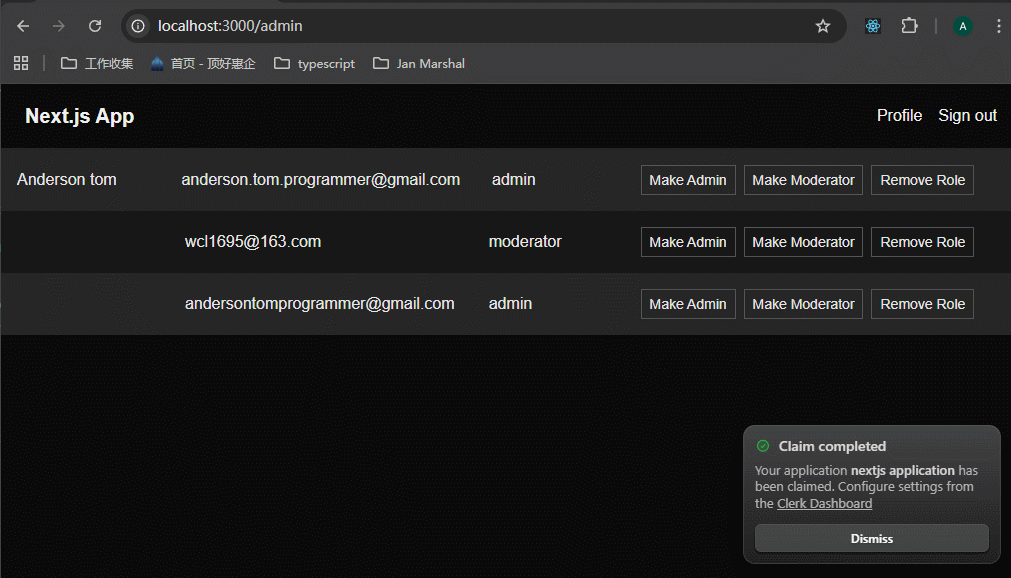
在clerk里面修改肯定是不行的,最佳实践就是编写自己的权限CRUD页面,这里就在admin页面编写。页面好做,但是有几个难点:
1、要从clerk获取所有用户的数据。
2、要使用clerk的方法,来操作clerk里面的数据。
上面两个难点,都可以使用clerkClient来操作。clerkClient可以操作clerk的backend api,这些backend api有哪些呢?参考https://clerk.com/docs/reference/backend-api

先定义app/admin/actions.ts。
xxxxxxxxxx601// app/admin/actions.ts23"use server";45import { auth, clerkClient } from "@clerk/nextjs/server";6import { Roles } from "../../../types/globals";7import { revalidatePath } from "next/cache";89export async function setRole(formData: FormData) {10 // 获取会话声明11 const { sessionClaims } = await auth();1213 // 如果没有admin权限,就不准修改14 if (sessionClaims?.metadata?.role !== "admin") {15 throw new Error("Not Authorized")16 }1718 // clerkClient可以操作clerk的backend api19 const client = await clerkClient();2021 // 从表单里面获取数据22 const userId = formData.get("userId") as string;23 const role = formData.get("role") as Roles2425 try {26 // 更新 userId 的用户的 role27 await client.users.updateUser(userId, {28 publicMetadata: { role }29 })30 // 更新成功之后,刷新admin页面的数据31 revalidatePath("/admin")32 } catch {33 throw new Error("Failed to set role")34 }35}3637// 删除角色38export async function removeRole(formData: FormData) {39 const { sessionClaims } = await auth();4041 if (sessionClaims?.metadata?.role !== "admin") {42 throw new Error("Not Authorized")43 }4445 const client = await clerkClient();46 const userId = formData.get("userId") as string;4748 try {49 // 这里的删除,其实就是置空即可50 await client.users.updateUser(userId, {51 publicMetadata: {52 role: null53 }54 })55 // 更新成功之后,刷新admin页面的数据56 revalidatePath("/admin")57 } catch {58 throw new Error("Failed to remove role")59 }60}xxxxxxxxxx831// app/admin/page.tsx23import { clerkClient } from "@clerk/nextjs/server";4import { removeRole, setRole } from "./actions";56export default async function AdminPage() {78 // clerkClient调用clerk backend api,获取用户数据9 const client = await clerkClient();1011 const users = (await client.users.getUserList()).data;1213 return (14 <>15 {users.map((user) => {16 return (17 <div18 key={user.id}19 className={`flex items-center justify-between gap-4 p-4 ${20 users.indexOf(user) % 2 === 021 ? "bg-neutral-50 dark:bg-neutral-800"22 : "bg-white dark:bg-neutral-900"23 }`}24 >25 <div className="flex gap-8 flex-5">26 <div className="dark:text-neutral-200 flex-1 shrink-0">27 {user.firstName} {user.lastName}28 </div>2930 <div className="dark:text-neutral-200 flex-2">31 {32 user.emailAddresses.find(33 (email) => email.id === user.primaryEmailAddressId34 )?.emailAddress35 }36 </div>3738 <div className="dark:text-neutral-200 flex-1">39 {user.publicMetadata.role as string}40 </div>41 </div>4243 <div className="flex gap-2 flex-3">44 <form action={setRole} className="inline">45 <input type="hidden" value={user.id} name="userId" />46 <input type="hidden" value="admin" name="role" />47 <button48 type="submit"49 className="px-2 py-1 text-sm border border-neutral-300 dark:border-neutral-600 dark:text-neutral-200 dark:hover:bg-neutral-700"50 disabled={(user?.publicMetadata && user?.publicMetadata?.role === "admin")}51 >52 Make Admin53 </button>54 </form>5556 <form action={setRole} className="inline">57 <input type="hidden" value={user.id} name="userId" />58 <input type="hidden" value="moderator" name="role" />59 <button60 type="submit"61 className="px-2 py-1 text-sm border border-neutral-300 dark:border-neutral-600 dark:text-neutral-200 dark:hover:bg-neutral-700"62 disabled={user?.publicMetadata && user?.publicMetadata?.role === "moderator"}63 >64 Make Moderator65 </button>66 </form>6768 <form action={removeRole} className="inline">69 <input type="hidden" value={user.id} name="userId" />70 <button71 type="submit"72 className="px-2 py-1 text-sm border border-neutral-300 dark:border-neutral-600 dark:text-neutral-200 dark:hover:bg-neutral-700"73 >74 Remove Role75 </button>76 </form>77 </div>78 </div>79 );80 })}81 </>82 );83}可以看到,修改之后数据解释刷新了。
下面就是我们达到的authentication 的目标:

91-Customizing Clerk Components
1、添加注册入口
使用clerk的SignUpButton来添加注册入口。

可以看到,signin和signup切换的非常流畅,估计它们触发的是同一个弹窗组件。只不过默认展示的内容不同。
2、自定义登录和注册按钮
我们使用的是clerk提供的登录、注册按钮组件,这里的样式能不能改一下呢?
可以,直接像传递children那样,把自定义的button传递给clerk的组件即可。

可以看到样式修改了。
3、自定义登录、注册页面
有时候,我们不想使用弹窗来登录、注册,想跳转到单独的页面去,怎么做呢?
简单的做法就是将SignInButton和SignUpButton里面的mode属性去掉,这样就会跳转到单独的页面了。

看一下效果:
但这样做有问题,域名是clerk的域名,我们想使用自己的域名和地址,该怎么做呢?
可以创建自己的登录、注册页面,使用clerk提供的SignUp和SignIn组件。
1、就像之前的/user-profile页面那样,创建app/sign-in/[[...sign-in]]/page.tsx和app/sign-up/[[...sign-up]]/page.tsx。在里面分别使用clerk的SignUp和SignIn组件。
这里注意要在middleware.ts的isPublicRoutes里面,加上这两个路径。因为这两个路径很明显不需要登录,就可以查看。
xxxxxxxxxx111// authentication-demo/src/app/sign-in/[[..sign-in]]/page.tsx23import { SignIn } from "@clerk/nextjs"45export default function SignInPage() {6 return (7 <div className="flex justify-center items-center py-8">8 <SignIn />9 </div>10 )11}xxxxxxxxxx111// authentication-demo/src/app/sign-up/[[...sign-up]]/page.tsx23import { SignUp } from "@clerk/nextjs"45export default function SignUpPage() {6 return (7 <div className="flex justify-center items-center py-8">8 <SignUp />9 </div>10 )11}2、需要在.env.local文件里面添加变量,指定nextjs使用了clerk之后的登录、注册页面的路径。
需要注意的是,我们去掉了SignInButton和SignUpButton的mode属性,也没有指定点击了这两个组件里面的button的事件,说明clerk采用配置的方式来指定跳转的路径。

重新启动之后查看效果:

clerk的重定向非常智能,当用户访问某个受保护页面时,clerk会跳转到登录界面,等到登录完成之后,会自动重定向到原来的页面,不需要程序员额外操作。
这种默认重定向的行为很好,但还是可以定义备用的重定向地址,防止原地址的参数丢失之后不知道该怎么办。
通过环境变量来定义它,在.env.local里面定义:

还可以定义强制的重定向地址,无论用户原来的地址是什么,都强制跳转到定义的地址:

92-Deploying Next.js Apps to Vercel
1、确保项目已经上传到github
2、注册vercel账号,我使用anderson tom的账号登录。选择关联到github:

3、在控制台中选择新建项目,选择github里面的仓库。

4、配置项目信息

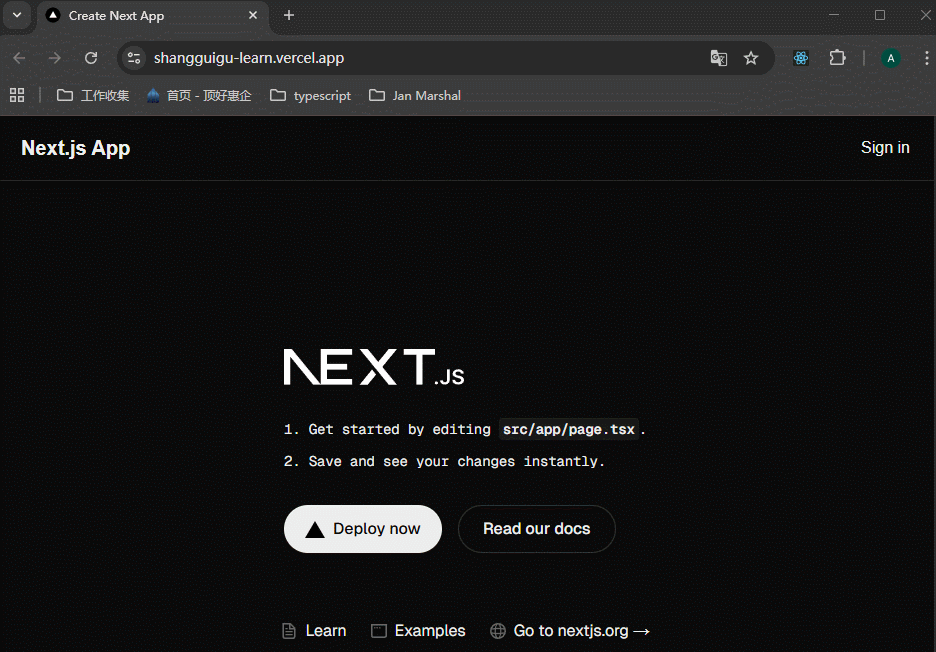
部署成功:

可以通过https://shangguigu-learn.vercel.app/来访问项目了:
后面可以使用域名来替换掉这个域名。