说不定面试的时候,会给一个codesandbox的项目,让你现场编程。这是很有可能的。
1、react folder structure
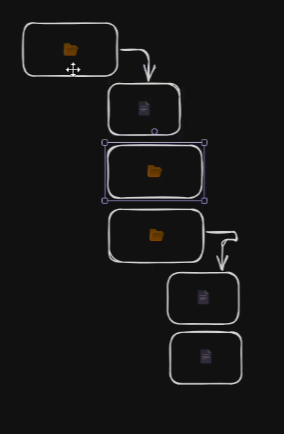
1、只有一个顶层文件夹,文件夹里面可以有文件夹或者文件。那么就有两种数据类型的node,leaf或者branch,使用isFolder属性来区分。
xxxxxxxxxx451// src/folder.ts2export const folders = {3 name: "root",4 isFolder: true,5 children: [6 {7 name: "src",8 isFolder: true,9 children: [10 {11 name: "components",12 isFolder: true,13 children: [14 {15 name: "Header.js",16 isFolder: false,17 },18 {19 name: "Footer.js",20 isFolder: false,21 },22 ],23 },24 {25 name: "App.js",26 isFolder: false,27 },28 {29 name: "index.js",30 isFolder: false,31 },32 ],33 },34 {35 name: "public",36 isFolder: true,37 children: [38 {39 name: "index.html",40 isFolder: false,41 },42 ],43 },44 ],45};2、use recursive,递归组件,同一个组件 FolderStruc 渲染自己的子节点,实现树形结构。
xxxxxxxxxx431// src/FolderStructure.tsx23import { useState } from "react";45interface Data {6 name: string;7 isFolder: boolean;8 children?: Data[];9}1011interface FolderStrucProps {12 data: Data;13}1415const FolderStruc = ({ data }: FolderStrucProps) => {16 const { isFolder, children } = data;17 const [folderOpen, setFolderOpen] = useState<boolean>(true);18 const toggleFolderOpen = () => {19 setFolderOpen((prev) => !prev);20 };2122 // if it's file23 if (!isFolder) return <div className="file">📄{data.name}</div>;2425 // if it's folder26 return (27 <div className="folder">28 <div className="folderName">29 <span onClick={toggleFolderOpen}>30 {folderOpen ? <span>📂</span> : <span>📁</span>}31 {data.name}32 </span>33 </div>34 {folderOpen &&35 children &&36 children.map((folder, index) => (37 <FolderStruc data={folder} key={index} />38 ))}39 </div>40 );41};4243export default FolderStruc;其实我有一点是很担心的,我害怕递归层级多了,里面定义的const [folderOpen, setFolderOpen] = useState<boolean>(true);会有很多,会不会影响性能?react能够很好的处理吗?
在几百个节点以内:完全没问题,React 处理得很好,几乎可以忽略。也可以加上React.memo。 一旦节点数量达到 500+(尤其是全展开时),每个文件夹都带一个 useState,就会开始明显卡顿,甚至几千节点时直接卡死。这是因为每次 setState → 触发该组件 + 所有子组件重新渲染检查,即使子节点没变,也要走一次 diff,所以性能会开始变差。
此时可以使用路径展开法,单一全局状态来处理,下面我会做一个例子。
3、编写一点CSS
xxxxxxxxxx131.folder {2 text-align: left;3 margin-left: 24px;4 border-left: 1px solid gray;5}67.folderName {8 cursor: pointer;9}1011.file {12 margin-left: 24px;13}4、在App.tsx中引入
xxxxxxxxxx151// App.tsx23import "./App.css";4import { folders } from "./folders";5import FolderStruc from "./FolderStructure";67function App() {8 return (9 <>10 <FolderStruc data={folders} />11 </>12 );13}1415export default App;效果:
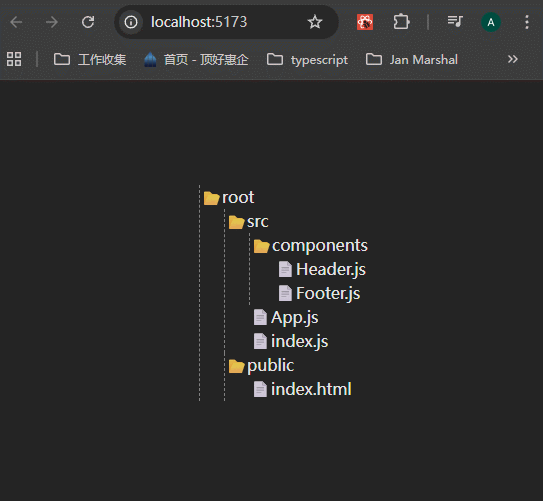
这个例子有点让我眼前一亮,为什么呢?因为margin-left的间距,我只需要设置.folder的就行了,就可以形成树形结构的效果。记得我修改element-ui树形结构样式的时候,是很麻烦的,要找到哪一个children、哪一个样式名,这个就很简单。
小结:
其实这个组件并不难,主要就是组件的递归。更加复杂的,像树形结构前面加上checkbox、加上intermediate状态、子级选满之后父级自动选中,这些才是困难的,有时间就做一下。
2、react folder structure + 路径展开法
3、OTP input
什么是OTP input?就是你在键盘上直接输入6位验证码,不用手动聚焦输入框,一个输入框输入完成之后,就会自动聚焦到下一个输入框。
有几点需要考虑:
- 每个输入框只能输入一个数字。
- 当一个输入框输入之后,focus应该自动跳转到下一个输入框。
- 用户可以使用backspace清除一个输入框的内容;如果这个输入框本身没有内容,那么focus应该自动跳转到前一个输入框。
1、根据需求,渲染出几个输入框:
xxxxxxxxxx261// src/OTPInput.tsx23import { useRef, useState } from "react";45// 需要的输入框个数6interface OTPInputProps {7 length?: number;8}910export const OTPInput = ({ length = 6 }: OTPInputProps) => {11 // 使用数组来创建状态12 const [otp, setOtp] = useState<string[]>(Array(length).fill(""));13 // 使用 useRef 来操作具体的input框14 const inputRefs = useRef<Array<HTMLInputElement | null>>([]);15 return (16 <div style={{ display: "flex", gap: "8px" }}>17 {otp.map((value, index) => (18 <input19 type="text"20 ref={(e) => (inputRefs.current[index] = e)}21 style={{ width: "50px", height: "50px", textAlign: "center" }}22 />23 ))}24 </div>25 );26};
2、开始处理上面提出的几个需要考虑的点。
①将input变为受控组件。完成第1和2点:
xxxxxxxxxx571// src/OPTInput.tsx23import { useRef, useState } from "react";45// 需要的输入框个数6interface OTPInputProps {7 length?: number;8}910export const OTPInput = ({ length = 6 }: OTPInputProps) => {11 // 使用数组来创建状态12 const [otp, setOtp] = useState<string[]>(Array(length).fill(""));13 // 使用 useRef 来操作具体的input框14 const inputRefs = useRef<Array<HTMLInputElement | null>>([]);1516 const focusInput = (index: number) => {17 const input = inputRefs.current[index];18 if (input) input.focus();19 };2021 const handleChange = (22 e: React.ChangeEvent<HTMLInputElement>,23 index: number24 ) => {25 const val = e.target.value;26 if (!/^\d$/.test(val)) return;2728 // 设置值,这里可以使用map方法来setOtp,但是后面需要用到新值,所以这里直接处理了29 const newOtp = [otp];30 newOtp[index] = val;31 setOtp(newOtp);3233 // 将焦点跳转到下一个input34 if (val && index < length - 1) {35 focusInput(index + 1);36 }3738 // 如果每个输入框里面都有值,那么就可以执行submit或其他事件了39 if (newOtp.every((digit) => digit !== "")) {40 // you can submit or other operation41 }42 };43 return (44 <div style={{ display: "flex", gap: "8px" }}>45 {otp.map((value, index) => (46 <input47 type="text"48 value={value}49 onChange={(e) => handleChange(e, index)}50 maxLength={1}51 ref={(e) => (inputRefs.current[index] = e)}52 style={{ width: "50px", height: "50px", textAlign: "center" }}53 />54 ))}55 </div>56 );57};效果:
②完成backspace删除(使用keydown事件)
xxxxxxxxxx831// src/OPTInput.tsx23import React, { useRef, useState } from "react";45// 需要的输入框个数6interface OTPInputProps {7 length?: number;8}910export const OTPInput = ({ length = 6 }: OTPInputProps) => {11 // 使用数组来创建状态12 const [otp, setOtp] = useState<string[]>(Array(length).fill(""));13 // 使用 useRef 来操作具体的input框14 const inputRefs = useRef<Array<HTMLInputElement | null>>([]);1516 const focusInput = (index: number) => {17 const input = inputRefs.current[index];18 if (input) input.focus();19 };2021 const handleChange = (22 e: React.ChangeEvent<HTMLInputElement>,23 index: number24 ) => {25 const val = e.target.value;26 if (!/^\d$/.test(val)) return;2728 const newOtp = [otp];29 newOtp[index] = val;30 setOtp(newOtp);3132 if (val && index < length - 1) {33 focusInput(index + 1);34 }353637 if (newOtp.every((digit) => digit !== "")) {38 // 39 }40 };4142 const handleKeyDown = (43 e: React.KeyboardEvent<HTMLInputElement>,44 index: number45 ) => {46 if (e.key === "Backspace") {47 const newOtp = [otp];48 // 如果当前输入框有值,就清空49 if (otp[index]) {50 newOtp[index] = "";51 setOtp(newOtp);52 } else {53 // 如果没有值,并且index>0,那么焦点就跳转到前一个Input里面,并清除内容54 if (index > 0) {55 newOtp[index - 1] = "";56 setOtp(newOtp);57 focusInput(index - 1);58 }59 }60 // 如果用户按左右箭头键,那么焦点就左右移动61 } else if (e.key === "ArrowLeft" && index > 0) {62 focusInput(index - 1);63 } else if (e.key === "ArrowRight" && index < length - 1) {64 focusInput(index + 1);65 }66 };6768 return (69 <div style={{ display: "flex", gap: "8px" }}>70 {otp.map((value, index) => (71 <input72 type="text"73 value={value}74 onChange={(e) => handleChange(e, index)}75 maxLength={1}76 onKeyDown={(e) => handleKeyDown(e, index)}77 ref={(e) => (inputRefs.current[index] = e)}78 style={{ width: "50px", height: "50px", textAlign: "center" }}79 />80 ))}81 </div>82 );83};可以看到,我按键操作情况。
③处理用户直接粘贴的事件,使用div上面的onPaste事件,几乎所有HTML的可交互元素,都有这个事件。
xxxxxxxxxx1251// src/OPTInput.tsx23import React, { useRef, useState } from "react";45// 需要的输入框个数6interface OTPInputProps {7 length?: number;8}910export const OTPInput = ({ length = 6 }: OTPInputProps) => {11 // 使用数组来创建状态12 const [otp, setOtp] = useState<string[]>(Array(length).fill(""));13 // 使用 useRef 来操作具体的input框14 const inputRefs = useRef<Array<HTMLInputElement | null>>([]);1516 const focusInput = (index: number) => {17 const input = inputRefs.current[index];18 if (input) input.focus();19 };2021 // submit操作22 const onSubmit = (arr: string[]) => {23 alert("You have entered " + arr.join(""));24 };2526 const handleChange = (27 e: React.ChangeEvent<HTMLInputElement>,28 index: number29 ) => {30 const val = e.target.value;31 if (!/^\d$/.test(val)) return;3233 // 设置值,这里可以使用map方法来setOtp,但是后面需要用到新值,所以这里直接处理了34 const newOtp = [otp];35 newOtp[index] = val;36 setOtp(newOtp);3738 // 将焦点跳转到下一个input39 if (val && index < length - 1) {40 focusInput(index + 1);41 }4243 // 如果每个输入框里面都有值,那么就可以执行submit或其他事件了44 if (newOtp.every((digit) => digit !== "")) {45 // you can submit or other operation46 }47 };4849 const handleKeyDown = (50 e: React.KeyboardEvent<HTMLInputElement>,51 index: number52 ) => {53 if (e.key === "Backspace") {54 const newOtp = [otp];55 // 如果当前输入框有值,就清空56 if (otp[index]) {57 newOtp[index] = "";58 setOtp(newOtp);59 } else {60 console.log("执行了");61 // 如果没有值,并且index>0,那么焦点就跳转到前一个Input里面62 if (index > 0) {63 newOtp[index - 1] = "";64 setOtp(newOtp);65 focusInput(index - 1);66 }67 }68 // 如果用户按左右箭头键,那么焦点就左右移动69 } else if (e.key === "ArrowLeft" && index > 0) {70 focusInput(index - 1);71 } else if (e.key === "ArrowRight" && index < length - 1) {72 focusInput(index + 1);73 }74 };7576 const handlePaste = (e: ClipboardEvent) => {77 const pasteContent = e?.clipboardData?.getData("text") ?? "";78 // 检查粘贴内容是否是数字79 if (!/^\d+/.test(pasteContent)) return;8081 // split之后,只取length长度,超过的不用管82 const pasteArr = pasteContent.split("").slice(0, length);83 const newOtp = [otp];8485 // 赋值86 pasteArr.forEach((char, i) => {87 newOtp[i] = char;88 });89 setOtp(newOtp);9091 // 如果粘贴内容长度为length,那么焦点就在第length上面。如果小于length,那么就聚焦到length下一个输入框。92 const nextIndex =93 pasteArr.length >= length ? length - 1 : pasteArr.length + 1;94 focusInput(nextIndex);9596 // 如果粘贴长度为length,那么就可以处理submit97 if (pasteArr.length === length) {98 // submit99 setTimeout(() => {100 onSubmit(newOtp);101 }, 500);102 }103104 e.preventDefault();105 };106107 return (108 <div109 style={{ display: "flex", gap: "8px", margin: "16px" }}110 onPaste={handlePaste}>111 {otp.map((value, index) => (112 <input113 key={index}114 type="text"115 value={value}116 onChange={(e) => handleChange(e, index)}117 maxLength={1}118 onKeyDown={(e) => handleKeyDown(e, index)}119 ref={(e) => (inputRefs.current[index] = e)}120 style={{ width: "50px", height: "50px", textAlign: "center" }}121 />122 ))}123 </div>124 );125};效果:
4、Autocomplete Search Bar
需求:
- fetch github names when people type in
- store last 10 searched users in the local storage
- display the suggestions in the drop-down
- user friendly
1、先完成基本的搜索框UI,然后请求数据,同时添加防抖
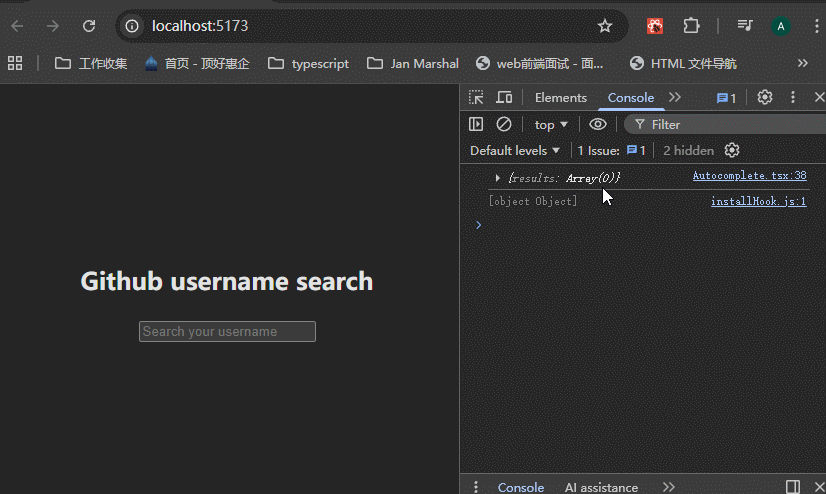
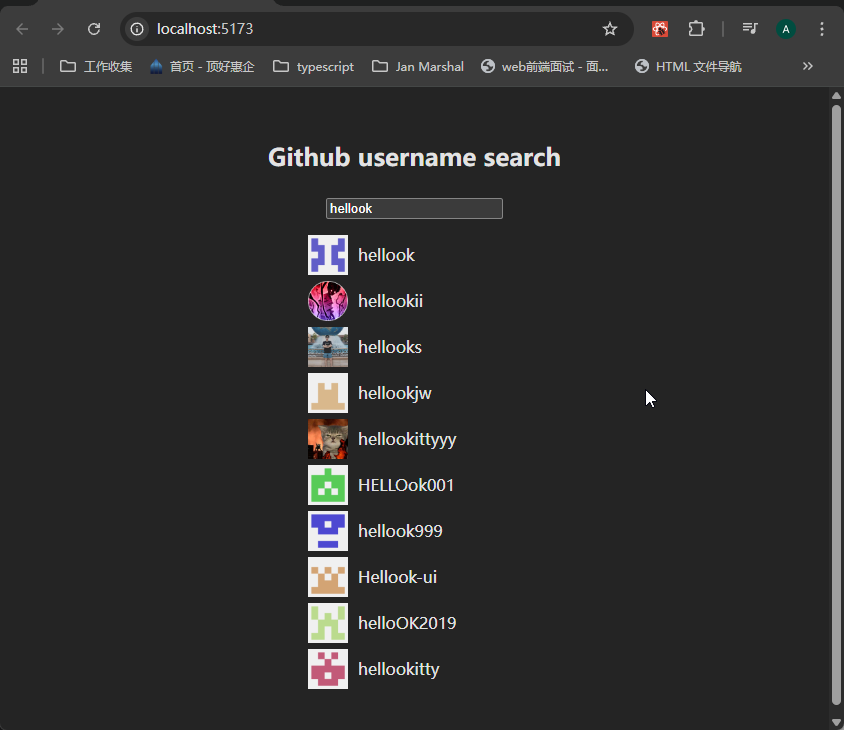
xxxxxxxxxx531// src/Autocomplete.tsx23import { useRef, useState } from "react";45interface GithubUser {6 login: string;7 avatar_url: string;8}910const GITHUB_URL = `https://api.github.com/search/users?q=`;1112export const Autocomplete = () => {13 const [query, setQuery] = useState("");14 const [results, setResults] = useState<GithubUser[]>([]);1516 const timeoutRef = useRef<number | null>(null);1718 const fetchUsers = async (q: string) => {19 const data = await fetch(GITHUB_URL + q);20 const res = await data.json();21 // 不需要展示所有结果,只需要展示10个。为什么呢?因为你看google搜索栏的提示,也是只展示10个,随着用户输入的越来越详细,出来的结果也就越准确了,所以根本没有必要展示很多个。22 setResults((res?.items ?? []).slice(0, 10) ?? []);23 };2425 const handleChange = (e: React.ChangeEvent<HTMLInputElement>) => {26 const value = e.target.value;27 setQuery(value);28 if (timeoutRef.current) clearTimeout(timeoutRef.current);2930 timeoutRef.current = setTimeout(() => {31 // 如果输入了三个及以上的字符,就请求接口,否则清空results32 if (value.length > 2) {33 fetchUsers(value);34 } else {35 setResults([]);36 }37 }, 500);38 };3940 console.log({ results });41 return (42 <div className="autocomplete-container">43 <h2 className="autocomplete-title">Github username search</h2>44 <input45 type="text"46 className="autocomplete-input"47 placeholder="Search your username"48 value={query}49 onChange={handleChange}50 />51 </div>52 );53};这样可以看到请求数据成功了,同时加上了防抖:
2、将results渲染到页面上,注意写法,results.length > 0 &&只有results有数据时,才展示。
xxxxxxxxxx621import { useRef, useState } from "react";23interface GithubUser {4 login: string;5 avatar_url: string;6}78const GITHUB_URL = `https://api.github.com/search/users?q=`;910export const Autocomplete = () => {11 const [query, setQuery] = useState("");12 const [results, setResults] = useState<GithubUser[]>([]);1314 const timeoutRef = useRef<number | null>(null);1516 const fetchUsers = async (q: string) => {17 const data = await fetch(GITHUB_URL + q);18 const res = await data.json();19 // 不需要展示所有结果,只需要展示10个。为什么呢?因为你看google搜索栏的提示,也是只展示10个,随着用户输入的越来越详细,出来的结果也就越准确了,所以根本没有必要展示很多个。20 setResults((res?.items ?? []).slice(0, 10) ?? []);21 };2223 const handleChange = (e: React.ChangeEvent<HTMLInputElement>) => {24 const value = e.target.value;25 setQuery(value);26 if (timeoutRef.current) clearTimeout(timeoutRef.current);2728 timeoutRef.current = setTimeout(() => {29 // 如果输入了三个及以上的字符,就请求接口,否则清空results30 if (value.length > 2) {31 fetchUsers(value);32 } else {33 setResults([]);34 }35 }, 500);36 };3738 console.log({ results });39 return (40 <div className="autocomplete-container">41 <h2 className="autocomplete-title">Github username search</h2>42 <input43 type="text"44 className="autocomplete-input"45 placeholder="Search your username"46 value={query}47 onChange={handleChange}48 />4950 {results.length > 0 && (51 <ul className="autocomplete-results">52 {results.map((user) => (53 <li key={user.login} className="autocomplete-result-item">54 <img src={user.avatar_url} alt="user avatar" className="avatar" />55 <span>{user.login}</span>56 </li>57 ))}58 </ul>59 )}60 </div>61 );62};加一点样式就是这样的效果:
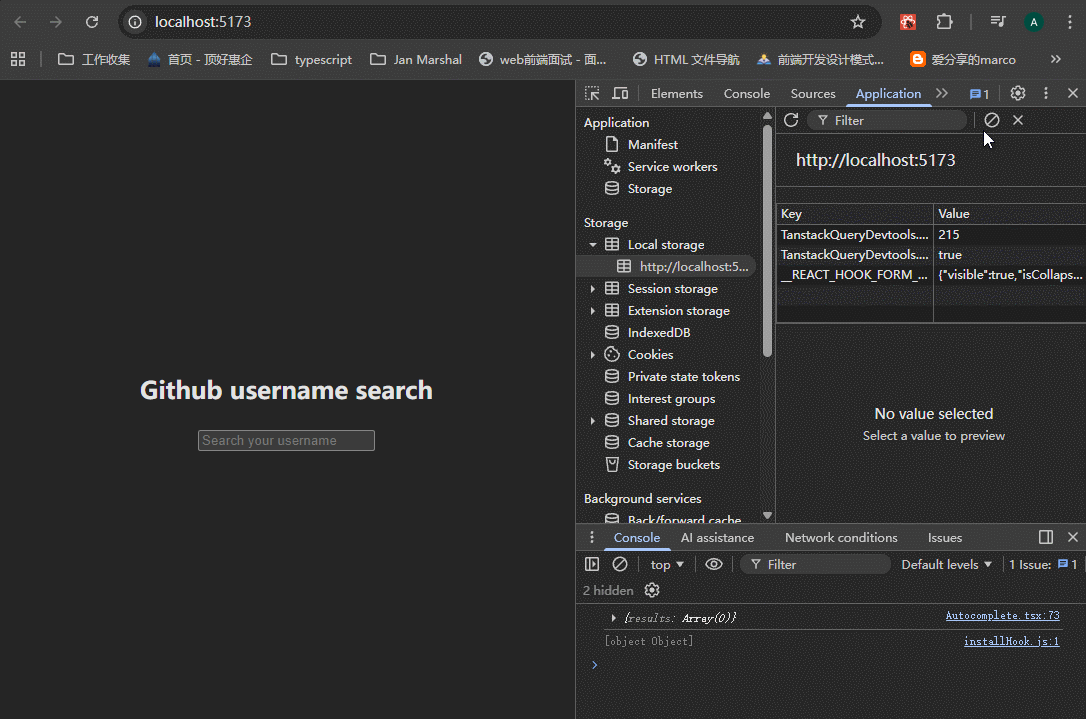
3、保存并展示之前搜索的最新的10个搜索词,点击这些搜索词可以直接搜索。
这10个搜索词是怎么来的呢?是用户点击了某一个搜索词之后,就添加到搜索词集里面。
代码里面主要就是saveToLocal,handleSelect,recentSearch赋初始值和渲染。这里没有使用useEffect,稍后会解释。
xxxxxxxxxx1161import { useRef, useState } from "react";23interface GithubUser {4 login: string;5 avatar_url: string;6}78const GITHUB_URL = `https://api.github.com/search/users?q=`;9const RECENT_SEARCHES = "RECENT_SEARCHES";1011export const Autocomplete = () => {12 const [query, setQuery] = useState("");13 const [results, setResults] = useState<GithubUser[]>([]);14 const [recentSearch, setRecentSearch] = useState<string[]>(() => {15 try {16 const item = localStorage.getItem(RECENT_SEARCHES);17 return item ? JSON.parse(item) : [];18 } catch {19 return [];20 }21 });2223 const timeoutRef = useRef<number | null>(null);2425 const fetchUsers = async (q: string) => {26 const data = await fetch(GITHUB_URL + q);27 const res = await data.json();28 // 不需要展示所有结果,只需要展示10个。为什么呢?因为你看google搜索栏的提示,也是只展示10个,随着用户输入的越来越详细,出来的结果也就越准确了,所以根本没有必要展示很多个。29 setResults((res?.items ?? []).slice(0, 10) ?? []);30 };3132 const handleChange = (e: React.ChangeEvent<HTMLInputElement>) => {33 const value = e.target.value;34 setQuery(value);35 if (timeoutRef.current) clearTimeout(timeoutRef.current);3637 timeoutRef.current = setTimeout(() => {38 // 如果输入了三个及以上的字符,就请求接口,否则清空results39 if (value.length > 2) {40 fetchUsers(value);41 } else {42 setResults([]);43 }44 }, 500);45 };4647 const saveToLocal = (username: string) => {48 // 去重49 const updatedList = [50 username,51 recentSearch.filter((item) => item !== username),52 ];53 // 如果搜索词集里面超过10个,则pop54 if (updatedList.length > 10) {55 updatedList.pop();56 }5758 // 赋值59 setRecentSearch(updatedList);60 // 存储到localStorage里面61 localStorage.setItem(RECENT_SEARCHES, JSON.stringify(updatedList));62 };6364 const handleSelect = (username: string) => {65 // 将username添加到搜索框里面去66 setQuery(username);67 // 将results清空68 setResults([]);69 // 添加到搜索词集里面去70 saveToLocal(username);71 };7273 console.log({ results });74 return (75 <div className="autocomplete-container">76 <h2 className="autocomplete-title">Github username search</h2>77 <input78 type="text"79 className="autocomplete-input"80 placeholder="Search your username"81 value={query}82 onChange={handleChange}83 />8485 {results.length > 0 && (86 <ul className="autocomplete-results">87 {results.map((user) => (88 <li89 key={user.login}90 className="autocomplete-result-item"91 onClick={() => handleSelect(user.login)}>92 <img src={user.avatar_url} alt="user avatar" className="avatar" />93 <span>{user.login}</span>94 </li>95 ))}96 </ul>97 )}9899 {recentSearch.length > 0 && (100 <div className="recent-searches">101 <h3 className="recent-title">Recent Searches</h3>102 <ul className="recent-list">103 {recentSearch.map((name) => (104 <li105 key={name}106 className="recent-item"107 onClick={() => handleSelect(name)}>108 {name}109 </li>110 ))}111 </ul>112 </div>113 )}114 </div>115 );116};可以看到,点击了某一项之后,就会添加到recent searches里面去;点击recent searches里面的某一项,就会赋值到搜索输入框。
4、user friendly
主要是编写样式。
xxxxxxxxxx611.avatar {2 height: 40px;3 width: 40px;4}56.autocomplete-container {7 max-width: 400px;8 margin: 20px auto;9 padding: 16px;10 border: 1px solid gray;11 border-radius: 14px;12}1314.autocomplete-input {15 min-width: 300px;16 width: 100%;17 box-sizing: border-box;18 border: 1px solid gray;19 padding: 10px;20 border-radius: 8px;21 position: relative;22 margin-bottom: 0;23}2425.autocomplete-results {26 list-style: none;27 min-width: 300px;28 border-radius: 8px;29 position: absolute;30 bottom: 10;31 margin-top: 0;32 background-color: rgb(71, 68, 68);33 box-sizing: border-box;34 display: flex;35 flex-direction: column;36 gap: 6px;37 padding: 6px;38}3940.autocomplete-result-item {41 box-sizing: border-box;42 padding: 5px;43 display: flex;44 justify-content: start;45 align-items: center;46 gap: 10px;47 cursor: pointer;48}4950.autocomplete-result-item:hover {51 background-color: #3a3a3a;52}5354.recent-list {55 list-style: none;56 display: flex;57 justify-content: start;58 align-items: center;59 flex-wrap: wrap;60 gap: 8px;61}
小结:
主要使用了受控组件、防抖、localStorage这些技术,还有一些产品设计方面的知识。
优化记录:
useEffect,在写获取recentsearch数据的时候,
报错:Error: Calling setState synchronously within an effect can trigger cascading renders。意思是在useEffect里面使用useState可能会触发无限渲染。
xxxxxxxxxx61useEffect(() => {2const saved = localStorage.getItem("RECENT_SEARCHES");3if (saved) {4setRecentSearch(JSON.parse(saved));5}6}, []);所以需要直接使用useState懒初始化。
xxxxxxxxxx81const [recentSearch, setRecentSearch] = useState<string[]>(() => {2try {3const item = localStorage.getItem(RECENT_SEARCHES);4return item ? JSON.parse(item) : [];5} catch {6return [];7}8});如果是获取数据,那么直接使用react query。
useEffect哪些场景使用呢:
推荐等级 场景(官方/社区公认的最佳用途) 典型代码示例 为什么只能/最好用 useEffect 5星 订阅和取消订阅外部系统(WebSocket、EventBus、第三方事件) useEffect(() => { const id = socket.on('msg', handler); return () => socket.off(id); }, []); 必须在组件卸载时清理,否则内存泄漏 5星 手动操作第三方 DOM 库(Chart.js、Mapbox、Three.js、Tippy、Swiper 等) useEffect(() => { chart.current = new Chart(ref.current, config); return () => chart.current?.destroy(); }, []); 这些库不是 React 管理的,必须自己创建/销毁 5星 监听原生浏览器事件或全局事件(resize、scroll、keydown、自定义事件) useEffect(() => { window.addEventListener('resize', handler); return () => window.removeEventListener('resize', handler); }, []); 必须在组件卸载时移除监听 5星 发起接口请求(根据某个依赖变化) useEffect(() => { if (userId) fetchUser(userId); }, [userId]); 数据获取是典型的“外部系统同步” 5星 与外部状态库同步(Zustand、Jotai、Valtio、Redux 外的全局 store) useEffect(() => { return globalStore.subscribe(setState); }, []); 官方底层就是用 useSyncExternalStore,但很多老库还是要自己写 effect 4星 路由变化时滚动到顶部、记录页面访问、埋点统计 useEffect(() => { window.scrollTo(0, 0); logPageView(); }, [location.pathname]); 属于“与外部世界同步” 4星 根据某个值动态修改 document.title、favicon useEffect(() => { document.title = ${count} 条未读; }, [count]);修改全局对象 4星 配合 useLayoutEffect 不合适但又必须在渲染后立刻做的事(极少数) 极少见,一般改用 useLayoutEffect 只有当你明确知道要异步但又不能放 state 初始化时才用 3星 仅执行一次的初始化(但又必须在渲染后才能拿到 DOM 或某些值) const didInit = useRef(false); useEffect(() => { if (!didInit.current) { didInit.current = true; init(); } }, []); 其实大多数都能改成 useState 懒初始化或 use()(React 19)
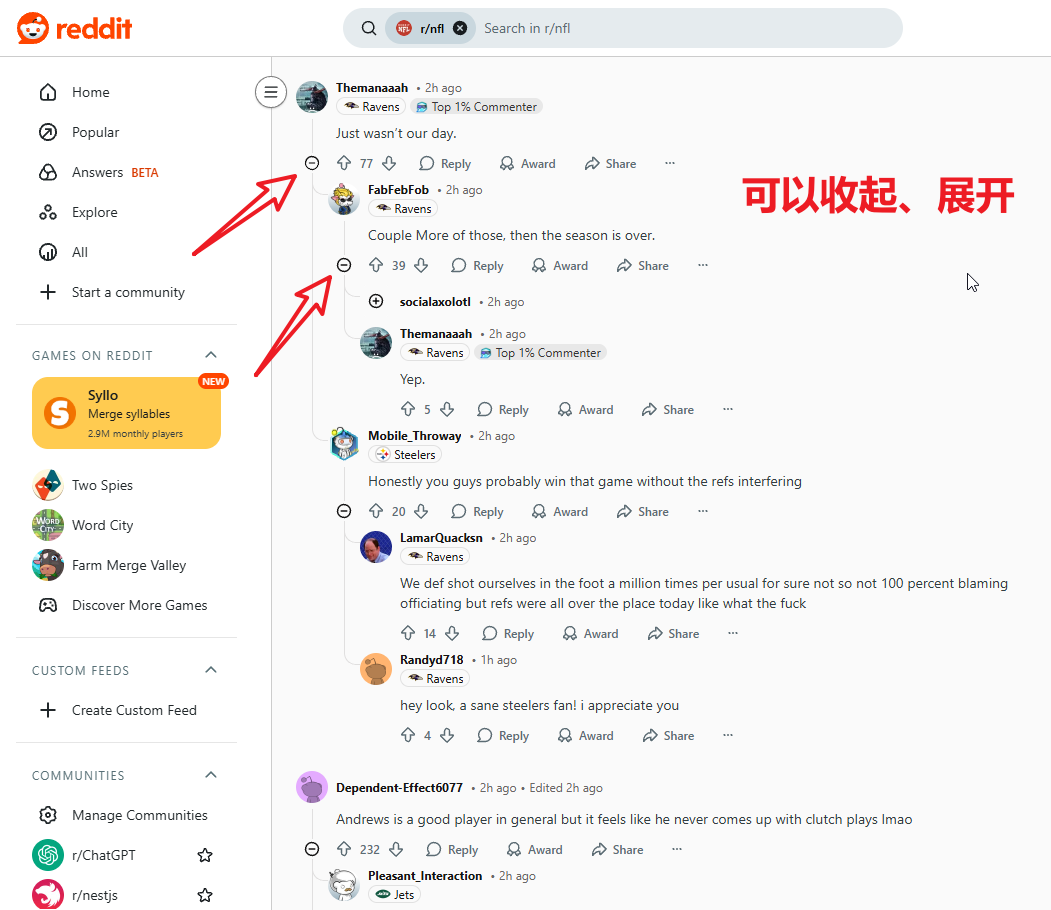
5、Build infinite nested comments system
这个就类似于reddit或者youtube里面的comments:
1、先准备数据:
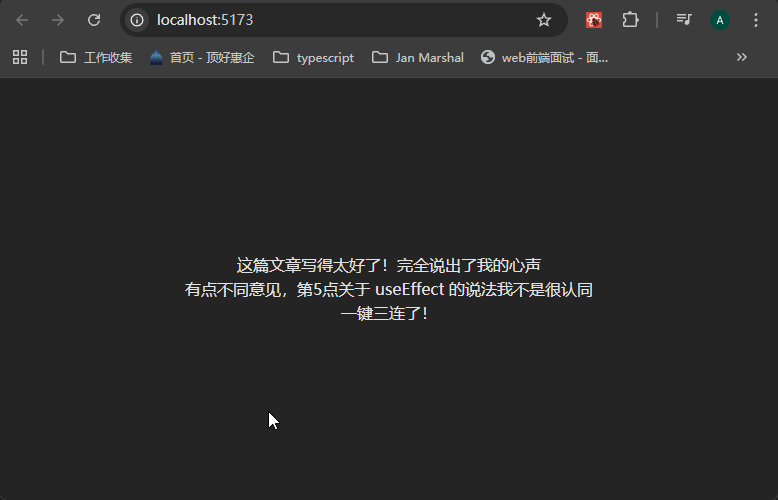
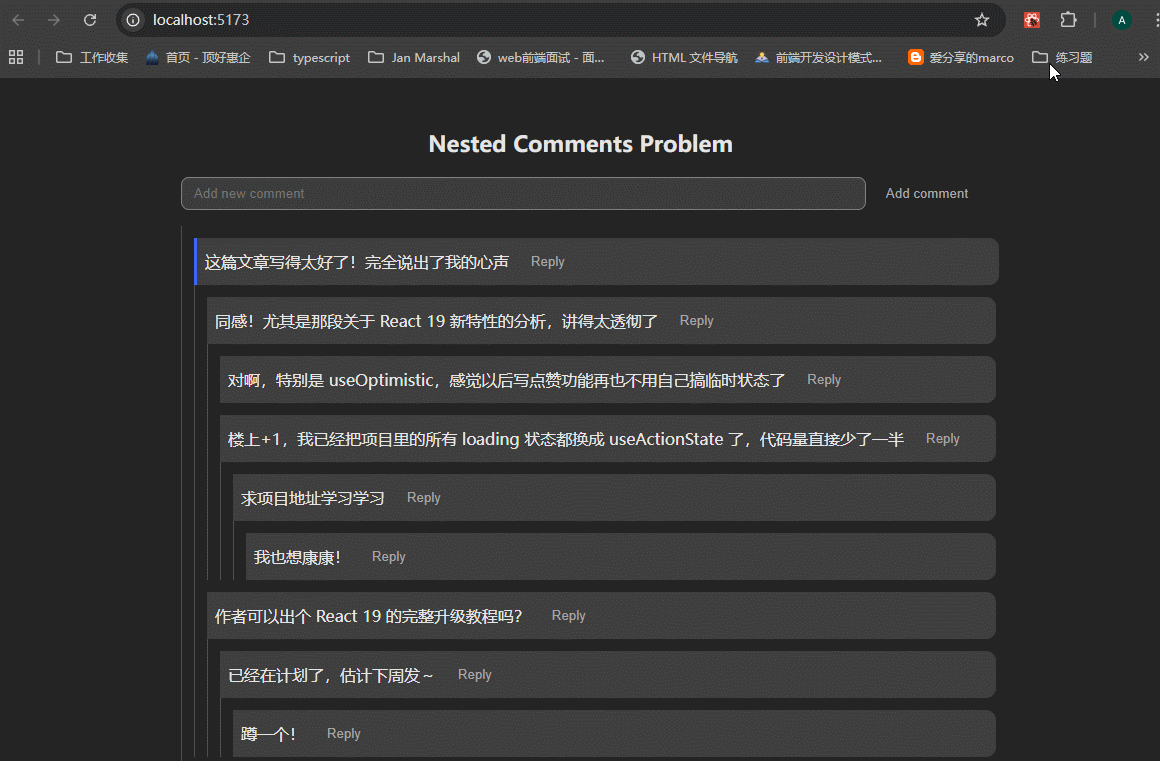
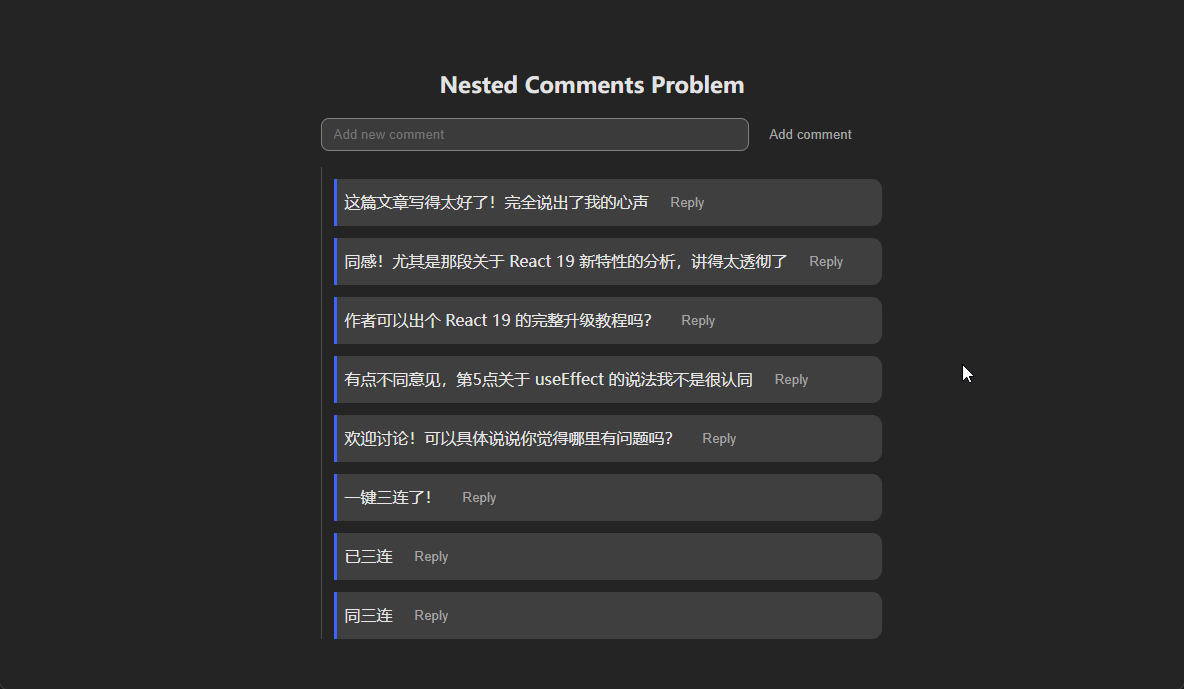
xxxxxxxxxx1011// src/data.ts2export interface CommentType {3 id: number;4 text: string;5 replies: CommentType[];6}78const initialComments: CommentType[] = [9 {10 id: 1,11 text: "这篇文章写得太好了!完全说出了我的心声",12 replies: [13 {14 id: 2,15 text: "同感!尤其是那段关于 React 19 新特性的分析,讲得太透彻了",16 replies: [17 {18 id: 3,19 text: "对啊,特别是 useOptimistic,感觉以后写点赞功能再也不用自己搞临时状态了",20 replies: [],21 },22 {23 id: 4,24 text: "楼上+1,我已经把项目里的所有 loading 状态都换成 useActionState 了,代码量直接少了一半",25 replies: [26 {27 id: 5,28 text: "求项目地址学习学习",29 replies: [30 {31 id: 6,32 text: "我也想康康!",33 replies: [],34 },35 ],36 },37 ],38 },39 ],40 },41 {42 id: 7,43 text: "作者可以出个 React 19 的完整升级教程吗?",44 replies: [45 {46 id: 8,47 text: "已经在计划了,估计下周发~",48 replies: [49 {50 id: 9,51 text: "蹲一个!",52 replies: [],53 },54 ],55 },56 ],57 },58 ],59 },60 {61 id: 10,62 text: "有点不同意见,第5点关于 useEffect 的说法我不是很认同",63 replies: [64 {65 id: 11,66 text: "欢迎讨论!可以具体说说你觉得哪里有问题吗?",67 replies: [68 {69 id: 12,70 text: "我还是觉得某些初始化场景下 useEffect 更直观,比如需要先渲染拿到 DOM 再操作的情况",71 replies: [72 {73 id: 13,74 text: "这个场景 React 19 的 use() 可以完美替代了,推荐你试试~",75 replies: [],76 },77 ],78 },79 ],80 },81 ],82 },83 {84 id: 14,85 text: "一键三连了!",86 replies: [87 {88 id: 15,89 text: "已三连",90 replies: [],91 },92 {93 id: 16,94 text: "同三连",95 replies: [],96 },97 ],98 },99];100101export default initialComments;2、编写简单的CommentList组件,看一下效果:
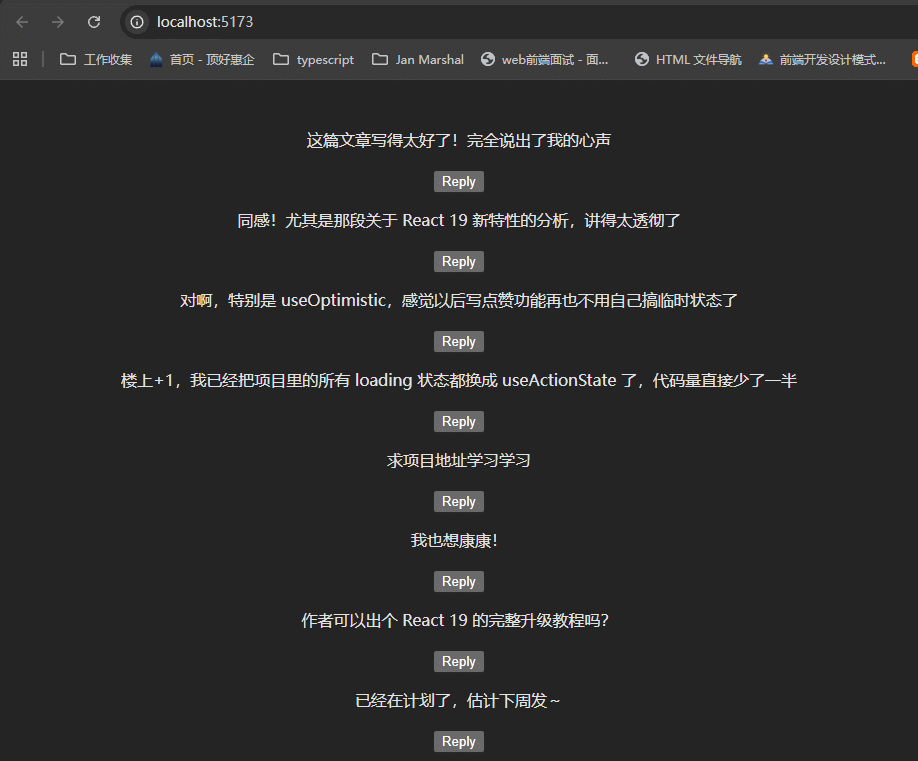
xxxxxxxxxx161// src/CommentList.tsx23import type { CommentType } from "./data";45interface ICommentList {6 comments: CommentType[];7}89export const CommentList = ({ comments }: ICommentList) => {10 return (11 <div>12 {comments.length > 0 &&13 comments.map((comment) => <div key={comment.id}>{comment.text}</div>)}14 </div>15 );16};可以看到,只渲染出了最外层的评论:
3、这一步就开始做CommentItem组件,调用自己来实现递归
xxxxxxxxxx451// src\CommentItem.tsx23import { useState } from "react";4import type { CommentType } from "./data";56export const CommentItem = ({ comment }: { comment: CommentType }) => {7 const [showReply, setShowReply] = useState(false);8 const [replyText, setReplyText] = useState("");910 const handleReplySubmit = () => {11 if (replyText.trim()) {12 // add to state logic,添加数据1314 setReplyText("");15 setShowReply(false);16 }17 };18 return (19 <div className="comment">20 <p>{comment.text}</p>21 {/* 就是评论下面的一些按钮,这里只做了reply按钮,其实还有点赞、不喜欢、share等等按钮,看一下reddit里面的评论区就知道了 */}22 <button onClick={() => setShowReply((prev) => !prev)}>23 {showReply ? "Cancel" : "Reply"}24 </button>25 {/* 评论区 */}26 {showReply && (27 <div className="reply-form">28 <input29 type="text"30 className="reply-input"31 placeholder="Add your reply"32 value={replyText}33 onChange={(e) => setReplyText(e.target.value)}34 />35 <button onClick={handleReplySubmit}>Send</button>36 </div>37 )}38 {/* 递归处理 */}39 {comment.replies.length > 0 &&40 comment.replies.map((com) => (41 <CommentItem comment={com} key={com.id} />42 ))}43 </div>44 );45};然后在CommentList里面引入:
xxxxxxxxxx191// src\CommentList.tsx23import { CommentItem } from "./CommentItem";4import type { CommentType } from "./data";56interface ICommentList {7 comments: CommentType[];8}910export const CommentList = ({ comments }: ICommentList) => {11 return (12 <div>13 {comments.length > 0 &&14 comments.map((comment) => (15 <CommentItem key={comment.id} comment={comment} />16 ))}17 </div>18 );19};基本效果已经出来了:
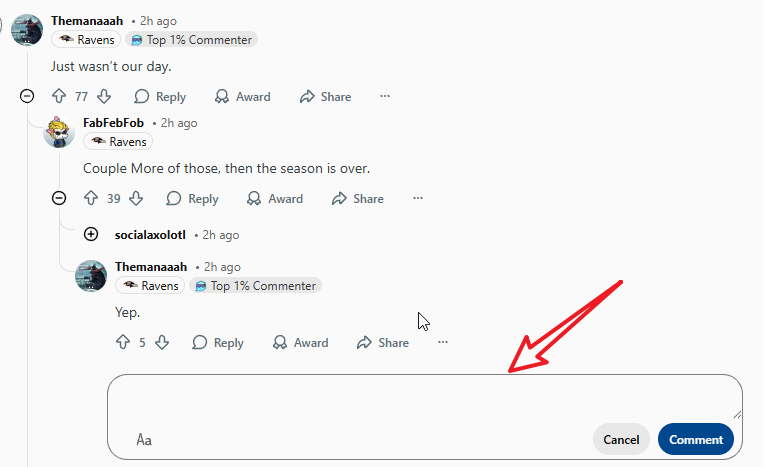
就类似于下面这种效果:
4、这一步就是将评论数据添加到data中,同时状态要更新。怎么做呢?这里不使用真实数据库,而是直接采用uplift the state的方法,将用到的数据就放在App.tsx里面,使用子级更新父级数据的方法,来做。
xxxxxxxxxx711// App.tsx2import { useState } from "react";3import "./App.css";4import { CommentList } from "./CommentList";5import initialComments, { type CommentType } from "./data";67function App() {8 const [comments, setComments] = useState<CommentType[]>(initialComments);9 const [newComment, setNewComment] = useState("");1011 // 这个递归的写法要理解,我大概率写不出来,即使写出来也很可能不是这样写12 const addReplyToTree = (13 tree: CommentType[],14 parentId: number,15 text: string16 ): CommentType[] => {17 return tree.map((comment) => {18 if (comment.id === parentId) {19 return {20 comment,21 replies: [comment.replies, { id: Date.now(), text, replies: [] }],22 };23 }24 return {25 comment,26 replies: addReplyToTree(comment.replies, parentId, text),27 };28 });29 };3031 const addReply = (parentId: number, text: string) => {32 const updatedList = addReplyToTree(comments, parentId, text);33 setComments(updatedList);34 };3536 const addTopLevelComment = () => {37 if (newComment.trim()) {38 setComments((prev) => {39 return [40 prev,41 {42 id: Date.now(),43 text: newComment,44 replies: [],45 },46 ];47 });48 setNewComment("");49 }50 };51 return (52 <>53 <div className="app">54 <h2 className="comments-title">Nested Comments Problem</h2>55 {/* 并不总是回复别人的评论,我们也应该可以添加第一层级的评论 */}56 <div className="new-comment-form">57 <input58 type="text"59 value={newComment}60 onChange={(e) => setNewComment(e.target.value)}61 placeholder="Add new comment"62 />63 <button onClick={addTopLevelComment}>Add comment</button>64 </div>65 </div>66 <CommentList comments={comments} addReply={addReply} />67 </>68 );69}7071export default App;在CommentList和CommentItem组件里面,传递addReply过去,然后绑定这个方法:
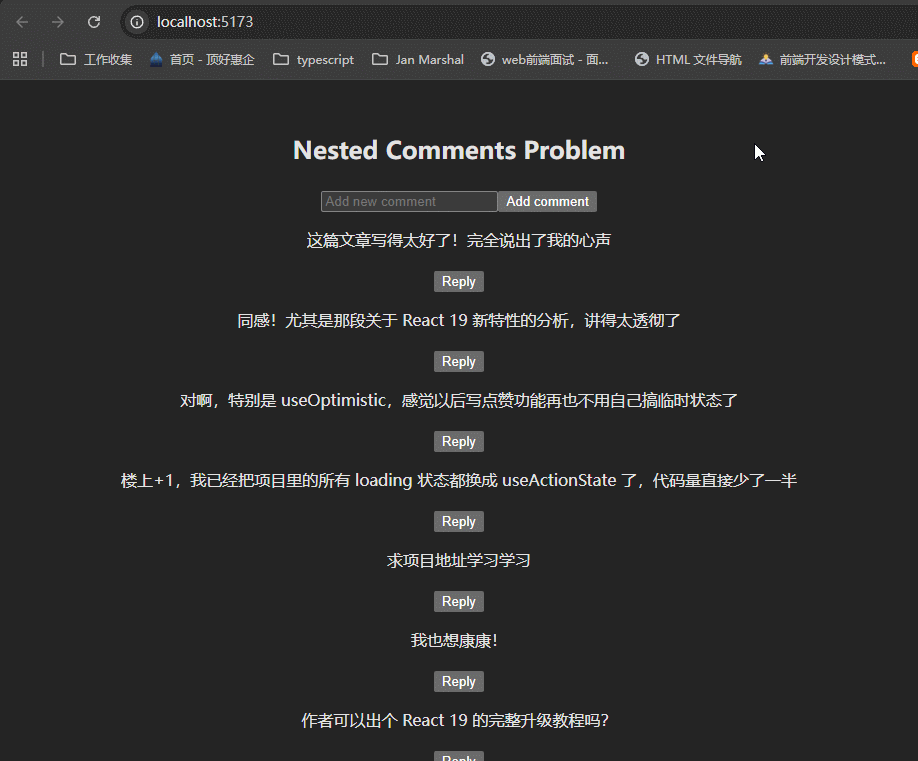
xxxxxxxxxx201// src\CommentList.tsx23import { CommentItem } from "./CommentItem";4import type { CommentType } from "./data";56interface ICommentList {7 comments: CommentType[];8 addReply: (parentId: number, text: string) => void;9}1011export const CommentList = ({ comments, addReply }: ICommentList) => {12 return (13 <div>14 {comments.length > 0 &&15 comments.map((comment) => (16 <CommentItem key={comment.id} comment={comment} addReply={addReply} />17 ))}18 </div>19 );20};xxxxxxxxxx501// src\CommentItem.tsx23import { useState } from "react";4import type { CommentType } from "./data";56interface ICommentItem {7 comment: CommentType;8 addReply: (parentId: number, text: string) => void;9}1011export const CommentItem = ({ comment, addReply }: ICommentItem) => {12 const [showReply, setShowReply] = useState(false);13 const [replyText, setReplyText] = useState("");1415 const handleReplySubmit = () => {16 if (replyText.trim()) {17 // add to state logic,添加数据18 addReply(comment.id, replyText);19 setReplyText("");20 setShowReply(false);21 }22 };23 return (24 <div className="comment">25 <p>{comment.text}</p>26 {/* 就是评论下面的一些按钮,这里只做了reply按钮,其实还有点赞、不喜欢、share等等按钮,看一下reddit里面的评论区就知道了 */}27 <button onClick={() => setShowReply((prev) => !prev)}>28 {showReply ? "Cancel" : "Reply"}29 </button>30 {/* 评论区 */}31 {showReply && (32 <div className="reply-form">33 <input34 type="text"35 className="reply-input"36 placeholder="Add your reply"37 value={replyText}38 onChange={(e) => setReplyText(e.target.value)}39 />40 <button onClick={handleReplySubmit}>Send</button>41 </div>42 )}43 {/* 递归处理 */}44 {comment.replies.length > 0 &&45 comment.replies.map((com) => (46 <CommentItem addReply={addReply} comment={com} key={com.id} />47 ))}48 </div>49 );50};此时已经可以添加评论了:
功能已经完成了,剩下的工作就是编写样式了。
xxxxxxxxxx6912h2 {3 font-size: 22px;4 margin-bottom: 16px;5}67.comment {8 padding: 12px 0 0 12px;9 border-left: 1px solid rgb(79, 78, 78);10}1112.comment p {13 margin: 0 0 8px 0;14}1516button {17 padding: 6px 12px;18 background-color: transparent;19 border: none;20 color: rgb(167, 166, 166);21 border-radius: 6px;22 cursor: pointer;23}2425button:hover {26 background-color: rgb(60, 101, 251);27 color: white;28}2930.reply-form {31 margin-top: 10px;32 display: flex;33 gap: 8px;34}3536.comment-container {37 background: rgb(63, 63, 63);38 border-left: 3px solid rgb(60, 101, 251);39 width: 100%;40 padding: 10px 8px;41 border-top-right-radius: 10px;42 border-bottom-right-radius: 10px;43}4445.comment-top {46 display: flex;47 justify-content: start;48 align-items: center;49 gap: 10px;50}5152.replies .comment-container {53 border-left: none;54}5556.reply-form input,57.new-comment-form input {58 flex: 1;59 padding: 8px 12px;60 border-radius: 8px;61 outline: none;62 border: 1px solid gray;63}6465.new-comment-form {66 display: flex;67 gap: 8px;68 margin-bottom: 16px;69}可以看到,结构很清楚了。
小结:
这个组件难在哪里,我觉得难在不晓得该在哪里递归。
①首先是组件,我准备直接在CommentList里面递归CommentItem的,就是下面这种样子:
xxxxxxxxxx201export const CommentList = ({ comments, addReply }: ICommentList) => {2 return (3 <div>4 {comments.length > 0 &&5 comments.map((comment) => (6 <>7 <CommentItem8 key={comment.id}9 comment={comment}10 addReply={addReply}11 />12 {comment.replies.length > 0 &&13 comment.replies.map((c) => (14 <CommentItem key={c.id} comment={c} addReply={addReply} />15 ))}16 </>17 ))}18 </div>19 );20};效果是这样的:
这根本就没有递归,最多就是把第二层展示出来了。
递归就是要重复自己,这一点要记住了,所以必须在CommentItem里面重复自己。
②递归函数我写的不好,老师的函数要记住。
③产品意识要有,这个评论应该是什么样的、功能、UI,心里要记住。
6、React Tab Component
Myntra, Zepto这些公司问过。
1、实现功能
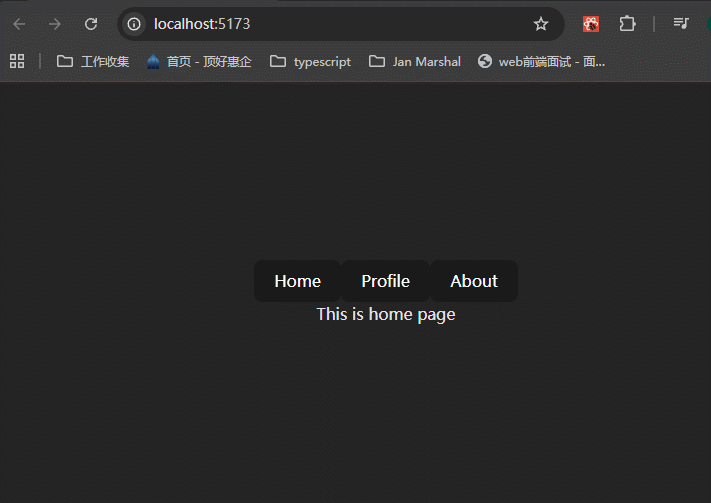
xxxxxxxxxx301// src/TabComponent.tsx23import { useState, type ReactNode } from "react";45interface ITabComponent {6 tabs: {7 label: string;8 content: ReactNode;9 }[];10}1112export const TabComponent = ({ tabs }: ITabComponent) => {13 const [active, setActive] = useState(0);1415 return (16 <div className="tab-container">17 <div className="tab-headers">18 {tabs.map((tab, index) => (19 <button20 className={`tab-button ${active === index ? "active-button" : ""}`}21 onClick={() => setActive(index)}>22 {tab.label}23 </button>24 ))}25 </div>2627 <div className="tab-content">{tabs[active].content}</div>28 </div>29 );30};在App.tsx中引入:
xxxxxxxxxx291// App.tsx23import "./App.css";4import { TabComponent } from "./TabComponent";56const tabs = [7 {8 label: "Home",9 content: <div>This is home page</div>,10 },11 {12 label: "Profile",13 content: <div>This is profile page</div>,14 },15 {16 label: "About",17 content: <div>This is about page</div>,18 },19];2021function App() {22 return (23 <>24 <TabComponent tabs={tabs} />25 </>26 );27}2829export default App;可以看到,功能已经实现了:
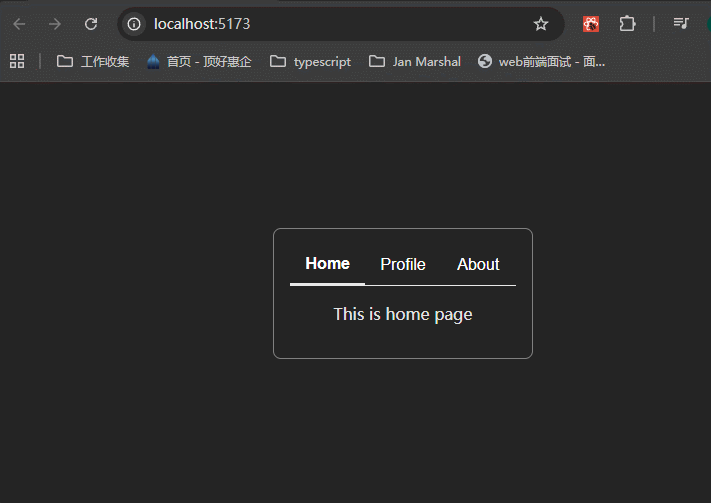
2、优化样式:
xxxxxxxxxx351.tab-container {2 width: 100%;3 max-width: 600px;4 border: 1px solid gray;5 border-radius: 8px;6 padding: 16px;7}89.tab-headers {10 border-bottom: 1px solid #e8e8e8;11 display: flex;12 justify-content: space-evenly;13 align-items: center;14}1516.tab-button {17 color: white;18 flex: 1;19 padding: 10px;20 font-size: 16px;21 cursor: pointer;22 background: none;23 border: none;24 outline: none;25 transition: background 0.3s;26}2728.active-button {29 border-bottom: 2px solid #e8e8e8;30 font-weight: bold;31}3233.tab-content {34 padding: 16px;35}效果:
小结:
组件不难,但是需要知道使用{}来渲染内容。
7 - Modal、Dialog、Toast、Notification、Drawer、SideSheet、MessageBox、Tooltips 、Popovers等等
实现这些功能的套路就是:
1、使用react-dom提供的createPortal方法来创建组件。在组件中,使用父组件传递过来的参数isOpen来判断是否显示,如果isOpen为true,则返回null。
这是最重要的一步,完成了这一步,基本的功能就实现了。
2、不要直接将元素挂载到document.body上面
因为document.body下面是<div id="root"></div>,如果document.body的内容变化了,app里面也会变化,造成不必要的重绘重排,这样会造成布局抖动、CSS层叠上下文混乱问题,同时body上面绑定了很多第三方库的事件,容易误触发。
所以一般都是在public/index.html里面,创建几个专门的portal容器用来使用。
xxxxxxxxxx101// public/index.html2<body>3 <noscript>You need to enable JavaScript to run this app.</noscript>4 <div id="root"></div>5 6 <!-- 专门给所有 Portal 用,永远只有一个! -->7 <div id="modal-root"></div> <!-- Modal/Drawer/Dialog -->8 <div id="tooltip-root"></div> <!-- 可选:Tooltip 单独一个,z-index 更高 -->9 <div id="toast-root"></div> <!-- 可选:Toast 单独一个,方便统一动画 -->10</body>然后在utils里面定义各种类型的portal组件,这样使用起来就很方便了:
xxxxxxxxxx171// utils/portal.tsx23const MODAL_ROOT = document.getElementById('modal-root')!;4const TOOLTIP_ROOT = document.getElementById('tooltip-root')!;5const TOAST_ROOT = document.getElementById('toast-root')!;67export const ModalPortal = ({ children }: { children: React.ReactNode }) => {8 return createPortal(children, MODAL_ROOT);9}1011export const PopoverPortal = ({ children }: { children: React.ReactNode }) => {12 return createPortal(children, TOOLTIP_ROOT);13}14 15export const ToastPortal = ({ children }: { children: React.ReactNode }) => {16 return createPortal(children, TOAST_ROOT);17}3、事件冒泡
portal 内部的事件仍然会像正常 React 组件一样冒泡到 React 树中它们的父组件和祖先组件,即使 DOM 节点在物理上很远。所以如果在portal里面定义了一个onClick事件,则需要使用e.stopPropagation()来阻止事件冒泡。
8 - table + pagination
一个参考案例
有一个很好的table案例,https://github.com/sadmann7/tablecn,如果不能直接使用,那么可以仿照写。这个案例也是使用tanstack/table来做的。代码在code文件夹里面,可以看到,还是非常复杂的。因为作者使用nextjs创建的项目,所以这个table是可以用在server component里面的,这就非常高级了。
这里的pagination和搜索使用到了nuqs这个库,useQueryState这个hook,将搜索条件和pagination相关参数放到了url上,然后从url上获取参数,然后触发更新。
这个案例是很复杂的,搞清楚了之后可以分享出来。
简单案例的实现步骤
table好做,直接照抄即可,tanstack/table里面第一个案例就做出来了:
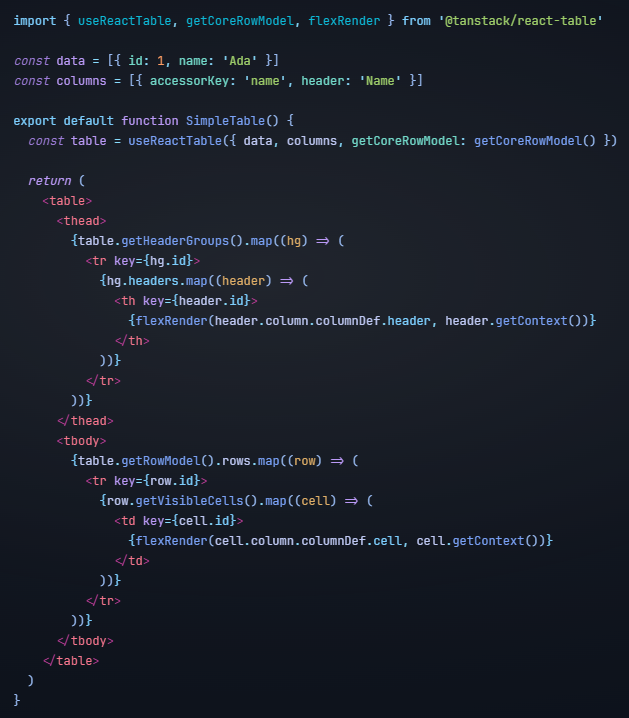
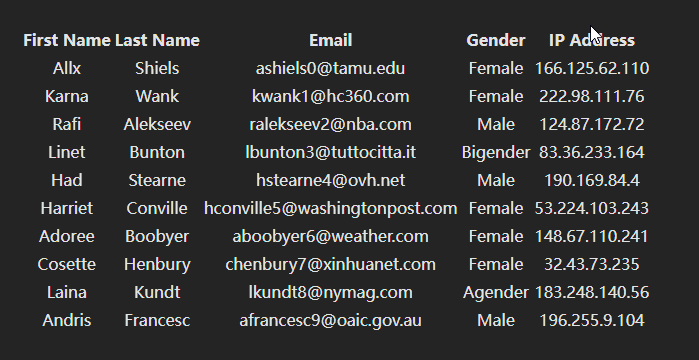
生成的表格是没有样式的,还需要自己加样式:
困难的是pagination应该怎么做?
TanStack Table 的分页功能分为两种主要模式:客户端分页 和 服务端分页。 你现在的项目用的是服务端分页(manualPagination: true),这也是实际项目中最常用的方式。下面用最直白的语言解释它的实现原理。核心概念:
表格自己不存数据 TanStack Table 只是一个“渲染引擎”,它不负责存数据,也不自己切页。 它只负责:
- 根据你给它的 data(当前页的数据)来渲染表格
- 根据你给它的 pageCount(总页数)来显示分页控件
- 当用户点“下一页”时,它会调用 onPaginationChange 通知你
分页状态由你自己管理 你需要用 React 的 state 来记录当前是第几页、每页几条:
xxxxxxxxxx41const [pagination, setPagination] = useState({2pageIndex: 0, // 当前页,从 0 开始3pageSize: 10 // 每页显示几条4})点击翻页 → 触发 state 变化 → 重新请求数据
当用户点“下一页”时发生的事:
- 用户点击 → table.nextPage() 被调用
- table 内部把 pageIndex +1
- 调用 onPaginationChange(你设置的 setPagination)
- state 更新 → React 重新渲染组件
- useQuery 发现 queryKey 变了(因为包含了 pageIndex),自动重新请求后端
- 后端返回新的那一页数据 → 表格显示新内容
流程图(文字版):
xxxxxxxxxx131用户点下一页2↓3table.nextPage()4↓5触发onPaginationChange → table内部setPagination(prev => prev + 1)6↓7React re-render8↓9useQuery 检测到 queryKey 变了(['skaters', search, {pageIndex:1, pageSize:10}])10↓11重新发请求 → http://localhost:3001/api/skaters?page=1&limit=1012↓13拿到新数据 → data.data 变成新的 10 条 → 表格更新
代码中关键的几行
xxxxxxxxxx201// 1. 分页状态2const [pagination, setPagination] = useState({ pageIndex: 0, pageSize: 10 });34// 2. 告诉 Table:我们自己管理分页(手动模式)5const table = useReactTable({6 data: data?.data ?? [], // 只渲染当前页的数据7 pageCount: data?.pageCount ?? -1, // 总页数从后端来(-1表示未知)8 state: {9 pagination, // 传入当前分页状态10 },11 onPaginationChange: setPagination, // 当用户翻页时,Table会调用这个更新状态12 manualPagination: true, // 重要!告诉 Table:分页不是我管的13 // ...14});1516// 3. useQuery 监听分页变化17useQuery({18 queryKey: ['skaters', search, pagination], // pagination 变 → 自动重新请求19 queryFn: () => fetchSkaters(/* 用 pagination.pageIndex +1 去请求 */),20});客户端分页 vs 服务端分页 对比(快速记忆)
| 特性 | 客户端分页 (manualPagination: false) | 服务端分页 (manualPagination: true) |
|---|---|---|
| 数据从哪来 | 一次性把所有数据拿回来 | 每次只拿当前页的数据 |
| 适合场景 | 数据量很小(<1000条) | 数据量大、需要搜索、排序 |
| 性能 | 前端压力大,首次加载慢 | 后端承担分页逻辑,响应更快 |
| 实现难度 | 简单,Table 自动处理 | 需要自己管理 pageIndex 和请求 |
| 你现在用的 | 否 | 是(推荐) |
总结一句话“分页本质上就是:用户点翻页 → 更新 pageIndex → 带着新的页码重新请求后端 → 把后端返回的新数据塞给表格渲染” TanStack Table 只负责“通知你”和“渲染当前页”,真正的分页逻辑(切哪一页、请求哪一页)是你自己通过 state + useQuery 完成的。
看了案例之后,我发现不管是分页还是搜索,都是通过
useQuery里面的queryKey来触发的。将pageNum、pageSize、keyword、各种搜索词这些状态放进queryKey里面去,当这些状态变化的时候,就会触发请求数据。所以说react query真的解决了问题。
简单案例代码
就是code/real-project里面的TablePagination组件。这里就不粘贴了,代码还是比较多的。
简单案例的问题点
翻页时页面闪动
主要原因通常有 3 个:
- 数据请求期间,data 变为 undefined 或 null,表格瞬间渲染空数组 → 内容消失
- keepPreviousData 没开,导致旧数据被清空,新数据还没回来
- 组件重新渲染时,表格高度/布局跳动
第1和3都是写一些HTML+CSS,针对第二个,需要配置useQuery里面的placeholderData: keepPreviousData,在新数据回来前,保留旧数据,这样就不会在翻页的时候清空数据,新数据返回后重新渲染数据,造成很突兀的闪动情况。
同时也可以配置useQuery里面的gcTime和staleTime,让缓存数据存在的时间更长一些,显示起来就很快。
搜索框输入一个字母就会触发更新
①加防抖,编写一个防抖的hook。
xxxxxxxxxx171// 1. 引入 useDebounce(自己写一个简单 hook 就行)2import { useState, useEffect } from 'react';34// 防抖 hook5function useDebounce(value: string, delay: number = 400) {6 const [debouncedValue, setDebouncedValue] = useState(value);78 useEffect(() => {9 const timer = setTimeout(() => {10 setDebouncedValue(value);11 }, delay);1213 return () => clearTimeout(timer);14 }, [value, delay]);1516 return debouncedValue;17}②使用防抖hook新建一个变量,这个变量改变了才触发更新。
xxxxxxxxxx251// 2. 在组件中使用2const [search, setSearch] = useState('');3const debouncedSearch = useDebounce(search, 400); // 400ms 后才更新45// useQuery 用 debouncedSearch6useQuery({7 queryKey: ['skaters', debouncedSearch, pagination.pageIndex, pagination.pageSize],8 queryFn: () => fetchSkaters({9 search: debouncedSearch, // 用防抖后的值10 // ...11 }),12 placeholderData: keepPreviousData,13 // ...14});1516// input 还是用原来的 search17<input18 type="text"19 value={search}20 onChange={(e) => {21 setSearch(e.target.value);22 setPagination(prev => ({ prev, pageIndex: 0 })); // 也可以移到 debounced 里23 }}24 placeholder="搜索姓名 / 邮箱..."25/>搜索框输入后,无法获取到最新的输入结果,造成返回结果不正确
这个其实是我的问题,因为上一个问题中,useQuery的queryKey里面的search要改为debouncedSearch,我没有改,所以造成这个问题。改了之后就好了。
固定列宽
①在列定义中指定宽度
首先,在你的 columns 配置中为特定列添加 size 属性。TanStack Table 默认的 size 值是 150。
xxxxxxxxxx251const columns: ColumnDef<Skater>[] = [2 { 3 accessorKey: "order", 4 header: "排序", 5 size: 60, // 设置宽度6 enableSorting: true 7 },8 { 9 accessorKey: "name", 10 header: "姓名", 11 size: 150, 12 },13 { 14 accessorKey: "email", 15 header: "邮箱", 16 size: 250, // 邮箱通常比较长,给大一点17 },18 // ... 其他列19 {20 id: "actions",21 header: "操作",22 size: 120, // 固定操作列宽度23 cell: ({ row }) => ( )24 },25];②在渲染时应用样式 (Tailwind)
TanStack Table 本身不负责渲染样式,你需要手动将 size 应用到 th 和 td 上。为了确保宽度严格固定,建议使用 table-fixed 布局。
- 修改表格标签:
给 table 加上 table-fixed 类。这会告诉浏览器不要根据内容自动撑开列宽,而是遵循你设置的宽度。
xxxxxxxxxx11<table className="min-w-full divide-y divide-gray-200 table-fixed">- 修改单元格渲染:
在渲染 th 和 td 时,直接通过内联样式设置宽度:
xxxxxxxxxx171{/* 在 thead 的 th 中 */}2<th3 key={header.id}4 style={{ width: `${header.getSize()}px` }} // 获取上面定义的 size5 className="px-6 py-4 text-left ..."6>7 {/* ... */}8</th>910{/* 在 tbody 的 td 中 */}11<td12 key={cell.id}13 style={{ width: `${cell.column.getSize()}px` }} // 获取上面定义的 size14 className="px-6 py-4 whitespace-nowrap text-sm"15>16 {flexRender(cell.column.columnDef.cell, cell.getContext())}17</td>注意:
如果width不起作用,那么添加
min-width或者max-width,或者二者都添加。
溢出显示...,并且可以鼠标悬浮显示全部信息
①封装 OverflowTooltip 组件
这个组件会自动判断子元素是否溢出。如果是,则展示 Tooltip;如果不是,则只渲染原始文本。使用了shadcn的Tooltip组件。
xxxxxxxxxx491import React, { useRef, useState } from "react"2import {3 Tooltip,4 TooltipContent,5 TooltipProvider,6 TooltipTrigger,7} from "@/components/ui/tooltip" // 确保路径正确89interface OverflowTooltipProps {10 content: string11 children?: React.ReactNode12}1314export const OverflowTooltip = ({ content }: OverflowTooltipProps) => {15 const [isOpen, setIsOpen] = useState(false)16 const [isOverflowing, setIsOverflowing] = useState(false)17 const textRef = useRef<HTMLDivElement>(null)1819 const checkOverflow = () => {20 const element = textRef.current21 if (element) {22 // 判断内容宽度是否超过容器宽度23 const overflowing = element.scrollWidth > element.clientWidth24 setIsOverflowing(overflowing)25 }26 }2728 return (29 <TooltipProvider>30 <Tooltip 31 open={isOpen && isOverflowing} 32 onOpenChange={(open) => setIsOpen(open)}33 >34 <TooltipTrigger asChild>35 <div36 ref={textRef}37 onMouseEnter={checkOverflow}38 className="truncate w-full cursor-default"39 >40 {content}41 </div>42 </TooltipTrigger>43 <TooltipContent side="top" className="max-w-[300px] break-all">44 <p>{content}</p>45 </TooltipContent>46 </Tooltip>47 </TooltipProvider>48 )49}②在 TanStack Table 的 columns 中应用
你可以直接在列定义的 cell 函数中使用该组件:
xxxxxxxxxx211const columns: ColumnDef<Skater>[] = [2 // ... 其他列3 {4 accessorKey: "email",5 header: "邮箱",6 size: 220, // 这里的宽度必须配合 table-fixed 才能触发溢出7 cell: ({ getValue }) => {8 const email = getValue() as string9 return <OverflowTooltip content={email} />10 },11 },12 {13 accessorKey: "name",14 header: "姓名",15 size: 150,16 cell: ({ getValue }) => {17 const name = getValue() as string18 return <OverflowTooltip content={name} />19 },20 },21]③关键 CSS 配合(提醒)
为了确保溢出检测(scrollWidth > clientWidth)准确生效,请务必检查以下两点:
- 表格布局:在
<table>标签上必须有table-fixed。 - 单元格宽度:在
td渲染时,需要显式设置宽度:
xxxxxxxxxx71<td2 key={cell.id}3 style={{ width: `${cell.column.getSize()}px` }} // 必须有固定宽度4 className="px-6 py-4"5>6 {flexRender(cell.column.columnDef.cell, cell.getContext())}7</td>table和pagination单独抽离成组件