说不定面试的时候,会给一个codesandbox的项目,让你现场编程。这是很有可能的。
代码在https://stackblitz.com/这个网站的Components项目里面,这个网站比code sandbox要好一些。
- stackblitz,最好是使用无痕浏览模式打开,避免浏览器缓存的影响。
- 我引入tailwindcss之后,新增一个组件之后,要重启服务器,否则样式不生效。甚至有可能新增了一个tailwindcss样式之后,都要重启服务器,否则不生效。
1、react folder structure
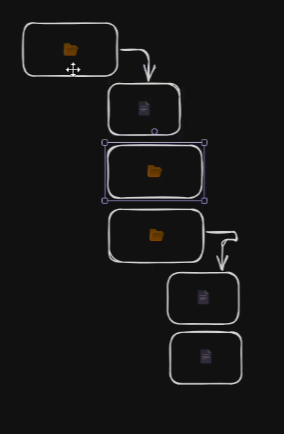
1、只有一个顶层文件夹,文件夹里面可以有文件夹或者文件。那么就有两种数据类型的node,leaf或者branch,使用isFolder属性来区分。
xxxxxxxxxx// src/folder.tsexport const folders = { name: "root", isFolder: true, children: [ { name: "src", isFolder: true, children: [ { name: "components", isFolder: true, children: [ { name: "Header.js", isFolder: false, }, { name: "Footer.js", isFolder: false, }, ], }, { name: "App.js", isFolder: false, }, { name: "index.js", isFolder: false, }, ], }, { name: "public", isFolder: true, children: [ { name: "index.html", isFolder: false, }, ], }, ],};2、use recursive,递归组件,同一个组件 FolderStruc 渲染自己的子节点,实现树形结构。
xxxxxxxxxx// src/FolderStructure.tsximport { useState } from "react";interface Data { name: string; isFolder: boolean; children?: Data[];}interface FolderStrucProps { data: Data;}const FolderStruc = ({ data }: FolderStrucProps) => { const { isFolder, children } = data; const [folderOpen, setFolderOpen] = useState<boolean>(true); const toggleFolderOpen = () => { setFolderOpen((prev) => !prev); }; // if it's file if (!isFolder) return <div className="file">📄{data.name}</div>; // if it's folder return ( <div className="folder"> <div className="folderName"> <span onClick={toggleFolderOpen}> {folderOpen ? <span>📂</span> : <span>📁</span>} {data.name} </span> </div> {folderOpen && children && children.map((folder, index) => ( <FolderStruc data={folder} key={index} /> ))} </div> );};export default FolderStruc;其实我有一点是很担心的,我害怕递归层级多了,里面定义的const [folderOpen, setFolderOpen] = useState<boolean>(true);会有很多,会不会影响性能?react能够很好的处理吗?
useState本身的定义数量几乎不影响性能,真正的性能杀手是“状态更新导致的组件树大面积重绘”。我们可以从以下几个维度来深入分析:
- 变量定义的内存开销:微乎其微
在 JavaScript 中,定义几十个甚至上百个
useState变量,占用的内存非常小。React 内部通过一个链表(Linked List)来管理这些 Hook,只要你的组件逻辑清晰,定义多个变量本身不会让页面变慢。
- 状态更新的范围:才是关键
如果你把所有文件夹的状态都放在父组件的一个大对象(比如
allFoldersState)里,那么:
- 问题:哪怕你只打开一个子文件夹,整个巨大的文件夹树组件都会触发
render。- 后果:React 需要重新计算成千上万个虚拟 DOM 节点,这才会导致明显的卡顿。
- 你的方案:局部化状态 (State Colocation)
像你提到的,在每个
Folder组件内部定义folderOpen:
- 优势:当一个文件夹被打开时,只有当前的
Folder组件及其子组件会重新渲染。- 结果:渲染范围被精确控制在局部。即使有 10,000 个文件夹,点击其中一个也只影响那一小块 DOM。这反而是性能最优的做法。
Having multiple
useStatecalls in a component is generally fine because React handles Hook management very efficiently. The real performance concern isn't the number of state variables, but the scope of re-renders. (在组件里写多个useState没问题,因为 React 管理 Hook 的效率很高。真正的性能担忧不是变量的数量,而是重新渲染的范围。)By keeping the
folderOpenstate local to eachFoldercomponent (State Colocation), we ensure that an update only triggers a re-render of that specific branch, rather than the entire tree. This is actually a standard performance best practice. (通过把folderOpen状态留在每个 Folder 组件内部,我们确保了更新只触发该分支的重绘,而不是整棵树。这实际上是标准的性能优化最佳实践。)
进一步优化的思路:
A. 记忆化 (Memoization)
确保你的文件夹项使用了
React.memo。xxxxxxxxxxconst FolderItem = React.memo(({ name, isOpen, }) => {// 只有 props 变化时才会重新渲染});B. 虚拟滚动 (Virtualization)
如果文件夹列表有数千行,无论你怎么优化
useState,DOM 节点的数量都会拖慢浏览器。
- 对策:使用
react-window或react-virtuoso,只渲染用户屏幕可见的那些文件夹行。C. 原子化状态库 (Optional)
如果文件夹之间有复杂的联动(比如点击 A 自动关闭 B),导致状态不得不频繁在父子间传递:
- 对策:考虑使用 Zustand。它们可以实现“按需订阅”,即使状态在顶层,更新时也只让对应的那个小组件重新渲染。
3、编写一点CSS
xxxxxxxxxx.folder { text-align: left; margin-left: 24px; border-left: 1px solid gray;}.folderName { cursor: pointer;}.file { margin-left: 24px;}4、在App.tsx中引入
xxxxxxxxxx// App.tsximport "./App.css";import { folders } from "./folders";import FolderStruc from "./FolderStructure";function App() { return ( <> <FolderStruc data={folders} /> </> );}export default App;效果:
这个例子有点让我眼前一亮,为什么呢?因为margin-left的间距,我只需要设置.folder的就行了,就可以形成树形结构的效果。记得我修改element-ui树形结构样式的时候,是很麻烦的,要找到哪一个children、哪一个样式名,这个就很简单。
小结:
其实这个组件并不难,主要就是组件的递归。更加复杂的,像树形结构前面加上checkbox、加上intermediate状态、子级选满之后父级自动选中,这些才是困难的,有时间就做一下。
2、react folder structure + 路径展开法
“路径展开法”(Path-based approach 或 Flattened Tree Structure)在处理深层嵌套或超大型树形结构时,通常比“递归嵌套法”更具工程优势。
什么是路径展开法?
不再使用 children: [...] 这种嵌套对象,而是将数据打平为一个数组,每个节点记录自己的 id、parentId 或 path(例如 /root/folder1/file.txt)。
特点:
- 数据平铺化 (Data Flattening)
Logic: Instead of keeping the tree structure, we convert it into a simple array where each item knows its path and depth.
逻辑: 我们不再保留嵌套的树结构,而是将其转换为一个简单的数组,每个元素都记录了自己的“路径”和“深度”。
- Benefit (好处): It simplifies rendering. React doesn't have to recurse deeply; it just maps over a flat list.
- 好处: 简化了渲染。React 不需要深层递归,只需要遍历一个平铺的列表。
- 状态提升与中心化 (Lifting State Up)
Logic: We moved the folderOpen state from individual child components to a single expandedIds Set in the parent.
逻辑: 我们把原本分散在每个子组件里的 folderOpen 状态,统一提取到了父组件的一个 expandedIds(集合)中。
- Benefit (好处): This is the Source of Truth. It makes it incredibly easy to implement global actions like "Expand All" or "Collapse All."
- 好处: 这是唯一事实来源。这让实现“一键展开”或“一键折叠”等全局操作变得异常简单。
- 动态可见性计算 (Dynamic Visibility Calculation)
Logic: We use a .filter() method to decide which nodes should be rendered on the screen.
逻辑: 我们使用 .filter() 方法来决定哪些节点应该显示在屏幕上。
- The Rule (规则): A node is visible only if its parent’s path exists in the
expandedIdsset. - 规则: 只有当一个节点的父级路径存在于“已展开集合”中时,该节点才可见。
- Performance (性能): Filtering an array is much faster than mounting/unmounting thousands of recursive React components.
- 性能: 过滤数组的速度远快于挂载或卸载成千上万个递归的 React 组件。
- 样式缩进 (Styling with Depth)
Logic: Instead of nesting HTML tags, we use the depth property to apply padding-left.
逻辑: 我们不再使用 HTML 标签的层层嵌套,而是利用 depth 属性来应用左侧内边距。
- Benefit (好处): This keeps the DOM tree shallow, which is better for the browser’s layout engine.
- 好处: 这保持了 DOM 树的扁平化,对浏览器的布局引擎(Layout Engine)更友好。
| Feature (特性) | Recursive Approach (递归法) | Flattened Approach (平铺法) |
|---|---|---|
| Complexity | Simple for small trees | Better for large, complex trees |
| Rendering | Deep recursion (Slow) | Flat iteration (Fast) |
| Virtualization | Impossible | Easy (Ready for react-window) |
| State | Distributed (Hard to sync) | Centralized (Easy to manage) |
By shifting from a recursive structure to a flattened data model, we treat the tree as a list. This allows us to use State Colocation for better management and prepares the component for Virtualization, ensuring O(1) or O(n) performance even with massive datasets.
(通过从递归结构转向平铺数据模型,我们将树视为列表。这使我们能够更好地管理状态,并为虚拟化渲染做好准备,确保即使面对海量数据也能保持极高性能。)
代码实现:
- 将树形结构扁平化
不管是前端处理还是后端处理,需要将树形结构扁平化。
xxxxxxxxxxexport const flattenFolders = (node, path = "root", depth = 0) => { let result = []; // 将当前节点推入数组 result.push({ id: path, name: node.name, isFolder: node.isFolder, depth: depth, }); // 如果是文件夹且有子节点,递归打平 if (node.isFolder && node.children) { node.children.forEach((child) => { result = result.concat( flattenFolders(child, `${path}/${child.name}`, depth + 1) ); }); } return result;};- 编写组件
在这个实现中,我们只需要维护一个 expandedIds 的 Set 来管理哪些路径是展开的。
xxxxxxxxxximport React, { useState, useMemo } from 'react';const FileExplorer = ({ data }) => { // 打平数据(通常在渲染外或通过 useMemo 处理) const allNodes = useMemo(() => flattenFolders(data), [data]); // 记录展开的节点 ID (path) const [expandedIds, setExpandedIds] = useState(new Set(["root"])); const toggleFolder = (id) => { const newExpanded = new Set(expandedIds); if (newExpanded.has(id)) { newExpanded.delete(id); } else { newExpanded.add(id); } setExpandedIds(newExpanded); }; // 关键:计算当前哪些节点应该被显示 // 只有父节点在 expandedIds 中的节点才显示 const visibleNodes = allNodes.filter((node) => { if (node.id === "root") return true; const pathParts = node.id.split("/"); // 例如 ["root", "src", "components"] pathParts.pop(); // 移除当前节点,剩下父级链 ["root", "src"] // 关键:检查路径上的每一个祖先是否都在展开列表中 let currentPath = ""; for (const part of pathParts) { currentPath = currentPath ? `${currentPath}/${part}` : part; if (!expandedIds.has(currentPath)) { return false; // 只要中间有一个断了,后续全部不显示 } } return true; }); return ( <div style={{ fontFamily: 'monospace', cursor: 'pointer' }}> {visibleNodes.map((node) => ( <div key={node.id} onClick={() => node.isFolder && toggleFolder(node.id)} style={{ paddingLeft: `${node.depth * 20}px`, // 使用 depth 控制缩进 display: 'flex', alignItems: 'center', height: '24px' }} > <span> {node.isFolder ? (expandedIds.has(node.id) ? "📂 " : "📁 ") : "📄 "} {node.name} </span> </div> ))} </div> );};效果:
3、OTP input
什么是OTP input?就是你在键盘上直接输入6位验证码,不用手动聚焦输入框,一个输入框输入完成之后,就会自动聚焦到下一个输入框。
有几点需要考虑:
- 每个输入框只能输入一个数字。
- 当一个输入框输入之后,focus应该自动跳转到下一个输入框。
- 用户可以使用backspace清除一个输入框的内容;如果这个输入框本身没有内容,那么focus应该自动跳转到前一个输入框。
1、根据需求,渲染出几个输入框:
xxxxxxxxxx// src/OTPInput.tsximport { useRef, useState } from "react";// 需要的输入框个数interface OTPInputProps { length?: number;}export const OTPInput = ({ length = 6 }: OTPInputProps) => { // 使用数组来创建状态 const [otp, setOtp] = useState<string[]>(Array(length).fill("")); // 使用 useRef 来操作具体的input框 const inputRefs = useRef<Array<HTMLInputElement | null>>([]); return ( <div style={{ display: "flex", gap: "8px" }}> {otp.map((value, index) => ( <input type="text" ref={(e) => (inputRefs.current[index] = e)} style={{ width: "50px", height: "50px", textAlign: "center" }} /> ))} </div> );};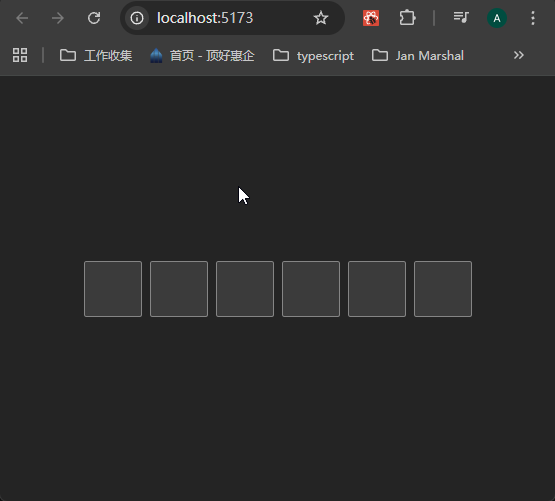
2、开始处理上面提出的几个需要考虑的点。
①将input变为受控组件。完成第1和2点:
xxxxxxxxxx// src/OPTInput.tsximport { useRef, useState } from "react";// 需要的输入框个数interface OTPInputProps { length?: number;}export const OTPInput = ({ length = 6 }: OTPInputProps) => { // 使用数组来创建状态 const [otp, setOtp] = useState<string[]>(Array(length).fill("")); // 使用 useRef 来操作具体的input框 const inputRefs = useRef<Array<HTMLInputElement | null>>([]); const focusInput = (index: number) => { const input = inputRefs.current[index]; if (input) input.focus(); }; const handleChange = ( e: React.ChangeEvent<HTMLInputElement>, index: number ) => { const val = e.target.value; if (!/^\d$/.test(val)) return; // 设置值,这里可以使用map方法来setOtp,但是后面需要用到新值,所以这里直接处理了 const newOtp = [otp]; newOtp[index] = val; setOtp(newOtp); // 将焦点跳转到下一个input if (val && index < length - 1) { focusInput(index + 1); } // 如果每个输入框里面都有值,那么就可以执行submit或其他事件了 if (newOtp.every((digit) => digit !== "")) { // you can submit or other operation } }; return ( <div style={{ display: "flex", gap: "8px" }}> {otp.map((value, index) => ( <input type="text" value={value} onChange={(e) => handleChange(e, index)} maxLength={1} ref={(e) => (inputRefs.current[index] = e)} style={{ width: "50px", height: "50px", textAlign: "center" }} /> ))} </div> );};效果:
②完成backspace删除(使用keydown事件)
xxxxxxxxxx// src/OPTInput.tsximport React, { useRef, useState } from "react";// 需要的输入框个数interface OTPInputProps { length?: number;}export const OTPInput = ({ length = 6 }: OTPInputProps) => { // 使用数组来创建状态 const [otp, setOtp] = useState<string[]>(Array(length).fill("")); // 使用 useRef 来操作具体的input框 const inputRefs = useRef<Array<HTMLInputElement | null>>([]); const focusInput = (index: number) => { const input = inputRefs.current[index]; if (input) input.focus(); }; const handleChange = ( e: React.ChangeEvent<HTMLInputElement>, index: number ) => { const val = e.target.value; if (!/^\d$/.test(val)) return; const newOtp = [otp]; newOtp[index] = val; setOtp(newOtp); if (val && index < length - 1) { focusInput(index + 1); } if (newOtp.every((digit) => digit !== "")) { // } }; const handleKeyDown = ( e: React.KeyboardEvent<HTMLInputElement>, index: number ) => { if (e.key === "Backspace") { const newOtp = [otp]; // 如果当前输入框有值,就清空 if (otp[index]) { newOtp[index] = ""; setOtp(newOtp); } else { // 如果没有值,并且index>0,那么焦点就跳转到前一个Input里面,并清除内容 if (index > 0) { newOtp[index - 1] = ""; setOtp(newOtp); focusInput(index - 1); } } // 如果用户按左右箭头键,那么焦点就左右移动 } else if (e.key === "ArrowLeft" && index > 0) { focusInput(index - 1); } else if (e.key === "ArrowRight" && index < length - 1) { focusInput(index + 1); } }; return ( <div style={{ display: "flex", gap: "8px" }}> {otp.map((value, index) => ( <input type="text" value={value} onChange={(e) => handleChange(e, index)} maxLength={1} onKeyDown={(e) => handleKeyDown(e, index)} ref={(e) => (inputRefs.current[index] = e)} style={{ width: "50px", height: "50px", textAlign: "center" }} /> ))} </div> );};可以看到,我按键操作情况。
③处理用户直接粘贴的事件,使用div上面的onPaste事件,几乎所有HTML的可交互元素,都有这个事件。
xxxxxxxxxx// src/OPTInput.tsximport React, { useRef, useState } from "react";// 需要的输入框个数interface OTPInputProps { length?: number;}export const OTPInput = ({ length = 6 }: OTPInputProps) => { // 使用数组来创建状态 const [otp, setOtp] = useState<string[]>(Array(length).fill("")); // 使用 useRef 来操作具体的input框 const inputRefs = useRef<Array<HTMLInputElement | null>>([]); const focusInput = (index: number) => { const input = inputRefs.current[index]; if (input) input.focus(); }; // submit操作 const onSubmit = (arr: string[]) => { alert("You have entered " + arr.join("")); }; const handleChange = ( e: React.ChangeEvent<HTMLInputElement>, index: number ) => { const val = e.target.value; if (!/^\d$/.test(val)) return; // 设置值,这里可以使用map方法来setOtp,但是后面需要用到新值,所以这里直接处理了 const newOtp = [otp]; newOtp[index] = val; setOtp(newOtp); // 将焦点跳转到下一个input if (val && index < length - 1) { focusInput(index + 1); } // 如果每个输入框里面都有值,那么就可以执行submit或其他事件了 if (newOtp.every((digit) => digit !== "")) { // you can submit or other operation } }; const handleKeyDown = ( e: React.KeyboardEvent<HTMLInputElement>, index: number ) => { if (e.key === "Backspace") { const newOtp = [otp]; // 如果当前输入框有值,就清空 if (otp[index]) { newOtp[index] = ""; setOtp(newOtp); } else { console.log("执行了"); // 如果没有值,并且index>0,那么焦点就跳转到前一个Input里面 if (index > 0) { newOtp[index - 1] = ""; setOtp(newOtp); focusInput(index - 1); } } // 如果用户按左右箭头键,那么焦点就左右移动 } else if (e.key === "ArrowLeft" && index > 0) { focusInput(index - 1); } else if (e.key === "ArrowRight" && index < length - 1) { focusInput(index + 1); } }; const handlePaste = (e: ClipboardEvent) => { const pasteContent = e?.clipboardData?.getData("text") ?? ""; // 检查粘贴内容是否是数字 if (!/^\d+/.test(pasteContent)) return; // split之后,只取length长度,超过的不用管 const pasteArr = pasteContent.split("").slice(0, length); const newOtp = [otp]; // 赋值 pasteArr.forEach((char, i) => { newOtp[i] = char; }); setOtp(newOtp); // 如果粘贴内容长度为length,那么焦点就在第length上面。如果小于length,那么就聚焦到length下一个输入框。 const nextIndex = pasteArr.length >= length ? length - 1 : pasteArr.length + 1; focusInput(nextIndex); // 如果粘贴长度为length,那么就可以处理submit if (pasteArr.length === length) { // submit setTimeout(() => { onSubmit(newOtp); }, 500); } e.preventDefault(); }; return ( <div style={{ display: "flex", gap: "8px", margin: "16px" }} onPaste={handlePaste}> {otp.map((value, index) => ( <input key={index} type="text" value={value} onChange={(e) => handleChange(e, index)} maxLength={1} onKeyDown={(e) => handleKeyDown(e, index)} ref={(e) => (inputRefs.current[index] = e)} style={{ width: "50px", height: "50px", textAlign: "center" }} /> ))} </div> );};效果:
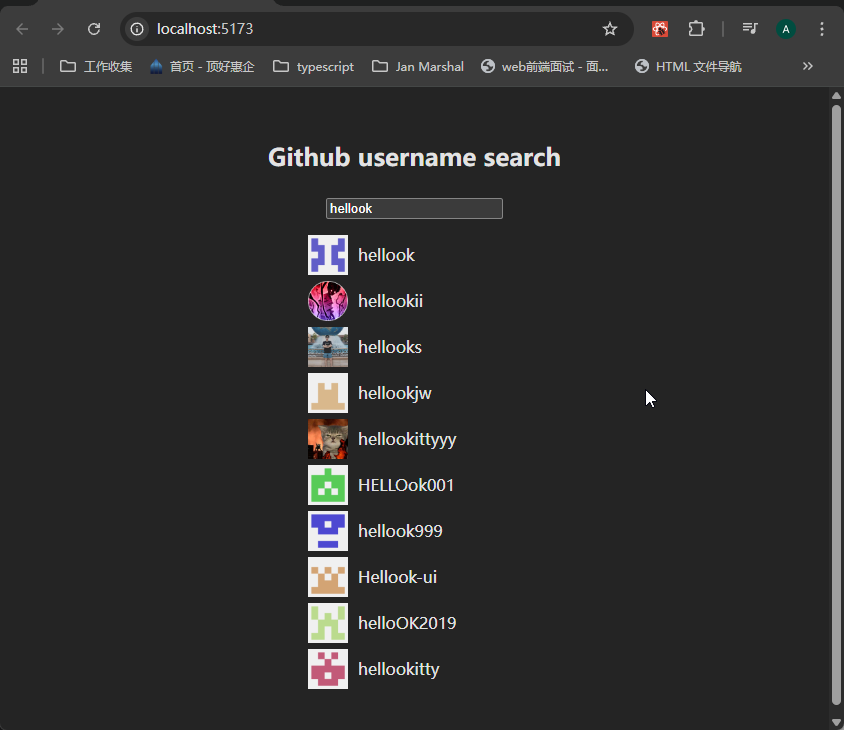
4、Autocomplete Search Bar
需求:
- fetch github names when people type in
- store last 10 searched users in the local storage
- display the suggestions in the drop-down
- user friendly
1、先完成基本的搜索框UI,然后请求数据,同时添加防抖
xxxxxxxxxx// src/Autocomplete.tsximport { useRef, useState } from "react";interface GithubUser { login: string; avatar_url: string;}const GITHUB_URL = `https://api.github.com/search/users?q=`;export const Autocomplete = () => { const [query, setQuery] = useState(""); const [results, setResults] = useState<GithubUser[]>([]); const timeoutRef = useRef<number | null>(null); const fetchUsers = async (q: string) => { const data = await fetch(GITHUB_URL + q); const res = await data.json(); // 不需要展示所有结果,只需要展示10个。为什么呢?因为你看google搜索栏的提示,也是只展示10个,随着用户输入的越来越详细,出来的结果也就越准确了,所以根本没有必要展示很多个。 setResults((res?.items ?? []).slice(0, 10) ?? []); }; const handleChange = (e: React.ChangeEvent<HTMLInputElement>) => { const value = e.target.value; setQuery(value); if (timeoutRef.current) clearTimeout(timeoutRef.current); timeoutRef.current = setTimeout(() => { // 如果输入了三个及以上的字符,就请求接口,否则清空results if (value.length > 2) { fetchUsers(value); } else { setResults([]); } }, 500); }; console.log({ results }); return ( <div className="autocomplete-container"> <h2 className="autocomplete-title">Github username search</h2> <input type="text" className="autocomplete-input" placeholder="Search your username" value={query} onChange={handleChange} /> </div> );};这样可以看到请求数据成功了,同时加上了防抖:
2、将results渲染到页面上,注意写法,results.length > 0 &&只有results有数据时,才展示。
xxxxxxxxxximport { useRef, useState } from "react";interface GithubUser { login: string; avatar_url: string;}const GITHUB_URL = `https://api.github.com/search/users?q=`;export const Autocomplete = () => { const [query, setQuery] = useState(""); const [results, setResults] = useState<GithubUser[]>([]); const timeoutRef = useRef<number | null>(null); const fetchUsers = async (q: string) => { const data = await fetch(GITHUB_URL + q); const res = await data.json(); // 不需要展示所有结果,只需要展示10个。为什么呢?因为你看google搜索栏的提示,也是只展示10个,随着用户输入的越来越详细,出来的结果也就越准确了,所以根本没有必要展示很多个。 setResults((res?.items ?? []).slice(0, 10) ?? []); }; const handleChange = (e: React.ChangeEvent<HTMLInputElement>) => { const value = e.target.value; setQuery(value); if (timeoutRef.current) clearTimeout(timeoutRef.current); timeoutRef.current = setTimeout(() => { // 如果输入了三个及以上的字符,就请求接口,否则清空results if (value.length > 2) { fetchUsers(value); } else { setResults([]); } }, 500); }; console.log({ results }); return ( <div className="autocomplete-container"> <h2 className="autocomplete-title">Github username search</h2> <input type="text" className="autocomplete-input" placeholder="Search your username" value={query} onChange={handleChange} /> {results.length > 0 && ( <ul className="autocomplete-results"> {results.map((user) => ( <li key={user.login} className="autocomplete-result-item"> <img src={user.avatar_url} alt="user avatar" className="avatar" /> <span>{user.login}</span> </li> ))} </ul> )} </div> );};加一点样式就是这样的效果:
3、保存并展示之前搜索的最新的10个搜索词,点击这些搜索词可以直接搜索。
这10个搜索词是怎么来的呢?是用户点击了某一个搜索词之后,就添加到搜索词集里面。
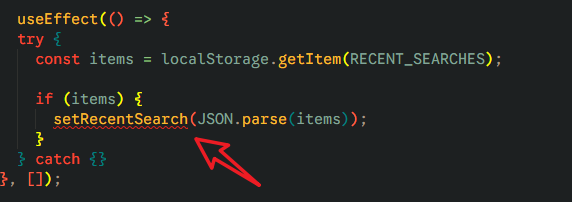
代码里面主要就是saveToLocal,handleSelect,recentSearch赋初始值和渲染。这里没有使用useEffect,稍后会解释。
xxxxxxxxxximport { useRef, useState } from "react";interface GithubUser { login: string; avatar_url: string;}const GITHUB_URL = `https://api.github.com/search/users?q=`;const RECENT_SEARCHES = "RECENT_SEARCHES";export const Autocomplete = () => { const [query, setQuery] = useState(""); const [results, setResults] = useState<GithubUser[]>([]); const [recentSearch, setRecentSearch] = useState<string[]>(() => { try { const item = localStorage.getItem(RECENT_SEARCHES); return item ? JSON.parse(item) : []; } catch { return []; } }); const timeoutRef = useRef<number | null>(null); const fetchUsers = async (q: string) => { const data = await fetch(GITHUB_URL + q); const res = await data.json(); // 不需要展示所有结果,只需要展示10个。为什么呢?因为你看google搜索栏的提示,也是只展示10个,随着用户输入的越来越详细,出来的结果也就越准确了,所以根本没有必要展示很多个。 setResults((res?.items ?? []).slice(0, 10) ?? []); }; const handleChange = (e: React.ChangeEvent<HTMLInputElement>) => { const value = e.target.value; setQuery(value); if (timeoutRef.current) clearTimeout(timeoutRef.current); timeoutRef.current = setTimeout(() => { // 如果输入了三个及以上的字符,就请求接口,否则清空results if (value.length > 2) { fetchUsers(value); } else { setResults([]); } }, 500); }; const saveToLocal = (username: string) => { // 去重 const updatedList = [ username, recentSearch.filter((item) => item !== username), ]; // 如果搜索词集里面超过10个,则pop if (updatedList.length > 10) { updatedList.pop(); } // 赋值 setRecentSearch(updatedList); // 存储到localStorage里面 localStorage.setItem(RECENT_SEARCHES, JSON.stringify(updatedList)); }; const handleSelect = (username: string) => { // 将username添加到搜索框里面去 setQuery(username); // 将results清空 setResults([]); // 添加到搜索词集里面去 saveToLocal(username); }; console.log({ results }); return ( <div className="autocomplete-container"> <h2 className="autocomplete-title">Github username search</h2> <input type="text" className="autocomplete-input" placeholder="Search your username" value={query} onChange={handleChange} /> {results.length > 0 && ( <ul className="autocomplete-results"> {results.map((user) => ( <li key={user.login} className="autocomplete-result-item" onClick={() => handleSelect(user.login)}> <img src={user.avatar_url} alt="user avatar" className="avatar" /> <span>{user.login}</span> </li> ))} </ul> )} {recentSearch.length > 0 && ( <div className="recent-searches"> <h3 className="recent-title">Recent Searches</h3> <ul className="recent-list"> {recentSearch.map((name) => ( <li key={name} className="recent-item" onClick={() => handleSelect(name)}> {name} </li> ))} </ul> </div> )} </div> );};可以看到,点击了某一项之后,就会添加到recent searches里面去;点击recent searches里面的某一项,就会赋值到搜索输入框。
4、user friendly
主要是编写样式。
xxxxxxxxxx.avatar { height: 40px; width: 40px;}.autocomplete-container { max-width: 400px; margin: 20px auto; padding: 16px; border: 1px solid gray; border-radius: 14px;}.autocomplete-input { min-width: 300px; width: 100%; box-sizing: border-box; border: 1px solid gray; padding: 10px; border-radius: 8px; position: relative; margin-bottom: 0;}.autocomplete-results { list-style: none; min-width: 300px; border-radius: 8px; position: absolute; bottom: 10; margin-top: 0; background-color: rgb(71, 68, 68); box-sizing: border-box; display: flex; flex-direction: column; gap: 6px; padding: 6px;}.autocomplete-result-item { box-sizing: border-box; padding: 5px; display: flex; justify-content: start; align-items: center; gap: 10px; cursor: pointer;}.autocomplete-result-item:hover { background-color: #3a3a3a;}.recent-list { list-style: none; display: flex; justify-content: start; align-items: center; flex-wrap: wrap; gap: 8px;}
小结:
主要使用了受控组件、防抖、localStorage这些技术,还有一些产品设计方面的知识。
编写疑问点:
useEffect,在写获取recentsearch数据的时候,
报错:Error: Calling setState synchronously within an effect can trigger cascading renders。意思是在useEffect里面使用useState可能会触发无限渲染。
xxxxxxxxxxuseEffect(() => {const saved = localStorage.getItem("RECENT_SEARCHES");if (saved) {setRecentSearch(JSON.parse(saved));}}, []);然后我使用了useState懒初始化。
xxxxxxxxxxconst [recentSearch, setRecentSearch] = useState<string[]>(() => {try {const item = localStorage.getItem(RECENT_SEARCHES);return item ? JSON.parse(item) : [];} catch {return [];}});这个方式在纯react项目里面是没有问题的,但是在nextjs项目中,会出现hydration mismatch的问题,原因是即使组件写了:
xxxxxxxxxx"use client";Next.js App Router 仍然会:
- 服务端先预渲染 HTML
- 浏览器下载 JS
- React Hydrate
服务端第一次渲染
服务器没有localStorage,所以会报错。
所以还是使用useEffect来从storage里面获取数据,虽然有报错,但这是合理的报错。
完整代码如下,我添加了tailwindcss,然后handleSelect的逻辑也优化了一下:
xxxxxxxxxx"use client";import Image from "next/image";import { useRef, useState, useEffect } from "react";interface GithubUser { login: string; avatar_url: string;}const GITHUB_URL = "https://api.github.com/search/users?q=";const RECENT_SEARCHES = "RECENT_SEARCHES";export default function AutoComplete() { const [query, setQuery] = useState(""); const [results, setResults] = useState<GithubUser[]>([]); const [recentSearch, setRecentSearch] = useState<string[]>([]); const timeoutRef = useRef<NodeJS.Timeout | null>(null); const fetchUsers = async (q: string) => { const data = await fetch(GITHUB_URL + q); const res = await data.json(); setResults((res?.items ?? []).slice(0, 10) ?? []); console.log(res?.items); }; const handleChange = (e: React.ChangeEvent<HTMLInputElement>) => { const value = e.target.value; setQuery(value); if (timeoutRef.current) clearTimeout(timeoutRef.current); timeoutRef.current = setTimeout(() => { if (value.length > 2) { fetchUsers(value); } else { setResults([]); } }, 500); }; const saveToLocal = (username: string) => { const updatedList = [ username, recentSearch.filter((item) => item !== username), ]; if (updatedList.length > 10) { updatedList.pop(); } setRecentSearch(updatedList); localStorage.setItem(RECENT_SEARCHES, JSON.stringify(updatedList)); }; const handleSelect = (username: string, type: "list" | "recent" = "list") => { setQuery(username); if (type === "list") { setResults([]); } else { if (timeoutRef.current) clearTimeout(timeoutRef.current); fetchUsers(username); } saveToLocal(username); }; useEffect(() => { try { const items = localStorage.getItem(RECENT_SEARCHES); if (items) { setRecentSearch(JSON.parse(items)); } } catch {} }, []); return ( <div className="flex flex-col justify-center p-8 border border-white rounded-2xl"> <h2 className="text-3xl mb-4">Github username search</h2> <div className="relative"> <input type="text" placeholder="Search your username" value={query} onChange={handleChange} className="w-full border border-white rounded-md px-4 py-2" /> {results.length > 0 && ( <ul className="absolute left-0 top-10 w-full bg-slate-800 rounded-lg p-2 flex flex-col space-y-2 mt-4"> {results.map((user) => ( <li key={user.login} className="flex justify-start items-center cursor-pointer p-2 rounded-md hover:bg-slate-600 duration-300" onClick={() => handleSelect(user.login)}> <Image src={user.avatar_url} alt="user avatar" width={30} height={30} className="rounded-full mr-2" /> <span>{user.login}</span> </li> ))} </ul> )} </div> {recentSearch.length > 0 && ( <div> <h3 className="text-center text-2xl my-4">Recent Searches</h3> <ul> {recentSearch.map((name) => ( <li key={name} className="cursor-pointer" onClick={() => handleSelect(name, "recent")}> {name} </li> ))} </ul> </div> )} </div> );}有了results之后,怎么使用上下方向键来选择result,然后使用enter键来触发handleSelect呢?
核心思路:
- 用一个 state 记录当前高亮项。键盘操作不需要和results框联系起来,因为键盘操作的时候,光标还在input里面,所以
onKeyDown事件需要绑定到input上。通过这个 state 来记录results里面的高亮状态。 这一点是最重要的。 - ArrowDown → 索引 +1
- ArrowUp → 索引 -1
- Enter → 触发当前项的 handleSelect
1. 新增 activeIndex
xxxxxxxxxxconst [activeIndex, setActiveIndex] = useState(-1);默认:
xxxxxxxxxx-1
表示当前没有选中任何项。
2. 当搜索结果变化时重置
xxxxxxxxxxconst fetchUsers = async (q: string) => { const data = await fetch(GITHUB_URL + q); const res = await data.json(); setResults((res?.items ?? []).slice(0, 10)); setActiveIndex(-1);};否则:
xxxxxxxxxx上一次选中了第5项新的搜索结果只有2项
索引会越界。
3. 处理键盘事件
给 input 添加:
xxxxxxxxxx<input ... onKeyDown={handleKeyDown}/>实现:
xxxxxxxxxxconst handleKeyDown = ( e: React.KeyboardEvent<HTMLInputElement>) => { if (!results.length) return; switch (e.key) { case "ArrowDown": e.preventDefault(); setActiveIndex((prev) => prev < results.length - 1 ? prev + 1 : 0 ); break; case "ArrowUp": e.preventDefault(); setActiveIndex((prev) => prev > 0 ? prev - 1 : results.length - 1 ); break; case "Enter": e.preventDefault(); if (activeIndex >= 0) { handleSelect(results[activeIndex].login); } break; }};4. 高亮当前项
原来:
xxxxxxxxxx<li className=" flex justify-start items-center cursor-pointer p-2 rounded-md hover:bg-slate-600 ">改成:
xxxxxxxxxx<li className={` flex justify-start items-center cursor-pointer p-2 rounded-md ${ activeIndex === index ? "bg-slate-600" : "hover:bg-slate-600" } `}>5. 添加 ARIA
很多高级前端面试官会问。
xxxxxxxxxx<input role="combobox" aria-expanded={results.length > 0} aria-activedescendant={ activeIndex >= 0 ? `option-${activeIndex}` : undefined }/><ul role="listbox"><li id={`option-${index}`} role="option" aria-selected={activeIndex === index}>这样屏幕阅读器也能正确朗读。
5、Build infinite nested comments system
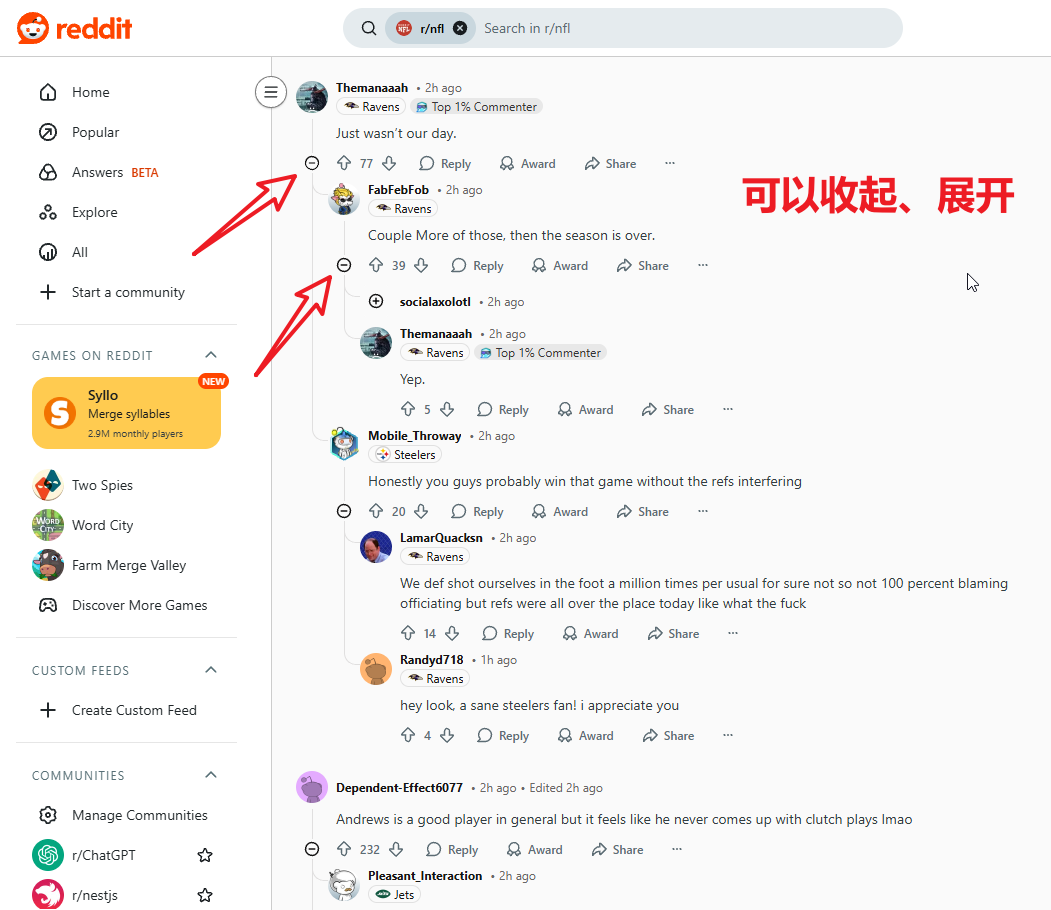
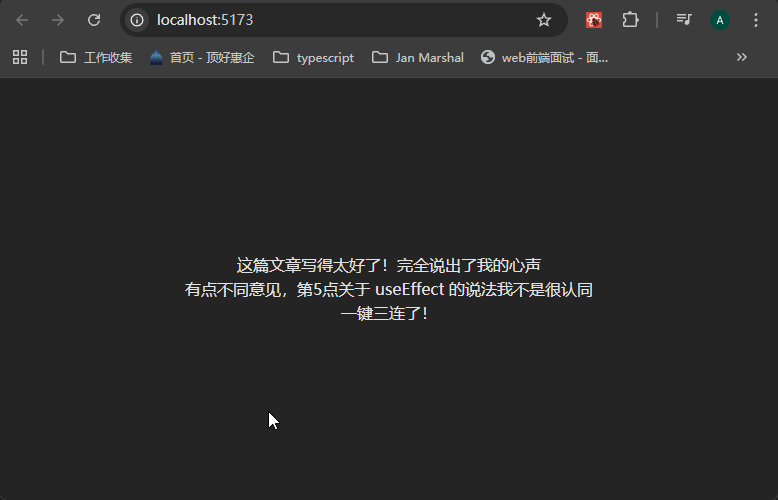
这个就类似于reddit或者youtube里面的comments:
1、先准备数据:
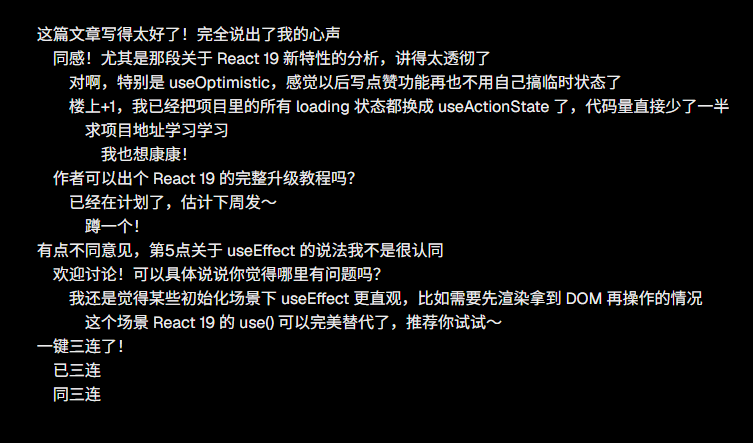
xxxxxxxxxx// src/data.tsexport interface CommentType { id: number; text: string; replies: CommentType[];}const initialComments: CommentType[] = [ { id: 1, text: "这篇文章写得太好了!完全说出了我的心声", replies: [ { id: 2, text: "同感!尤其是那段关于 React 19 新特性的分析,讲得太透彻了", replies: [ { id: 3, text: "对啊,特别是 useOptimistic,感觉以后写点赞功能再也不用自己搞临时状态了", replies: [], }, { id: 4, text: "楼上+1,我已经把项目里的所有 loading 状态都换成 useActionState 了,代码量直接少了一半", replies: [ { id: 5, text: "求项目地址学习学习", replies: [ { id: 6, text: "我也想康康!", replies: [], }, ], }, ], }, ], }, { id: 7, text: "作者可以出个 React 19 的完整升级教程吗?", replies: [ { id: 8, text: "已经在计划了,估计下周发~", replies: [ { id: 9, text: "蹲一个!", replies: [], }, ], }, ], }, ], }, { id: 10, text: "有点不同意见,第5点关于 useEffect 的说法我不是很认同", replies: [ { id: 11, text: "欢迎讨论!可以具体说说你觉得哪里有问题吗?", replies: [ { id: 12, text: "我还是觉得某些初始化场景下 useEffect 更直观,比如需要先渲染拿到 DOM 再操作的情况", replies: [ { id: 13, text: "这个场景 React 19 的 use() 可以完美替代了,推荐你试试~", replies: [], }, ], }, ], }, ], }, { id: 14, text: "一键三连了!", replies: [ { id: 15, text: "已三连", replies: [], }, { id: 16, text: "同三连", replies: [], }, ], },];export default initialComments;2、编写简单的CommentList组件,看一下效果:
xxxxxxxxxx// src/CommentList.tsximport type { CommentType } from "./data";interface ICommentList { comments: CommentType[];}export const CommentList = ({ comments }: ICommentList) => { return ( <div> {comments.length > 0 && comments.map((comment) => <div key={comment.id}>{comment.text}</div>)} </div> );};可以看到,只渲染出了最外层的评论:
3、这一步就开始做CommentItem组件,调用自己来实现递归
xxxxxxxxxx// src\CommentItem.tsximport type { CommentType } from "../data/data";export default function CommentItem({ comment }: { comment: CommentType }) { return ( <div className="ml-2"> <p>{comment.text}</p> {comment.replies.length > 0 && comment.replies.map((com) => ( <CommentItem comment={com} key={com.id} /> ))} </div> );}然后在CommentList里面引入:
xxxxxxxxxx// src\CommentList.tsximport { CommentItem } from "./CommentItem";import type { CommentType } from "./data";interface ICommentList { comments: CommentType[];}export const CommentList = ({ comments }: ICommentList) => { return ( <div> {comments.length > 0 && comments.map((comment) => ( <CommentItem key={comment.id} comment={comment} /> ))} </div> );};基本效果已经出来了:
下一步,为每一个评论Item加上回复评论的按钮和输入框,先实现简单UI即可。
xxxxxxxxxx// src\CommentItem.tsximport { useState } from "react";import type { CommentType } from "./data";export const CommentItem = ({ comment }: { comment: CommentType }) => { const [showReply, setShowReply] = useState(false); const [replyText, setReplyText] = useState(""); const handleReplySubmit = () => { if (replyText.trim()) { // add to state logic,添加数据 setReplyText(""); setShowReply(false); } }; return ( <div className="comment"> <p>{comment.text}</p> {/* 就是评论下面的一些按钮,这里只做了reply按钮,其实还有点赞、不喜欢、share等等按钮,看一下reddit里面的评论区就知道了 */} <button onClick={() => setShowReply((prev) => !prev)}> {showReply ? "Cancel" : "Reply"} </button> {/* 评论区 */} {showReply && ( <div className="reply-form"> <input type="text" className="reply-input" placeholder="Add your reply" value={replyText} onChange={(e) => setReplyText(e.target.value)} /> <button onClick={handleReplySubmit}>Send</button> </div> )} {/* 递归处理 */} {comment.replies.length > 0 && comment.replies.map((com) => ( <CommentItem comment={com} key={com.id} /> ))} </div> );};
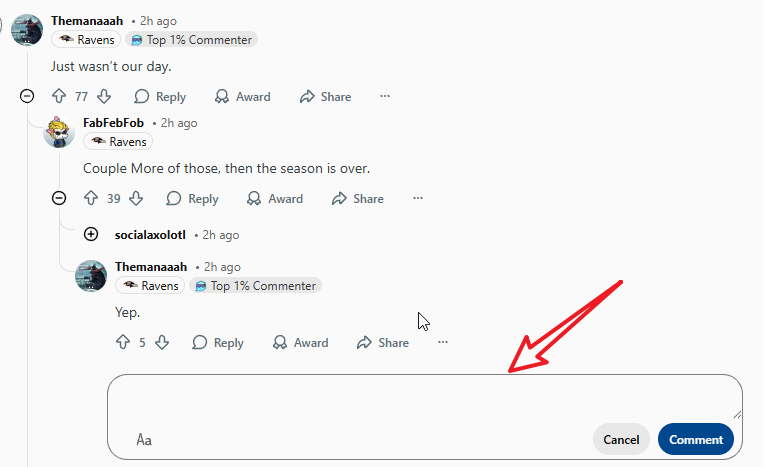
就类似于下面这种效果:
4、这一步就是将评论数据添加到data中,同时状态要更新。怎么做呢?这里不使用真实数据库,而是直接采用uplift the state的方法,将用到的数据就放在App.tsx里面,使用子级更新父级数据的方法,来做。
xxxxxxxxxx// App.tsximport { useState } from "react";import "./App.css";import { CommentList } from "./CommentList";import initialComments, { type CommentType } from "./data";function App() { const [comments, setComments] = useState<CommentType[]>(initialComments); const [newComment, setNewComment] = useState(""); // 这个递归的写法要理解,我大概率写不出来,即使写出来也很可能不是这样写 const addReplyToTree = ( tree: CommentType[], parentId: number, text: string ): CommentType[] => { return tree.map((comment) => { if (comment.id === parentId) { return { comment, replies: [comment.replies, { id: Date.now(), text, replies: [] }], }; } return { comment, replies: addReplyToTree(comment.replies, parentId, text), }; }); }; const addReply = (parentId: number, text: string) => { const updatedList = addReplyToTree(comments, parentId, text); setComments(updatedList); }; const addTopLevelComment = () => { if (newComment.trim()) { setComments((prev) => { return [ prev, { id: Date.now(), text: newComment, replies: [], }, ]; }); setNewComment(""); } }; return ( <> <div className="app"> <h2 className="comments-title">Nested Comments Problem</h2> {/* 并不总是回复别人的评论,我们也应该可以添加第一层级的评论 */} <div className="new-comment-form"> <input type="text" value={newComment} onChange={(e) => setNewComment(e.target.value)} placeholder="Add new comment" /> <button onClick={addTopLevelComment}>Add comment</button> </div> </div> <CommentList comments={comments} addReply={addReply} /> </> );}export default App;在CommentList和CommentItem组件里面,传递addReply过去,然后绑定这个方法:
xxxxxxxxxx// src\CommentList.tsximport { CommentItem } from "./CommentItem";import type { CommentType } from "./data";interface ICommentList { comments: CommentType[]; addReply: (parentId: number, text: string) => void;}export const CommentList = ({ comments, addReply }: ICommentList) => { return ( <div> {comments.length > 0 && comments.map((comment) => ( <CommentItem key={comment.id} comment={comment} addReply={addReply} /> ))} </div> );};xxxxxxxxxx// src\CommentItem.tsximport { useState } from "react";import type { CommentType } from "./data";interface ICommentItem { comment: CommentType; addReply: (parentId: number, text: string) => void;}export const CommentItem = ({ comment, addReply }: ICommentItem) => { const [showReply, setShowReply] = useState(false); const [replyText, setReplyText] = useState(""); const handleReplySubmit = () => { if (replyText.trim()) { // add to state logic,添加数据 addReply(comment.id, replyText); setReplyText(""); setShowReply(false); } }; return ( <div className="comment"> <p>{comment.text}</p> {/* 就是评论下面的一些按钮,这里只做了reply按钮,其实还有点赞、不喜欢、share等等按钮,看一下reddit里面的评论区就知道了 */} <button onClick={() => setShowReply((prev) => !prev)}> {showReply ? "Cancel" : "Reply"} </button> {/* 评论区 */} {showReply && ( <div className="reply-form"> <input type="text" className="reply-input" placeholder="Add your reply" value={replyText} onChange={(e) => setReplyText(e.target.value)} /> <button onClick={handleReplySubmit}>Send</button> </div> )} {/* 递归处理 */} {comment.replies.length > 0 && comment.replies.map((com) => ( <CommentItem addReply={addReply} comment={com} key={com.id} /> ))} </div> );};此时已经可以添加评论了:
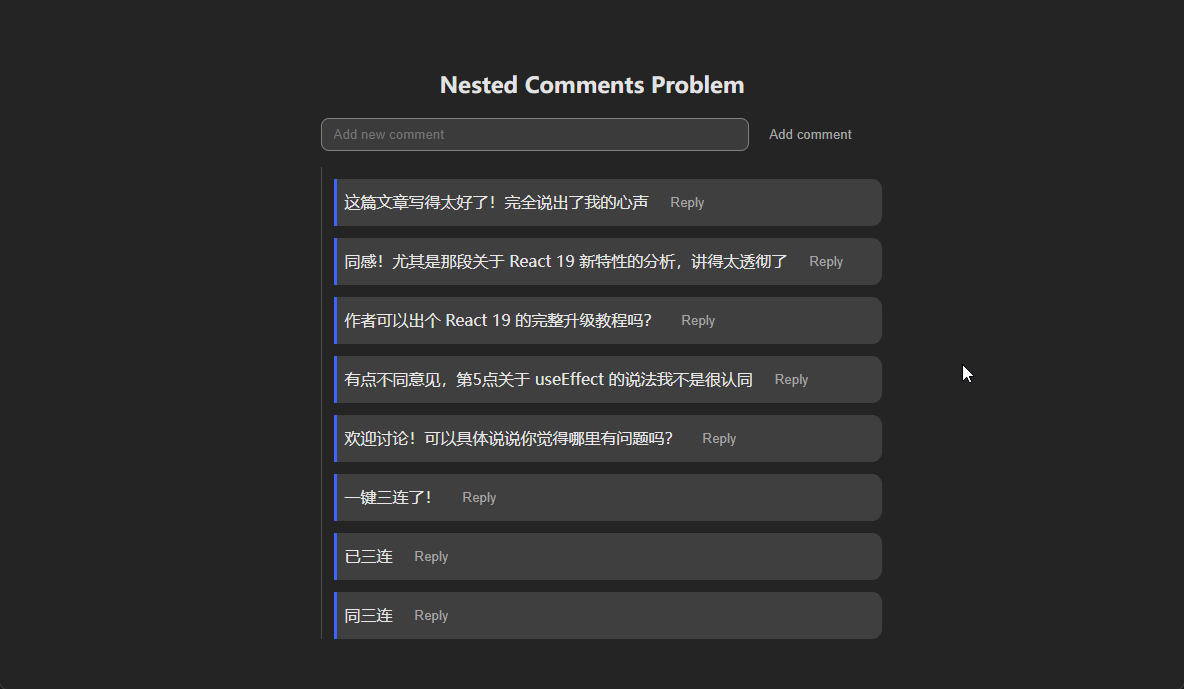
功能已经完成了,剩下的工作就是编写样式了。
xxxxxxxxxxh2 { font-size: 22px; margin-bottom: 16px;}.comment { padding: 12px 0 0 12px; border-left: 1px solid rgb(79, 78, 78);}.comment p { margin: 0 0 8px 0;}button { padding: 6px 12px; background-color: transparent; border: none; color: rgb(167, 166, 166); border-radius: 6px; cursor: pointer;}button:hover { background-color: rgb(60, 101, 251); color: white;}.reply-form { margin-top: 10px; display: flex; gap: 8px;}.comment-container { background: rgb(63, 63, 63); border-left: 3px solid rgb(60, 101, 251); width: 100%; padding: 10px 8px; border-top-right-radius: 10px; border-bottom-right-radius: 10px;}.comment-top { display: flex; justify-content: start; align-items: center; gap: 10px;}.replies .comment-container { border-left: none;}.reply-form input,.new-comment-form input { flex: 1; padding: 8px 12px; border-radius: 8px; outline: none; border: 1px solid gray;}.new-comment-form { display: flex; gap: 8px; margin-bottom: 16px;}可以看到,结构很清楚了。
小结:
这个组件难在哪里,我觉得难在不晓得该在哪里递归。
①首先是组件,我准备直接在CommentList里面递归CommentItem的,就是下面这种样子:
xxxxxxxxxxexport const CommentList = ({ comments, addReply }: ICommentList) => { return ( <div> {comments.length > 0 && comments.map((comment) => ( <> <CommentItem key={comment.id} comment={comment} addReply={addReply} /> {comment.replies.length > 0 && comment.replies.map((c) => ( <CommentItem key={c.id} comment={c} addReply={addReply} /> ))} </> ))} </div> );};效果是这样的:
这根本就没有递归,最多就是把第二层展示出来了。
递归就是要重复自己,这一点要记住了,所以必须在CommentItem组件里面重复自己,怎么重复自己呢?就是在jsx代码里面使用自己。
②递归函数我写的不好,老师的函数要记住。
③产品意识要有,这个评论应该是什么样的、功能、UI,心里要记住。
6、React Tab Component
Myntra, Zepto这些印度公司问过。
1、实现功能
xxxxxxxxxx// src/TabComponent.tsximport { useState, type ReactNode } from "react";interface ITabComponent { tabs: { label: string; content: ReactNode; }[];}export const TabComponent = ({ tabs }: ITabComponent) => { const [active, setActive] = useState(0); return ( <div className="tab-container"> <div className="tab-headers"> {tabs.map((tab, index) => ( <button className={`tab-button ${active === index ? "active-button" : ""}`} onClick={() => setActive(index)}> {tab.label} </button> ))} </div> <div className="tab-content">{tabs[active].content}</div> </div> );};在App.tsx中引入:
xxxxxxxxxx// App.tsximport "./App.css";import { TabComponent } from "./TabComponent";const tabs = [ { label: "Home", content: <div>This is home page</div>, }, { label: "Profile", content: <div>This is profile page</div>, }, { label: "About", content: <div>This is about page</div>, },];function App() { return ( <> <TabComponent tabs={tabs} /> </> );}export default App;可以看到,功能已经实现了:
2、优化样式:
xxxxxxxxxx.tab-container { width: 100%; max-width: 600px; border: 1px solid gray; border-radius: 8px; padding: 16px;}.tab-headers { border-bottom: 1px solid #e8e8e8; display: flex; justify-content: space-evenly; align-items: center;}.tab-button { color: white; flex: 1; padding: 10px; font-size: 16px; cursor: pointer; background: none; border: none; outline: none; transition: background 0.3s;}.active-button { border-bottom: 2px solid #e8e8e8; font-weight: bold;}.tab-content { padding: 16px;}效果:
小结:
组件不难,但是需要知道使用{}来渲染children内容。
7 - Modal、Dialog、Toast、Notification、Drawer、SideSheet、MessageBox、Tooltips 、Popovers等等
实现这些功能的套路就是:
1、使用react-dom提供的createPortal方法来创建组件。
在组件中,使用父组件传递过来的参数isOpen来判断是否显示,如果isOpen为true,则返回null。
这是最重要的一步,完成了这一步,基本的功能就实现了。
xxxxxxxxxx"use client";import { ReactNode, useEffect, useState } from "react";import { createPortal } from "react-dom";interface ModalProps { open: boolean; onClose: () => void; children: ReactNode;}export default function Modal({ open, onClose, children,}: ModalProps) { const [mounted, setMounted] = useState(false); useEffect(() => { setMounted(true); return () => { setMounted(false); }; }, []); if (!mounted || !open) { return null; } const modalRoot = document.getElementById("modal-root"); if (!modalRoot) { return null; } return createPortal( <div className="fixed inset-0 z-50 flex items-center justify-center" onClick={onClose} > {/* backdrop */} <div className="absolute inset-0 bg-black/50" /> {/* modal */} <div className=" relative z-10 w-full max-w-lg rounded-xl bg-white p-6 shadow-xl " onClick={(e) => e.stopPropagation()} > {children} </div> </div>, modalRoot );}重点CSS解释:
fixed
xxxxxxxxxxfixed等于:
xxxxxxxxxxposition: fixed;作用:
xxxxxxxxxx永远相对于浏览器窗口定位而不是相对于父元素。
inset-0
xxxxxxxxxxinset-0等于:
xxxxxxxxxxtop: 0;right: 0;bottom: 0;left: 0;效果:
xxxxxxxxxx铺满整个屏幕bg-black/50
xxxxxxxxxxbg-black/50等于:
xxxxxxxxxxbackground: rgba(0,0,0,0.5);效果:
xxxxxxxxxx半透明遮罩
2、不要直接将元素挂载到document.body上面
因为document.body下面是<div id="root"></div>,如果document.body的内容变化了,app里面也会变化,造成不必要的重绘重排,这样会造成布局抖动、CSS层叠上下文混乱问题,同时body上面绑定了很多第三方库的事件,容易误触发。
所以一般都是在public/index.html里面,创建几个专门的portal容器用来使用。
xxxxxxxxxx// public/index.html<body> <noscript>You need to enable JavaScript to run this app.</noscript> <div id="root"></div> <!-- 专门给所有 Portal 用,永远只有一个! --> <div id="modal-root"></div> <!-- Modal/Drawer/Dialog --> <div id="tooltip-root"></div> <!-- 可选:Tooltip 单独一个,z-index 更高 --> <div id="toast-root"></div> <!-- 可选:Toast 单独一个,方便统一动画 --></body>然后在utils里面定义各种类型的portal组件,这样使用起来就很方便了:
xxxxxxxxxx// utils/portal.tsxconst MODAL_ROOT = document.getElementById('modal-root')!;const TOOLTIP_ROOT = document.getElementById('tooltip-root')!;const TOAST_ROOT = document.getElementById('toast-root')!;export const ModalPortal = ({ children }: { children: React.ReactNode }) => { return createPortal(children, MODAL_ROOT);}export const PopoverPortal = ({ children }: { children: React.ReactNode }) => { return createPortal(children, TOOLTIP_ROOT);} export const ToastPortal = ({ children }: { children: React.ReactNode }) => { return createPortal(children, TOAST_ROOT);}nextjs官方命令创建的nextjs项目,是没有index.html文件的,这时候该怎么办呢?
可以在layout.tsx里面创建挂载点:
xxxxxxxxxx// app/layout.tsxexport default function RootLayout({children,}: {children: React.ReactNode;}) {return (<html><body>{children}<div id="modal-root" /><div id="toast-root" /><div id="notification-root" /></body></html>);}然后:
xxxxxxxxxxcreatePortal(<Modal />,document.getElementById("modal-root")!)
3、事件冒泡
portal 内部的事件仍然会像正常 React 组件一样冒泡到 React 树中它们的父组件和祖先组件,即使 DOM 节点在物理上很远。所以如果在portal里面定义了一个onClick事件,则需要使用e.stopPropagation()来阻止事件冒泡。
4、使用
使用起来就非常简单了,只需要一个state来控制显示/隐藏即可。
xxxxxxxxxx"use client";import { useState } from "react";import Modal from "./Modal";export default function Page() { const [open, setOpen] = useState(false); return ( <> <button onClick={() => setOpen(true)} className="rounded bg-blue-500 px-4 py-2 text-white" > Open Modal </button> <Modal open={open} onClose={() => setOpen(false)} > <h2 className="text-2xl font-bold"> Hello Modal </h2> <p className="mt-4"> This is a modal created by createPortal. </p> <button onClick={() => setOpen(false)} className="mt-4 rounded bg-red-500 px-4 py-2 text-white" > Close </button> </Modal> </> );}效果:
我有个问题,比如说tooltip、popover这些类型的弹窗,不是占据整个页面来定位的,而是相对于里面的内容来定位的,是不是这样?这些类型的弹窗该怎么做呢?
你问到了一个非常重要的 UI 架构问题。
实际上:
xxxxxxxxxxModalDialogDrawerToastNotification和
xxxxxxxxxxTooltipPopoverDropdown MenuContext MenuComboboxDate Picker虽然都属于"浮层(Overlay)",但定位方式完全不同。
第一类:Modal 类
例如:
xxxxxxxxxxModalDialogDrawerToastNotification特点:
xxxxxxxxxx相对于 Viewport(浏览器窗口)定位例如:
xxxxxxxxxxposition: fixed;整个页面居中右上角底部左侧都和页面内容没关系。
所以:
xxxxxxxxxxcreatePortal(, document.body)非常合适。
第二类:Anchor 类
例如:
xxxxxxxxxxTooltipPopoverDropdownSelectDatePickerContextMenu特点:
xxxxxxxxxx相对于某个元素定位例如:
xxxxxxxxxxButtonInputAvatarIcon举个例子:
xxxxxxxxxx<button> Open Menu</button>Popover 要出现在:
xxxxxxxxxxButton 下方而不是:
xxxxxxxxxx页面中央很多人第一反应
直接这样写:
xxxxxxxxxx<div className="relative"> <button>Open</button> <div className="absolute top-full left-0"> Popover </div></div>这样确实能工作。
但是很快会遇到问题:
overflow:hidden
xxxxxxxxxx<div className="overflow-hidden"> <Button /></div>Popover 被裁掉。
transform
xxxxxxxxxxtransform: translateZ(0);创建新的:
xxxxxxxxxxstacking context导致层级异常。
页面滚动
xxxxxxxxxxPopover 位置错乱所以现代 UI 库:
- Radix
- HeadlessUI
- MUI
- Ant Design
其实也会:
xxxxxxxxxxcreatePortal()Tooltip 实际是 Portal
例如:
xxxxxxxxxxcreatePortal( <Tooltip />, document.body)挂到 body。
很多人会问:
既然挂到 body 了,怎么还能跟着 Button?
答案:
通过计算坐标。
原理
按钮:
xxxxxxxxxxconst rect = buttonRef.current.getBoundingClientRect();获得:
xxxxxxxxxx{ top: 120, left: 400, width: 100, height: 40}然后 Tooltip:
xxxxxxxxxxstyle={{ position: "fixed", top: rect.bottom + 8, left: rect.left}}渲染:
xxxxxxxxxxcreatePortal( tooltip, document.body)结果:
xxxxxxxxxxButton 在哪里Tooltip 就出现在哪里虽然:
xxxxxxxxxxDOM 完全不在一起为什么不用 absolute?
因为:
xxxxxxxxxxposition:absolute依赖:
xxxxxxxxxx最近的定位祖先很容易受到:
xxxxxxxxxxoverflowtransformz-index影响。
而:
xxxxxxxxxxposition:fixed配合:
xxxxxxxxxxgetBoundingClientRect()得到的是:
xxxxxxxxxx相对于 Viewport 的坐标最稳定。
真实项目怎么做?
几乎没人自己算。
都用:Floating UI
现在是行业标准。
例如:
xxxxxxxxxxconst { refs, floatingStyles } = useFloating();按钮:
xxxxxxxxxx<button ref={refs.setReference}> Open</button>Popover:
xxxxxxxxxx<div ref={refs.setFloating} style={floatingStyles}> Content</div>Floating UI 自动处理:
xxxxxxxxxx元素定位窗口滚动边界检测自动翻转自动偏移自动更新例如:
xxxxxxxxxxButton 靠近底部正常:
xxxxxxxxxxPopover↓放不下。
Floating UI 自动变成:
xxxxxxxxxxPopover↑Button这叫:
xxxxxxxxxxFlip面试回答
如果面试官问:
Tooltip 或 Popover 需要 createPortal 吗?
比较完整的回答:
Tooltip、Popover、Dropdown 等浮层虽然需要相对于触发元素定位,但生产环境通常仍会使用 createPortal 挂载到 body,避免受到父容器 overflow、transform 和 z-index 的影响。定位则通过 getBoundingClientRect 获取触发元素的位置,或者直接使用 Floating UI 这类库来计算坐标和处理边界碰撞、自动翻转等问题。因此现代 UI 库中的 Tooltip 和 Popover 通常都是 Portal + Positioning Engine 的组合,而不是简单的 absolute 定位。
这其实就是为什么像 Radix UI、Headless UI、MUI、Ant Design 的 Tooltip/Popover,DOM 看起来都跑到了 <body> 下面,但视觉上仍然能精准贴在按钮旁边。
tooltip范例代码
需要传一个targetRef给tooltip,这样就可以让tooltip相对于anchor定位了。
xxxxxxxxxx"use client";import { createPortal } from "react-dom";import { RefObject, useEffect, useState } from "react";interface TooltipProps { targetRef: RefObject<HTMLElement | null>; text: string; open: boolean;}export default function Tooltip({ targetRef, text, open,}: TooltipProps) { const [position, setPosition] = useState({ top: 0, left: 0, }); useEffect(() => { if (!open || !targetRef.current) { return; } const rect = targetRef.current.getBoundingClientRect(); setPosition({ top: rect.top - 40, left: rect.left + rect.width / 2, }); }, [open, targetRef]); if (!open) { return null; } return createPortal( <div className=" fixed -translate-x-1/2 rounded bg-black px-3 py-2 text-sm text-white shadow " style={{ top: position.top, left: position.left, }} > {text} </div>, document.body );}使用:
xxxxxxxxxx"use client";import { useRef, useState } from "react";import Tooltip from "./Tooltip";export default function Page() { const buttonRef = useRef<HTMLButtonElement>(null); const [open, setOpen] = useState(false); return ( <> <button ref={buttonRef} onMouseEnter={() => setOpen(true)} onMouseLeave={() => setOpen(false)} className="rounded bg-blue-500 px-4 py-2 text-white" > Hover Me </button> <Tooltip open={open} targetRef={buttonRef} text="Hello Tooltip" /> </> );}效果:

其实这种实现方式不是很好,因为一般来说,我们是将要包裹的元素直接写进标签里面,而不是通过targetRef来传递。
xxxxxxxxxx<Tooltip> <TooltipTrigger asChild> <Button variant="outline">Hover</Button> </TooltipTrigger> <TooltipContent> <p>Add to library</p> </TooltipContent></Tooltip>但是如果要使用原始方法来实现,要解决下面的问题,非常复杂:
xxxxxxxxxxscrollresizeoverflowcollisionflipportalz-index所以还是使用floating ui来帮忙实现。
floating ui实现
目录结构
xxxxxxxxxxcomponents/└── tooltip/ ├── tooltip.tsx ├── tooltip-trigger.tsx ├── tooltip-content.tsx └── tooltip-context.ts为了方便展示,我放一个文件里。
Tooltip.tsx
xxxxxxxxxx"use client";import { createContext, useContext, useState, ReactNode, cloneElement, isValidElement,} from "react";import { useFloating, offset, flip, shift, autoUpdate, useHover, useInteractions, FloatingPortal, Placement,} from "@floating-ui/react";type TooltipContextType = { open: boolean; setOpen: (open: boolean) => void; refs: ReturnType<typeof useFloating>["refs"]; floatingStyles: React.CSSProperties; getReferenceProps: ReturnType< typeof useInteractions >["getReferenceProps"]; getFloatingProps: ReturnType< typeof useInteractions >["getFloatingProps"];};export const TooltipContext = createContext<TooltipContextType | null>(null);export function useTooltipContext() { const context = useContext(TooltipContext); if (!context) { throw new Error( "Tooltip components must be used inside Tooltip" ); } return context;}interface TooltipProps { children: ReactNode; placement?: Placement;}export function Tooltip({ children, placement = "top",}: TooltipProps) { const [open, setOpen] = useState(false); const floating = useFloating({ open, onOpenChange: setOpen, placement, whileElementsMounted: autoUpdate, middleware: [ offset(8), flip(), shift(), ], }); const hover = useHover(floating.context); const { getReferenceProps, getFloatingProps, } = useInteractions([hover]); return ( <TooltipContext.Provider value={{ open, setOpen, refs: floating.refs, floatingStyles: floating.floatingStyles, getReferenceProps, getFloatingProps, }} > {children} </TooltipContext.Provider> );}TooltipTrigger.tsx
支持:
xxxxxxxxxx<TooltipTrigger asChild> <Button /></TooltipTrigger>
xxxxxxxxxx"use client";import { useTooltipContext,} from "./tooltip-context";interface TooltipTriggerProps { children: React.ReactElement; asChild?: boolean;}export function TooltipTrigger({ children, asChild = false,}: TooltipTriggerProps) { const { refs, getReferenceProps, } = useTooltipContext(); if (asChild) { return cloneElement( children, getReferenceProps({ ref: refs.setReference, children.props, }) ); } return ( <button ref={refs.setReference} {getReferenceProps()} > {children} </button> );}TooltipContent.tsx
xxxxxxxxxx"use client";import { FloatingPortal,} from "@floating-ui/react";import { useTooltipContext,} from "./tooltip-context";interface TooltipContentProps { children: ReactNode;}export function TooltipContent({ children,}: TooltipContentProps) { const { open, refs, floatingStyles, getFloatingProps, } = useTooltipContext(); if (!open) { return null; } return ( <FloatingPortal> <div ref={refs.setFloating} style={floatingStyles} {getFloatingProps()} className=" z-50 rounded-md bg-black px-3 py-1.5 text-sm text-white shadow-md " > {children} </div> </FloatingPortal> );}使用方式
xxxxxxxxxximport { Tooltip, TooltipTrigger, TooltipContent,} from "./tooltip";export default function Page() { return ( <Tooltip> <TooltipTrigger asChild> <button className=" rounded border px-4 py-2 " > Hover Me </button> </TooltipTrigger> <TooltipContent> Add to library </TooltipContent> </Tooltip> );}面试重点:这里面最核心的是什么?
很多人会回答:
Floating UI。
其实不是。
真正的核心是:
xxxxxxxxxxCompound Components(组合组件模式)即:
xxxxxxxxxx<Tooltip> <TooltipTrigger /> <TooltipContent /></Tooltip>这种 API。
内部靠:
xxxxxxxxxxContext+Ref+Portal+Floating UI实现。
xxxxxxxxxxTooltip 看起来简单实际是前端组件库里非常经典的一道架构题面试官如果让你设计 Tooltip,通常真正考察的不是定位,而是:
xxxxxxxxxxCompound ComponentsContextRef 管理Portal可访问性(A11y)Floating UI这些能力如何组合在一起。
中文口语版
这个 Tooltip 采用的是 Compound Components(组合组件)模式。
首先,
Tooltip组件内部会创建一个 Context,用来共享状态和引用。
TooltipTrigger负责拿到触发元素的 DOM 节点,并把这个节点注册给 Floating UI 作为 reference element。当用户 hover 到 Trigger 上时,Floating UI 会把 open 状态更新为 true。
然后
TooltipContent从同一个 Context 里面获取 open 状态和 reference element。接着通过 Floating UI 计算 Tooltip 的位置,并使用 Portal 渲染到 document.body 下,避免被父元素的 overflow 或 z-index 影响。
最终 Tooltip 虽然在 DOM 结构上挂载到了 body 下面,但视觉上仍然会跟随 Trigger 元素。
整个实现主要依赖四个核心能力:
- Context 用来共享状态
- Ref 用来获取目标元素
- Floating UI 用来计算位置
- Portal 用来解决层级问题
This Tooltip is implemented using the Compound Components pattern.
The
Tooltipcomponent creates a Context to share state and references between its child components.
TooltipTriggerregisters the target DOM element as the reference element for Floating UI.When the user hovers over the trigger, Floating UI updates the open state.
TooltipContentthen reads the open state and reference element from the same Context.Floating UI calculates the position of the tooltip, and the content is rendered through a Portal into
document.bodyto avoid overflow and stacking context issues.Although the tooltip is rendered outside of the normal DOM hierarchy, it is visually positioned relative to the trigger element.
The implementation is mainly built on four concepts:
- Context for state sharing
- Ref for DOM access
- Floating UI for positioning
- Portal for layer management